Are you looking to install and use GNS3 2.2 or later on your Kali Linux 2024 system? In this article, I will help you install this software to prepare for Cisco exams. I will also illustrate how to fix the most common errors we encounter.
Finally, I will provide step-by-step instructions on how to add a Cisco Router or other network devices to the emulator program. In short, you will be able to use this network software effectively in your studies!
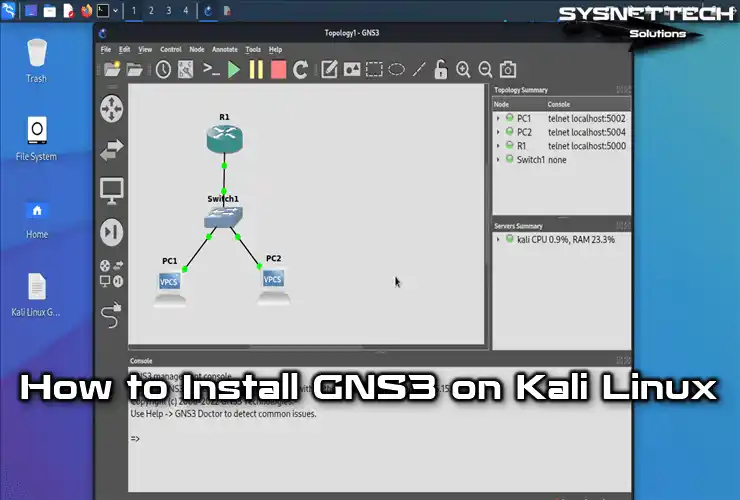
How to Set Up GNS3 to Prepare for Cisco Exams on Kali Linux 2022.3
Graphical Network Simulator is a free networking program that is often preferred by people preparing for Cisco exams. It requires IOS images of Routers or other network devices.
Unlike the Packet Tracer program, GNS3 software requires IOS images of devices but allows you to make more comprehensive network designs.
You will need Layer 2 and Layer 3 devices when designing network topologies for your Routing or Switching exams. Therefore, instead of Router IOS, you should add the IOS images of these devices to the emulator program.
If you have a computer with Windows 10/11, installing GNS3 may be more manageable. However, installing this program on a Linux distribution such as Kali Linux may be more complex than you might think. Some programs require additional dependent packages to run smoothly.
After installing this software without any problems in the Kali Linux distribution, you can create various network topologies to prepare for Cisco exams and examine how computers in different networks communicate.
How to Install GNS3
To run the Cisco network simulator program smoothly on your Kali system, you may need to edit the repo addresses or install the necessary additional dependent packages.
Step 1
First, open the terminal on your Kali computer by pressing CTRL + ALT + T and update the repository package list with the “sudo apt update” command.
sudo apt update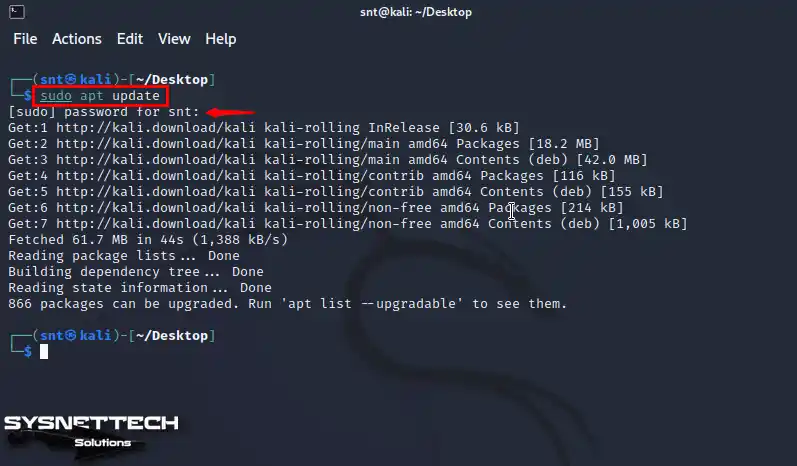
Step 2
To get all the files needed for the GNS3 simulator, type this command into the terminal.
sudo apt install -y python3-pip python3-pyqt5 python3-pyqt5.qtsvg python3-pyqt5.qtwebsockets qemu qemu-kvm qemu-utils libvirt-clients libvirt-daemon-system virtinst wireshark xtightvncviewer apt-transport-https ca-certificates curl gnupg2 software-properties-commonNOTE: If the qemu package cannot be installed from the existing repository during installation, download and install the qemu package manually using the commands below.
wget http://ftp.us.debian.org/debian/pool/main/q/qemu/qemu_3.1+dfsg-8+deb10u8_amd64.deb
sudo dpkg -i qemu_3.1+dfsg-8+deb10u8_amd64.deb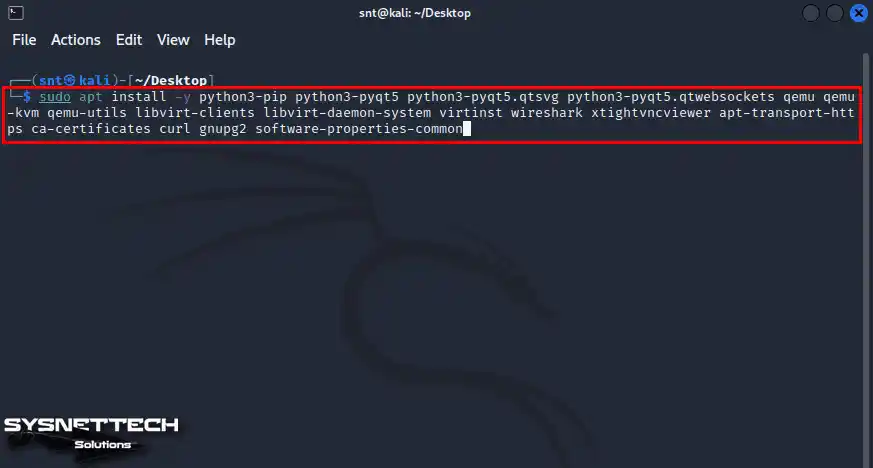
Step 3
You can use the pip3 command on Linux to download Python applications. To download the GNS3 GUI and GNS3 Server with pip3, execute the “sudo pip3 install gns3-server gns3-gui” command in the terminal.
sudo pip3 install gns3-server gns3-gui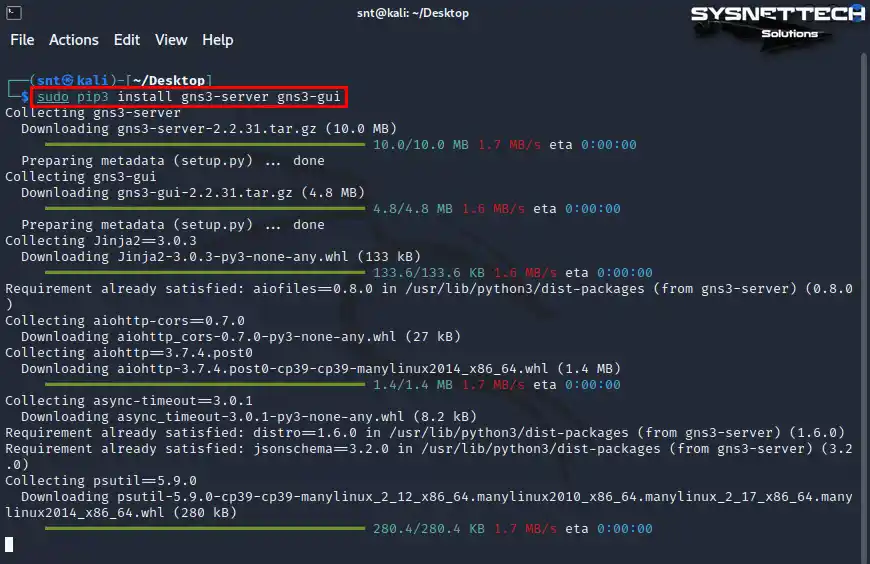
Step 4
Execute the “sudo apt install dynamips” command in the terminal to install Dynamips, which allows you to emulate Cisco Routers on your physical computer via the GNS3 program.
sudo apt install dynamips
Step 5
After installing GNS3, open the start menu, type “gns3” in the search box, find the program, and run it.

Step 6
You must choose to run the IOS images that you will add to the GNS3 program on a virtual machine or local server. In the Setup Wizard window, select “Run appliances on my local computer” for the Server setting and click Next.

Step 7
In the Local Server Configuration window, check that the Host Binding setting is Localhost and continue without changing the default port number.

Step 8
After configuring the GNS3 server, check the local server authentication and continue.
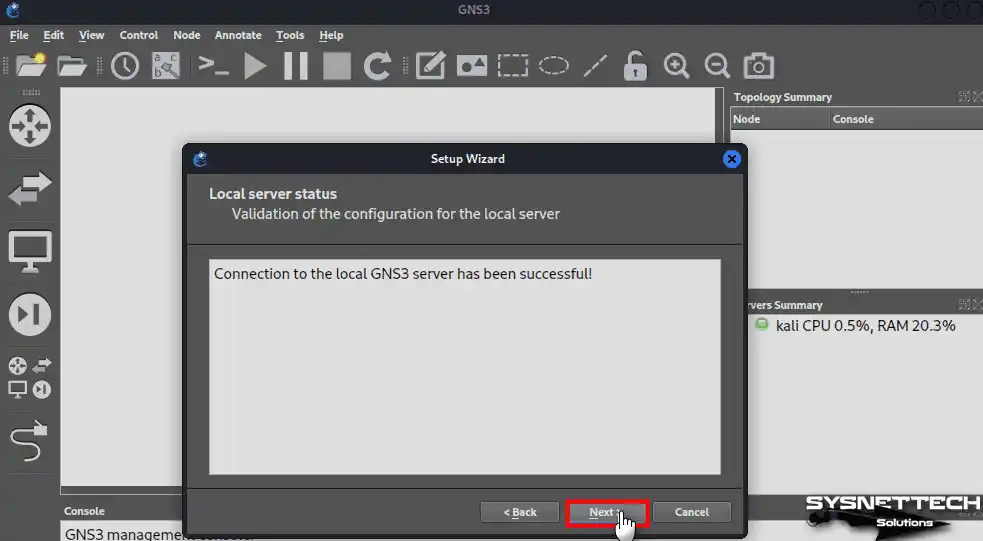
Step 9
At the last step of the installation wizard, check the server information in the summary window again and click Finish.

How to Add a Cisco Router
After installing GNS3 on Kali Linux, the first thing you need to do is to add the IOS image of any Router model. After this process, you can start using the Router devices on your computer to prepare for the Cisco exams.
Step 1
Click Edit / Preferences in the GNS3 software tool menu to add the router image.

Step 2
After clicking IOS Routers under Dynamips in the left panel options in the Preferences window, click the New button. Then click Browse to add the IOS image to the New IOS Router Template window.

Step 3
Go to the location of the IOS image you downloaded to your Linux computer, select the c7200 file, and click Open.

Step 4
In the question window that opens, click Yes to decompress the IOS and wait for the image to decompress.

Step 5
Click Next after adding the c7200 Router IOS.

Step 6
In the Name and Platform window, leave your Router’s name and platform settings at default.

Step 7
You should choose the memory size for the virtual Router according to the RAM capacity of your physical computer. The default is 512 MB, but you can increase it to make the Router work more efficiently.

Step 8
The router’s FastEthernet interface is installed by default in the Network Adapters window. If you want to add a Gigabit Ethernet or Serial Interface, you can insert these cards into the empty slots.
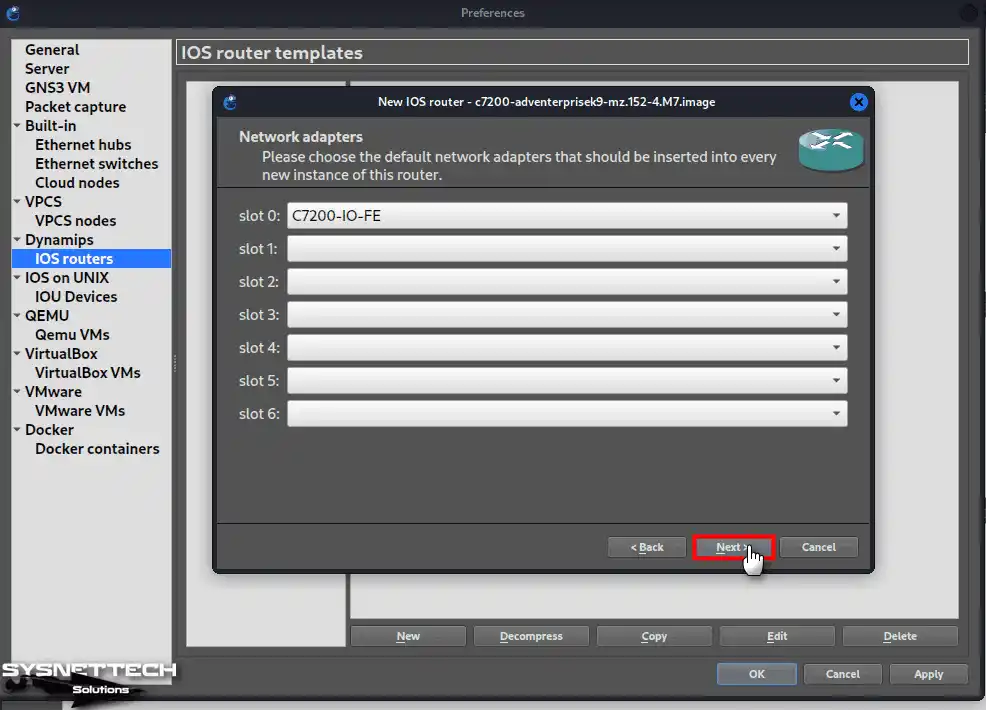
Step 9
Idle-PC is a value given so that the Router that will run in GNS3 does not use 100% of your computer’s processor. This value is a value determined by GNS3 based on the performance of your computer.
Click the Idle-PC Finder button to find a suitable Idle-PC value for the c7200 Router.
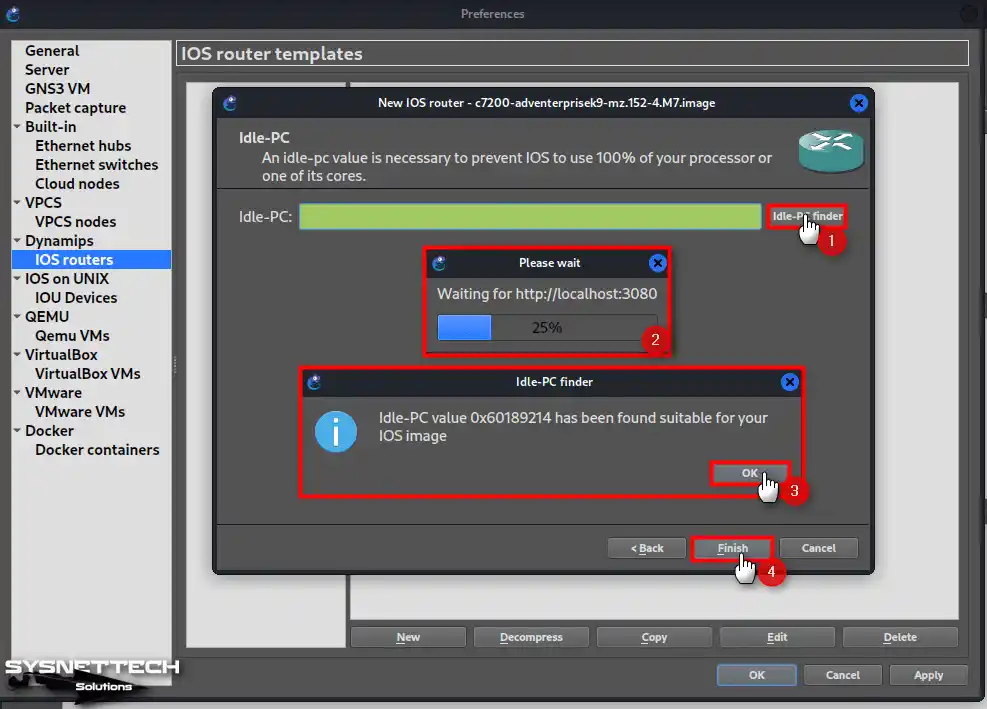
Step 10
After checking the properties of the Router you added, close the Preferences window.

How to Fix the “uBridge is not available” Error in GNS3
After adding a Cisco Router to your network software, you may encounter a uBridge error when you try to cable the Router, Switch, or other devices in the workspace. This issue also occurs on different Linux distributions for Kali distribution only.
To fix the uBridge problem on your Kali computer, you need to install the relevant software.
Step 1
When you try to plug one end of the network cable into the Router’s FastEthernet or other interfaces, you will get the error message “Error while creating a link: uBridge is not available, the path doesn’t exist, or you just installed GNS3 and need to restart your user session to refresh user permissions, ” as shown in the image below.

Step 2
To fix the bridge error in GNS3, first execute the “sudo apt install libpcap-dev” command in the terminal and confirm the installation of new packages.
sudo apt install libpcap-dev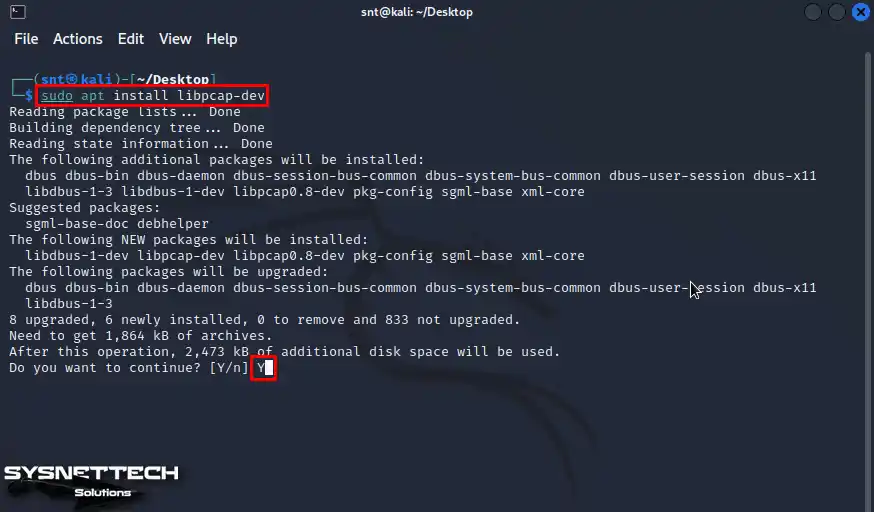
Step 3
To copy uBridge from Github to your computer, type “git clone https://github.com/GNS3/ubridge.git” into the terminal. Then, look at the files in the folder.
git clone https://github.com/GNS3/ubridge.git
cd ubridge
Step 4
Execute the “make” command to install uBridge.
make
Step 5
Finally, execute the “sudo make install” command to copy the uBridge permissions and required files.
sudo make install
How to Fix the “No path to a VPCS executable has been set” Error in GNS3
After fixing the uBridge error, you shouldn’t see any more errors when connecting the Router and other devices. But, when you run all the devices again, you might see the “No path to a VPCS executable has been set” error.
Step 1
All you need to do to fix this VPCS error is to install VPCS on your Kali system.

Step 2
To install VPCS on Kali, open the terminal and execute the “sudo apt install vpcs” command.
sudo apt install vpcs
How to Fix the “VPCS executable version must be >= 0.6.1 but not a 0.8” Error.
After fixing the VPCS error, when you run all the devices in the workspace again, you will get the “VPCS executable version must be >= 0.6.1 but not 0.8” issue this time. This error is related to the VPCS version on some Linux distributions.
Step 1
If you encounter the error “VPCS executable version must be >= 0.6.1 but not 0.8” in GNS3, you will receive a warning like the one in the image below.

Step 2
To fix the VPCS error, you need to install the appropriate version of VPCS on your Kali system. To install the VPCS 0.8 version on your computer, execute the commands below in order on the console.
cd ~/Downloads
git clone https://github.com/TolgaBagci/vpcs_0.8-1_amd64.deb.git
cd vpcs_0.8-1_amd64.deb
sudo dpkg -i vpcs_0.8-1_amd64.deb
Step 3
When you run the devices in the network environment again, you will see that the PCs in the Topology Summary section are working normally.

How to Create a New Project in Kali Linux
After successfully running the GNS3 simulation program on your Linux system, you can now create new projects and start configuring Cisco devices.
Step 1
Click CTRL + N or the new project icon to open the Project window. Name the project according to the network topology you will create, configure the location where you want to save it, and click OK.

Step 2
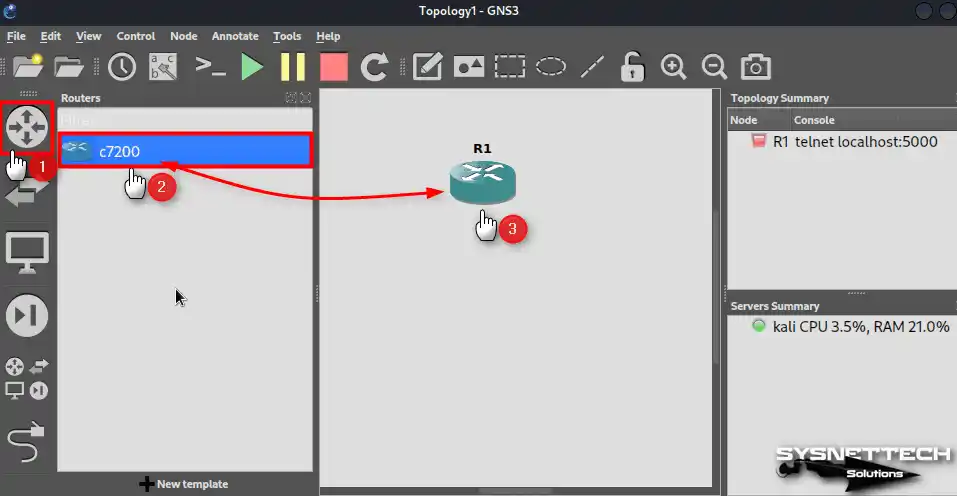
Click on the Routers list in the left panel of the GNS3 program, then drag and drop the C7200 router to the workspace.
Step 3
Click the All Devices panel and add one Cisco Switch and two VPCS PCs to the workspace.

Step 4
Activate the cabling option and connect one end of the cable to the FastEthernet port of R1 and the other end to the Switch1.

Step 5
At this stage, you want to configure the IP address for Router R1’s FastEthernet port. To do this, double-click the router to open the command-line interface (CLI). Then, enter the commands I specified. After that, you will successfully assign the IP address to the FastEthernet port.
R1# conf t
R1(config)# interface fastEthernet 0/0
R1(config-if)# ip address 192.168.1.1 255.255.255.0
R1(config-if)# no shutdown
Step 6
To automatically assign IP addresses to all computers in the IP block connected to Router R1, create a DHCP pool by executing the commands below in the terminal.
R1# conf t
R1(config)# ip dhcp pool LAN1
R1(dhcp-config)# network 192.168.1.1 255.255.255.0
R1(dhcp-config)# default-router 192.168.1.1
R1(dhcp-config)# dns-server 192.168.1.1
R1(dhcp-config)# exit
R1(config)# ip dhcp excluded-address 192.168.1.1
Step 7
Execute the “ip dhcp” command at the CLI prompt to assign an IP address from DHCP to the VPCS PC1, and then execute the “show ip” command to check all the information it receives.
PC1> ip dhcp
PC1> show ip
Step 8
Likewise, execute the “ip dhcp” command to get the address information of VPCS PC2 from DHCP.
PC2> ip dhcp
Step 9
After configuring all devices in the topology, ping PC1 and PC2 from R1 to test the connection between devices.
R1# ping 192.168.1.2
R1# ping 192.168.1.3
Step 10
Test the network connection by pinging R1 and PC2 from PC1.
PC1> ping 192.168.1.1
PC1> ping 192.168.1.3
Step 11
Finally, the network connection can be tested by pinging PC1 and R1 from PC2.
PC2> ping 192.168.1.1
PC2> ping 192.168.1.2
How to Uninstall GNS3 from Kali Linux
When you plan to remove the GNS3 networking software from your Kali Linux PC, we recommend backing up any network designs you have created and then deleting them from your system, including any dependent packages.
Steps:
Step 1
To uninstall GNS3, execute the “sudo pip3 uninstall gns3-server gns3-gui” command in the terminal. After checking the directories to be removed, press Y to proceed.
sudo pip3 uninstall gns3-server gns3-gui
Step 2
To uninstall the virtual PC simulator from GNS3, use the terminal to execute the “sudo apt purge pcs” command.
sudo apt purge vpcs
Step 3
To uninstall the software that emulates Cisco routers in the GNS3 program, execute the “sudo apt purge dynamips” command in the terminal.
sudo apt purge dynamips
Step 4
Execute the command below in the terminal to remove all dependent packages of the GNS3 software from the system.
sudo apt purge python3-pip python3-pyqt5 python3-pyqt5.qtsvg python3-pyqt5.qtwebsockets qemu qemu-kvm qemu-utils libvirt-clients libvirt-daemon-system virtinst wireshark xtightvncviewer apt-transport-https ca-certificates curl gnupg2 software-properties-common
Step 5
Finally, run the command below in the terminal to clean the residual files or additional packages related to GNS3 from your system.
sudo apt autoremove && sudo apt autoclean
Step 6
Since you installed the ubridge software manually, you can see the installation directory in the image below. Since you uninstalled GNS3, you don’t need this software anymore. Go to the Home directory in the terminal and delete the directory with the “sudo rm -rf ubridge” command.
sudo rm -rf ubridge
Step 7
Likewise, delete the Cisco IOS images you added to the program and the GNS3 directory where the projects you made are saved from your system.
sudo rm -rf GNS3
Video
Installing Old Versions
Conclusion
As a result, you can use GNS3 on your Kali Linux PC to prepare for Cisco exams. The installation process can be complex, but following the steps I have provided will make it quick. This emulator software can also simulate Cisco devices by creating comprehensive network topologies.
In short, GNS3 also provides the ability to run firewalls along with routers and switches. This way, you can develop your networking skills and prepare a realistic environment for your certification exams. Therefore, you can create custom network designs by adding and configuring IOS images.
You will gain hands-on experience, and I am sure that your confidence in Cisco exams will increase with GNS3!


thank you for this
You’re welcome!
Hi, Ive got loads of “Certificate verification failed” messages, i have already set them manually to trusted but still fails to update with apt-get update.
hi Jamie,
You must remove the “s” from all https in the repository /etc/apt/source.list
hello sir ,I have a question :
I have installed gns3 for 2 times as you said .
but I can not put any device to a new project .
can you give me any sugestions?
hello Tolga:
I have installed gns3 2 times as you said ,but I can not put any devices to a new project ,can you give me suggestions ?