In this article, we will install macOS 10.14 on ESXi. Then, we will fix the screen resolution error by installing VMware Tools on the macOS virtual machine.
How to Install macOS Mojave 10.14 on ESXi 6.7 (6.7U2)
On June 4, 2018, Apple released a new version of the MacOS operating system, 10.14, for developers. MacOS 10.14 was called Mojave. The full version of the macOS Mojave will probably be available for everyone in September or October.
What is VMware ESXi? VMware ESXi is a server virtualization solution. VMware ESXi is also known as VMware vSphere Hypervisor. VMware ESXi is a Hypervisor Type 1 virtualization solution.
You can set up and run Apple’s MacOS operating system without having a Mac computer. In our previous articles, we installed MacOS with VMware Workstation, VirtualBox, and ESXi.
In this article, we will install macOS Mojave 10.14 on ESXi. Version 6.7 of ESXi was released on April 17, 2018. If you are using the 6.5 version on an existing infrastructure, you can upgrade your infrastructure to a new release by browsing the article called How to Upgrade ESXi.
How to Run macOS Mojave on VMware vSphere Hypervisor ESXi 6.7
After you install ESXi, you need to download some files needed for Mojave installation. Download the macOS Mojave ISO file, VM Unlocker, and VM Tools from the following links.
After downloading the necessary files for the setup of macOS Mojave 10.14 from the above links, upload these files to your vSphere server. If you do not know how to upload files to ESXi, you can browse How to Copy Files to ESXi Datastore.
After uploading the files on Datastore, you need to prepare for the virtual machine setup. First, enable SSH and connect to your VMware ESXi server using the Putty program.
After connecting with SSH, you need to setup VMware Unlocker to run macOS on VMware ESXi.
Follow the steps below to install macOS Mojave 10.14 on your server.
How to Install VMware Unlocker on VMware ESXi
Follow the steps below to set up VMware ESXi Unlocker.
Step 1
The files in Datastore are as follows. Go to the next step to enable SSH on VMware ESXi.

Step 2
On the ESXi 6.7 server, press F2, and then press Enter on the Troubleshoot Mode Options. Press Enter on the Enable SSH option to enable SSH.

Step 3
After enabling SSH, download the Putty program from here and open the program. To make an SSH connection to your ESXi server, type the server’s IP address and select SSH. Then click the Open button to connect.

Step 4
After typing your username and password, press Enter.

Step 5
After successfully connecting to the server, use the following commands to extract the zipped file to set up VMware Unlocker.
cd vmfs
cd volumes
cd datastore
unzip VMwareUnlocker2.1.1forESXi6.7.zip

Step 6
To set up VMware Unlocker on VMware ESXi, apply the following commands to the terminal.
cd esxi
chmod +x esxi-install.sh
./esxi-install.sh
reboot

Step 7
After installing the vSphere ESXi Unlocker, restart your server using the Reboot command.

How to Create a New Virtual Machine for macOS
After installing the vSphere ESXi Unlocker, follow the steps below to create and configure a new virtual machine.
Step 1
After connecting to vSphere ESXi 6.7 via a web browser, click on Virtual Machines and then Create / Register VM.

Step 2
In the Create New Virtual Machine window, select Create a new virtual machine for Mojave and click on the Next button.

Step 3
Configure macOSMojave1014 for the VM name and set Compatibility to ESXi 6.7, Guest OS Family setting to Mac OS, and Guest OS Version to Apple macOS 10.14 (64-bit) and click Next to continue.
")
Step 4
Select Datastore and click Next.

Step 5
Configure the number of processors to 2 and the RAM size to 4 GB.

Step 6
Configure the Network Adapter and then click Datastore ISO File to add the ISO file to the virtual machine.
Also, configure the Video Card option to Auto-detect settings.

Step 7
Select the ISO file.

Step 8
Finally, enable the Hardware Virtualization and Performance Counters options for the virtual machine’s processor configuration and click Next.

Step 9
The summary information of the 10.14 virtual machine to be installed on vSphere ESXi 6.7 is as follows. Click on the Finish button to continue the installation.

How to Install macOS in vSphere ESXi
After making the necessary configurations on vSphere ESXi 6.7, follow the steps below for installing macOS.
Step 1
Run the virtual machine by clicking on the Power on button.

Step 2
Wait for the installation to start.

Step 3
Select your macOS system language and click Continue.

Step 4
To configure the disk, select Disk Utility and click the Continue button.

Step 5
Once you have selected the Virtual SATA Hard Drive Media disk, click the Erase button.

Step 6
Once you have configured the disk name, format, and Scheme settings, click the Erase button again.

Step 7
After configuring the hard disk of the macOS virtual machine, click on the Done button and then close the Disk Utility.

Step 8
Select the Install macOS option and click the Continue button.

Step 9
Click the Continue button to launch the MacOS installation on vSphere ESXi.

Step 10
Select the disk to install macOS 10.14 and click the Install button.

Step 11
Wait while it copies the necessary files for the macOS Mojave installation.

Step 12
Wait while it is installing macOS Mojave on vSphere Hypervisor. This may take some time…

Step 13
After copying the installation files, the virtual machine will restart, and you will see the following image. You need to configure the latest settings of the macOS Mojave.
Select the country you live in and click Continue.

Step 14
Select your keyboard layout and click Continue.

Step 15
To accept Apple’s Data & Privacy settings, click Continue directly.

Step 16
If you are installing a clean macOS Mojave, you can continue with it. Don’t transfer any information now.

Step 17
Click Sign Up Later and then Skip to sign in later on Apple.

Step 18
Click the Agree button to accept the MacOS Mojave software license agreement.

Step 19
Create a new user account for the macOS Mojave operating system and click Continue.

Step 20
Click on Continue to allow applications such as Apple’s Maps and Find My Mac, which will enable you to send the errors you have on your Mac to Apple.

Step 21
The most prominent feature of macOS Mojave 10.14 is the Dark theme. Select Dark appearance and click Continue.

Step 22
Once you have successfully installed macOS Mojave on vSphere, you can check the version using the Apple logo / About.

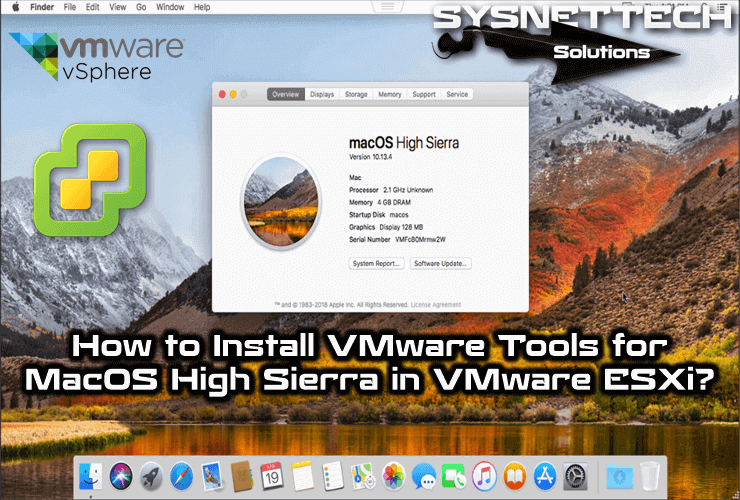
How to Install VMware Tools for macOS Mojave on vSphere
After installing macOS Mojave, you need to install VMware Tools. With VM Tools, you can use the virtual machine in full-screen mode and get the virtual machine to run more efficiently.
To install VMware Tools on a macOS virtual machine, follow the steps below in order.
Step 1
Close the virtual machine and click the Edit button, as shown below.

Step 2
Upload the Darwin.iso file into Datastore and then select the Darwin.iso file in the Datastore Browser window.

Step 3
After adding the darwin.iso file to the macOS virtual machine, click the Save button to save the settings.

Step 4
Now, run the Mojave virtual machine.

Step 5
Double-click on the VM Tools installation image, and in the window that opens, double-click Install VMware Tools to install.

Step 6
In the VM Tools Installer window, click the Continue button.

Step 7
Click the Continue Installation button again.

Step 8
Type your user account name and password, and then click the Install Software button.

Step 9
Click the OK button to turn off the Not Optimized for VM Tools Mac option.

Step 10
Click the Open Security Preferences button if you encounter a System Extension Blocked alert.

Step 11
Click the Allow button to allow the VM Tools setup file.

Step 12
After setting up VM Tools for macOS, click the Restart button to restart the virtual machine.

Step 13
After the macOS 10.14 virtual machine restarts, make the virtual machine full screen.

Step 14
You can understand whether VM Tools is running on the entire screen of the virtual machine.

Conclusion
In this article, we have installed macOS Mojave 10.14 on vSphere 6.7. Finally, we have resolved the screen resolution issue. Thanks for following us!

TolgaBagci
Hi, I'm Tolga, a computer expert with 20 years of experience. I help fix computer issues with things like hardware, systems, networks, virtualization, servers, and operating systems. Check out my website for helpful info, and feel free to ask me anything. Keep yourself in the loop about the newest technologies!
Thanks for your work.
Unfortunately I can’t execute the esxi-install.sh script as root “operation not permitted”.
Please advise.
Even by executing the commands manually I can’t install MacOS. It stucks in a reboot loop.
THANKS IN ADVANCE!
I had the same issue, it turns out secure boot has to be disabled in the bios before attempting the install, you can re-enable secure boot after the unlocker install. this info is not found anywhere online!
Thanks for the tip – I was able to install unlocker by disabling secure boot, but mojave setup still keeps rebooting. Can you remember what else you did to get the install going?
What is your processor model?
It was my mistake actually – I installed unlocker, and the script finished correctly indicating that it had installed, but I found out the hard way that it was not.
In any case, there is a new unlocker script out now by DrDonk specific for esxi (link is https://github.com/DrDonk/esxi-unlocker) which installed correctly (you can verify that unlocker is installed by looking at boot.cfg file and verify that unlocker.tgz is included). It will also be displayed when esxi is booting (make sure UEFI safe boot is disabled).
All good now. Many thanks for your support.
Hello,
Fantastic article. I was able to get this working without any issues at all!
I do have a question though… In the past, with Unlocker, I’ve had to re-run the esxi-install.sh anytime I applied updates to my hosts. Is this still the case as far as you know?
Thanks!
Answered my own question after applying updates: Yes.
Hallo tolqabaqci,
at first, thank you very much for a lot of manuals you wrote.
Now my question – I am a little bit confused. I do understand, that I need the unlocker to install any macOS under VMware workstation – VMware workstation does not official support Apple OS. But I do not understand why I need an unlocker for VMware ESVi 6.x – I see “Mac OS” in “Select Guest OS Family” menu if I create new VM. I guessed ESVi supports native the Mac OS and it is not necessary to unlock it – am I wrong? Thank you.
There is a macOS option when creating a new virtual machine on ESXi, but the system will restart automatically when you try to install macOS. Therefore you will need to use macOS Unlocker.
Try to install macOS on ESXi without Unlocker and observe the result.
Thank you for the prompt answer. You are right, the system starts over and over. But I really don’t understand the vmware logic – one can select the macOS but can’t install it. On the VMware internet site the macOS is specified as a valid guest system for ESVi 6.x It is really strange.
You’re welcome.
To understand this, you need to try older versions of macOS on ESXi. I haven’t tried it before, but I’m going to look at it when it’s time.
It worked like a champ. THANKS mate.
Quick questions, how do I make the resolution of the monitor bigger? When I remote desktop into it I get this tiny little window to work with 🙁
Thanks again mate
Thank you, thank you for your comment.
Did you install VMware Tools after installing Mojave on ESXi?
Yes indeed VMware tools are installed Sir
In Virtual machine settings, make sure that you have Video Card: Auto-Detect Settings.
Thanks. Strange for my video card settings I only 2 options, default and custom settings. I don’t see the auto-detect for some reason. ??
Hello!
I’ve installed the unlocker and rebooted my ESXi 6.7 host but the MacOS VM does not get out of a boot loop. The VM reports some sort of panic and spits out a bunch of non-readable text. Have you ever come across this issue?
Thanks
Hello there.
The situation you encountered is very interesting, I have never encountered such an error.
In the ESXi Virtual Machine Creation window, you can try selecting the MacOS Sierra for the virtual machine.
Or try defining 2 or 4 processors to the macOS virtual machine.
Hiya! Thanks for the awesome guide. I am however stuck at installation, when booting for first time (with ISO loaded to boot from) after the bar has gone across I get the sto symbol and it won’t go any further. Any ideas? I’m running ESXi 6.7 on a Dell Poweredge R510 (Dual Xeon X5670).
Hiya! Thanks for the awesome guide. I am however stuck at installation, when booting for first time (with ISO loaded to boot from) after the bar has gone across I get the sto symbol and it won’t go any further. Any ideas? I’m running ESXi 6.7 on a Dell Poweredge R510 (Dual Xeon X5670).
***edit*** Fixed! It was my dodgy ISO, I installed from the USB I’d made instead.
Hello, I’ve installed the unlocker 2.1.1 and rebooted my ESXi 6.7.
Now i can not login to the host vm
This error:
503 service unavailable (failed to connect to endpoint: [N7Vmacore4Http16LocalServiceSpecE0x0000000ada09e790]_serverNamespace = / action = Allow _port = 8309 )
The instructions work fine, however it would fail with this error: “This copy of the Install macOS High Sierra application is damaged, and can’t be used to install macOS.” This error was on multiple .iso files that I downloaded from this article. Doing a Google search reveals that the issue is due to expired certificates.
(https://9to5mac.com/2019/10/24/macos-application-damaged/) Is there a way that the iso files can be downloaded again and provided for download with the new certificates?
Thank you.
I am getting this error when in install the macOS
“This copy of installed macOS Mojave is damaged and can’t be used to install macOS”
Could you please guide me about this error?
Turn off network, set esxi 6.7 to 10/10/2015. open teminal in macosx install input “date 1010101015″
>>> fixed ” this copy……
terminal 🙂
you’re a life saver!
This was a great article. I got it working on VM Workstation then ESXi 6.7 U3. Had to do unlocker AFTER all updates where completed though. Took about an hour and 20 min to install. But after that the boot time is about 3 min. I’m fine with both. There was nothing in the article on where to find the darwin.iso.
I found it here – softwareupdate.vmware.com->CDS->vmw-desktop->fusion->11.1.0->13668589->packages->”…darwin.zip.tar” unzip layers of zip file to get to iso and extract.
What I did differently was, I used the “removable drive” functionality in the VMware Remote Console to connect to the iso and it shows up on the desktop like any other iso; installed that way so I didn’t have to have the vm shutdown to gain access.
Saludos, gracias por compartir tus conocimientos, tengo un problema, ya instale el UnLocker, baje el ISO, cree la maquina virtual con los detalles explicados y al darle que arranque, aparece la Manzana y no hace anda mas … alguna idea ??
Gracias
¿Puedes intentar desactivar la función de virtualización de la CPU de la máquina virtual? Y asegúrese de que Unlocker haya instalado la versión 2.1.1.
Thx for the great Declaration.
Any Chance to get Catalina to work?
Thank you for your comment. Sorry, I haven’t tried macOS Catalina 🙁
just found this.. very good 🙂
but I’m stuck with the error “Mojave damaged’ etc…
Now the tip is to ‘turn of the network” and set the date.. I get that..
But can someone explain what is meant by this.. if I turn of the nw I can long longer access ESXi or get to the Mac installer / terminal ..
Confused..
@Jak error msg says iso expired, idea of this fix is to disable guest vm network and start vm, once on mojave setup screen you can run disk utility to format drive then run terminal to set macos system date back to 2015, this will allow you to proceed with the install.
i have install macos on esxi 6.7 ,
but iMessage not works
clover bootloader can not be install here
do you have solution?
I’ am getting an Error which says that the install is dameged and it can’t be install
Disable network connectivity to VM, set date on esxi to 10/10/2015 and try again… that worked for me.
Very good man! thank you very much!
Add, please about the set date to manual(10.10.2015 in ESXI)
the copy of the macOS Mojave application is damaged and cannot be used to install macOS.
What can cause this?
Is it serious you block copy on this page? Where are we, in the middle ages?
Sorry about that. Spammers are still very active today.
Hi @tolga,
I have followed your guide step by step but every time I try to start my VM on my ESXI 6.7 host it gets stuck on the Apple Logo. I am guessing it is because I have a ryzen processor in my host? your thoughts?
Is there any way to get this to work?