In this professional guide, I will explain how to install Windows 7 OS in a virtual machine using Oracle VM VirtualBox on Windows 11 & 10. First, I will show you how to create a new virtual machine for this operating system. I will also configure the performance settings of the virtual PC.
In addition, I will cover how to optimize the VM settings for a smooth user experience. As a result, you will be able to get the most out of Windows 7 in a virtualized environment.
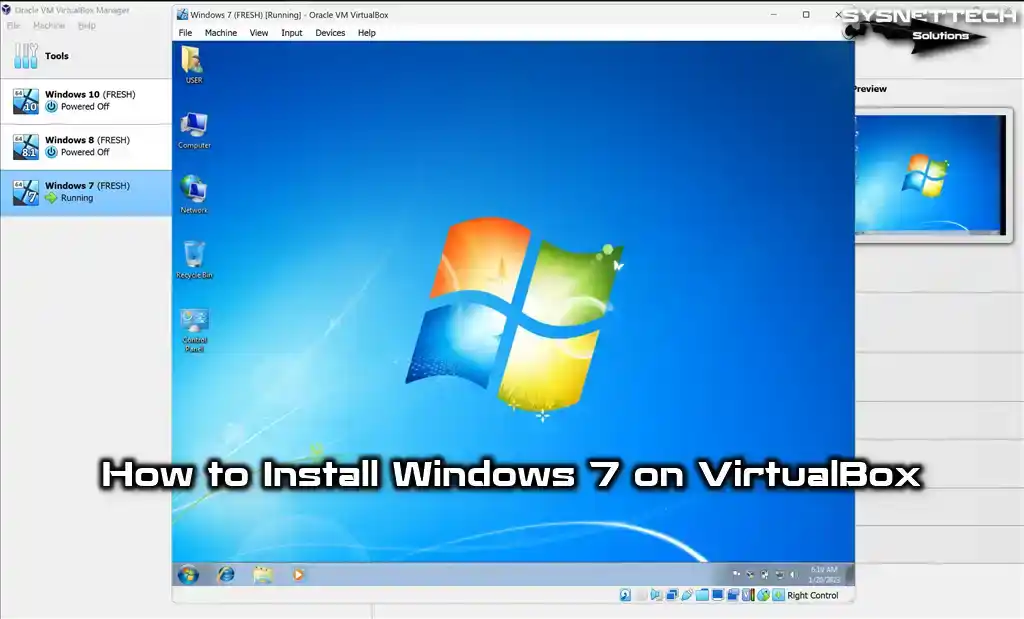
How to Set Up Windows 7 Ultimate 64 Bit on Windows 10/11 using Oracle VM VirtualBox 7
Following the Windows Vista system, Microsoft unveiled Windows 7 on October 22, 2009, catering to personal computers, tablets, media devices, and laptops, focusing on enhancing performance and security.
Windows 7 has Starter, Home Basic, Home Premium, Professional, Enterprise, and Ultimate editions.
This Windows version was developed to deliver an enhanced user experience and improved convenience in the interaction between users and computers. Windows 7 supports processors with fewer cores and 32-bit and 64-bit architectures.
Shortly after releasing this operating system, Microsoft promptly issued the Service Pack 1 (SP1) update package to address system vulnerabilities, bugs, and performance issues.
Windows 7 is Microsoft‘s most widely used and favorite operating system today. Today, most companies and individuals still use this version of Windows.
This operating system is almost the smoothest, but Microsoft finished support for the Windows 7 operating system on January 19, 2015. On the other hand, Extended Support ended entirely on January 14, 2020.
For this explanation, we strongly advise against installing an outdated operating system on your host computer. Instead, we recommend utilizing virtualization software like VMware or VirtualBox to run and experience more aged systems, such as Windows 7, on a virtual machine. This approach ensures a separate and isolated environment for compatibility and security purposes.
How to Create and Configure a New Virtual Machine for Windows 7 OS
First, you need to correctly create a virtual computer and configure the device’s performance settings. Once you have successfully established the Oracle software on your host computer, click its shortcut to launch the program. From there, carefully follow the steps below to create a new virtual machine.
Step 1
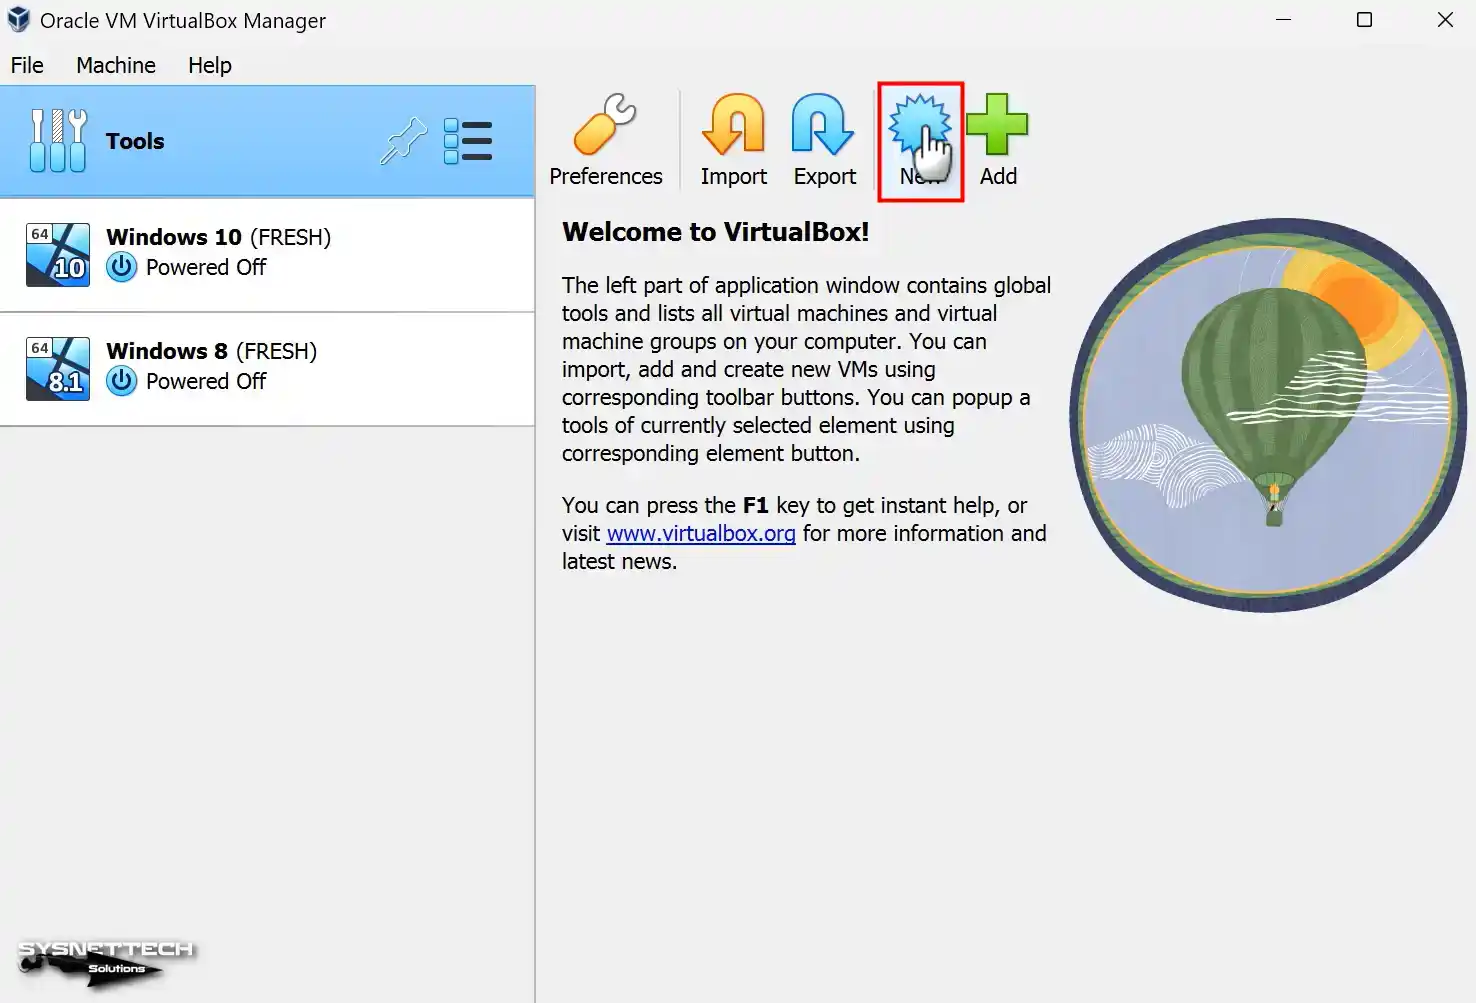
After running the virtualization software on your Windows 11 or Windows 10 system, click Machine / New on the program’s main page or click New with the big icon as in the image below.
Step 2
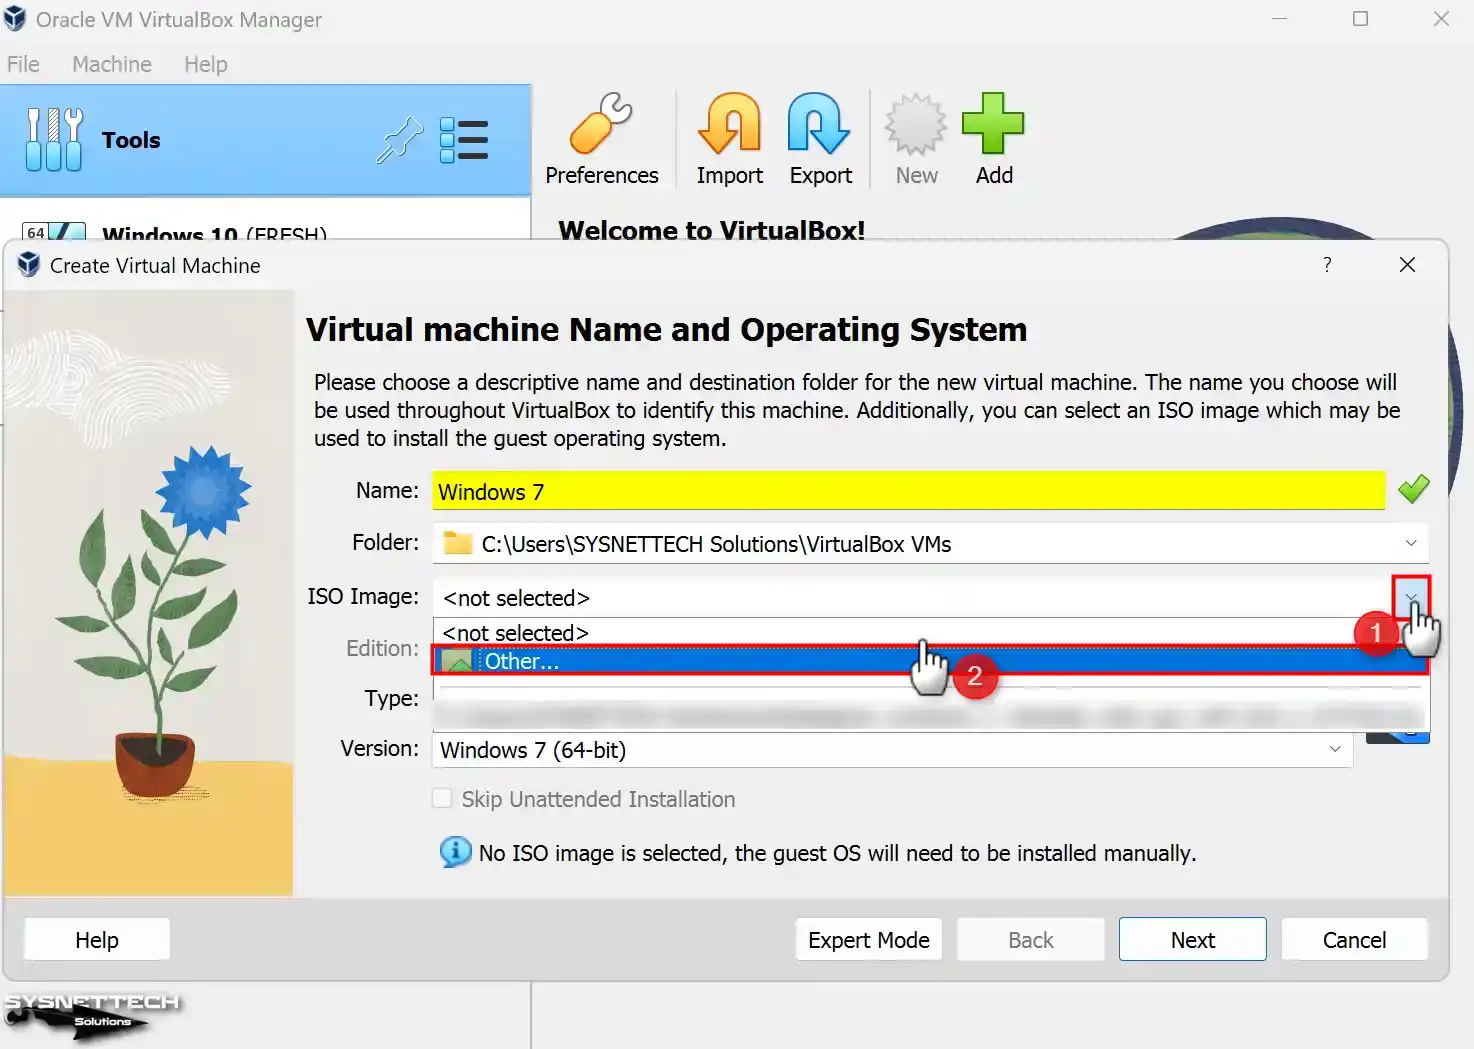
When you type the name of the operating system you will install on your Virtual PC in the Name area, VirtualBox will automatically set the Type and Version values. For example, suppose you type Windows 7 in the operating system name. In that case, the version is set to 64 Bit automatically, and if you are going to install 32 Bit, configure the architecture of the system manually.
To add a Windows 7 ISO file to the virtual machine, expand the drop-down menu from the ISO Image section and click Other.
Step 3
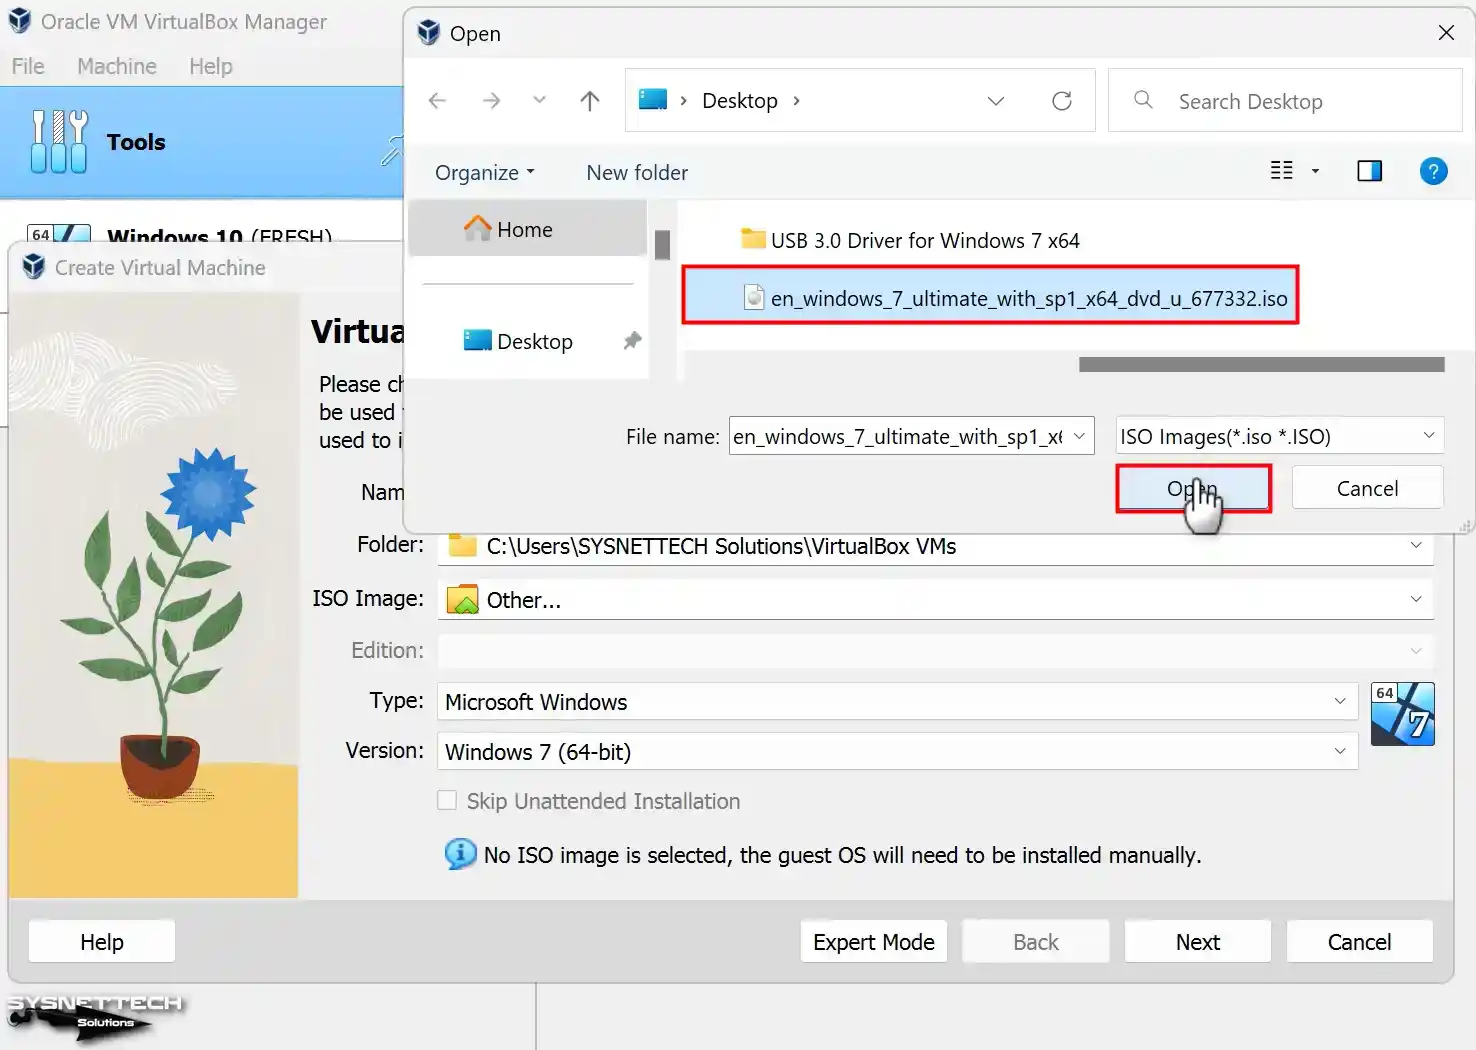
Choose the Windows 7 image file you downloaded to your computer from the newly opened window. Once chosen, click the “Open” button to use the file.
Step 4
In VirtualBox’s 7.x versions, you can now use the unattended installation feature to prepare a guest machine with preconfigured settings. However, since preparing a VM using the manual method will be more stable, select the Skip Unattended Installation option and click Next.

Step 5
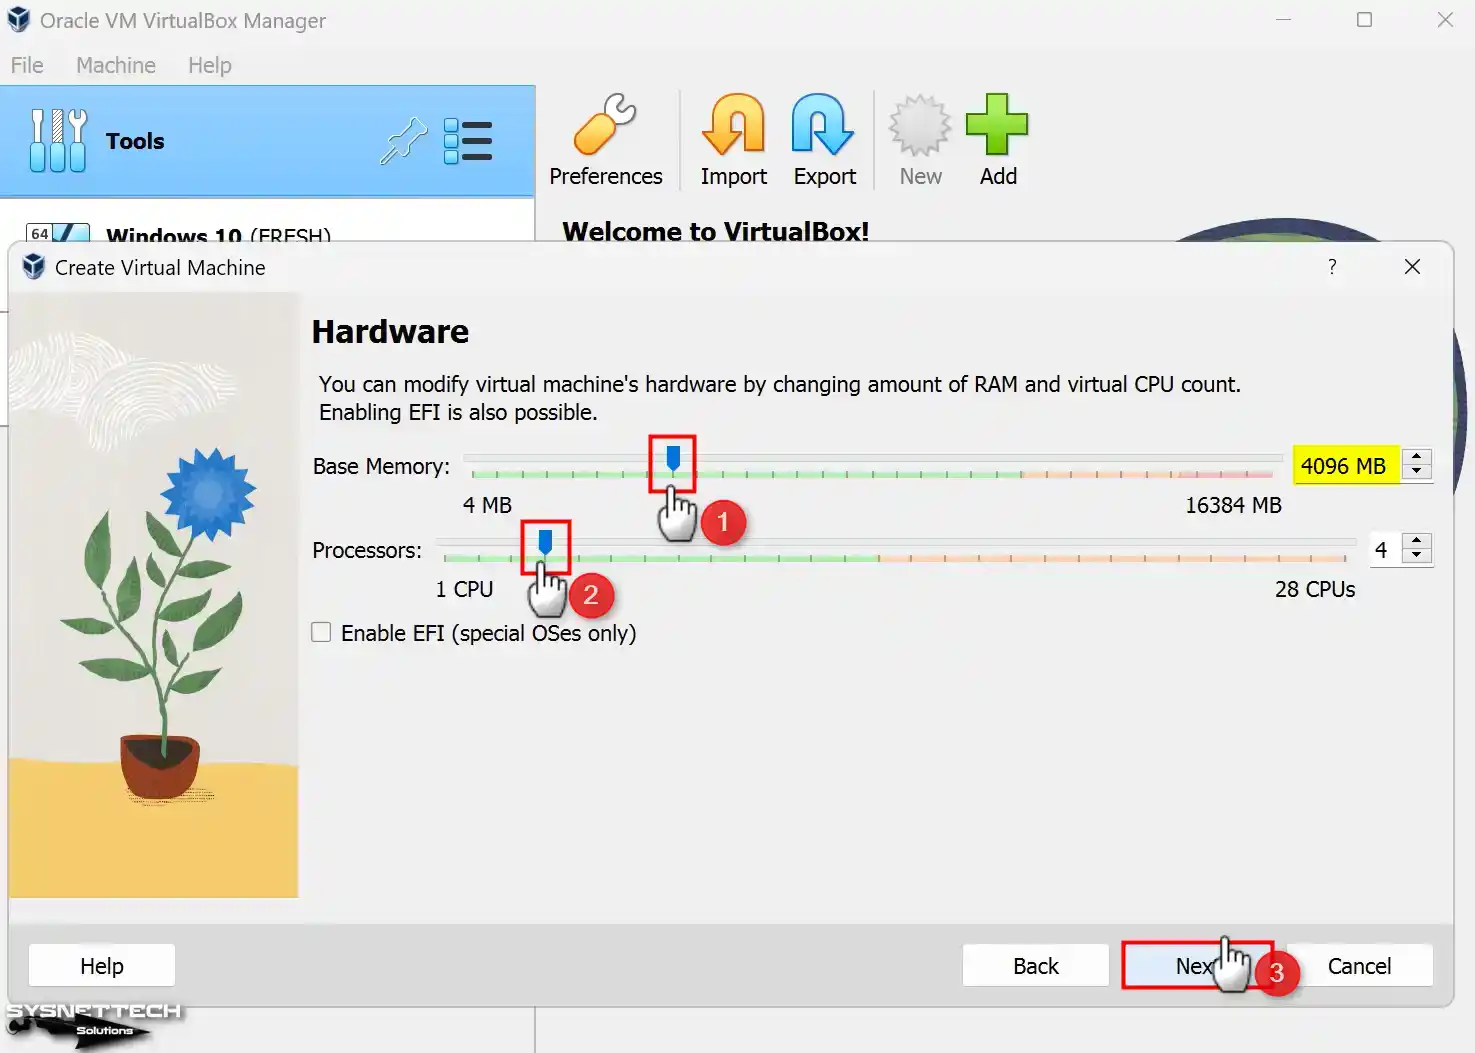
For the Memory Size setting, set a suitable value for the Windows 7 VM depending on the RAM capacity of your host computer. Suppose your host computer has a total of 8 GB RAM. In that case, it is advised to configure the allocated memory for the virtual machine to 4 GB, which is acceptable for smooth operation.
Step 6
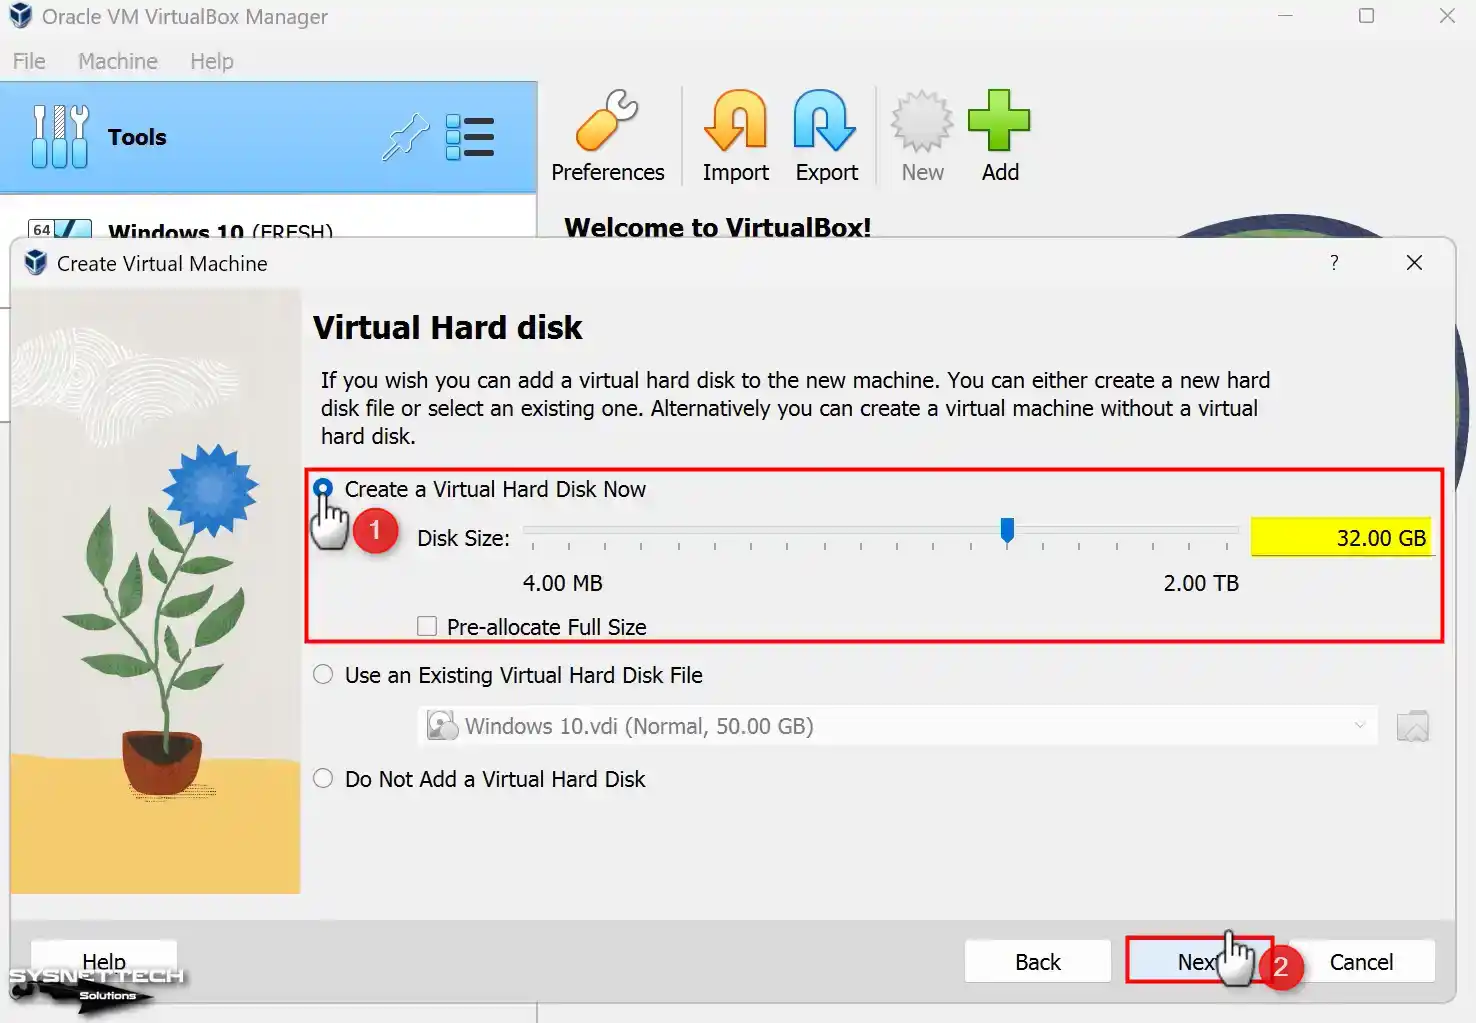
Since installing Windows 7 from scratch, you must now select Create a virtual hard disk in the Hard disk configuration window. Suppose you have a VM previously installed with Oracle virtualization software. For that topic, you need to add the virtual HDD of that system using an existing virtual hard disk file option.
In the 6.x versions of VirtualBox, select VDI (VirtualBox Disk Image) developed by Oracle for the virtual disk type and continue. VHD is used for Microsoft proprietary virtualization software. VMDK is a virtual disk file commonly used by VMware Workstation.
Also, you must select in this window how the virtual disk file will be stored on your physical HDD. Suppose you want to fill the capacity of your host disk sparingly. In that case, you should choose the Dynamically Allocated option. If you have a more aged PC, it is recommended to allocate disk space on your host’s disk equal to the capacity of the virtual disk using the Fixed Size option.
Step 7
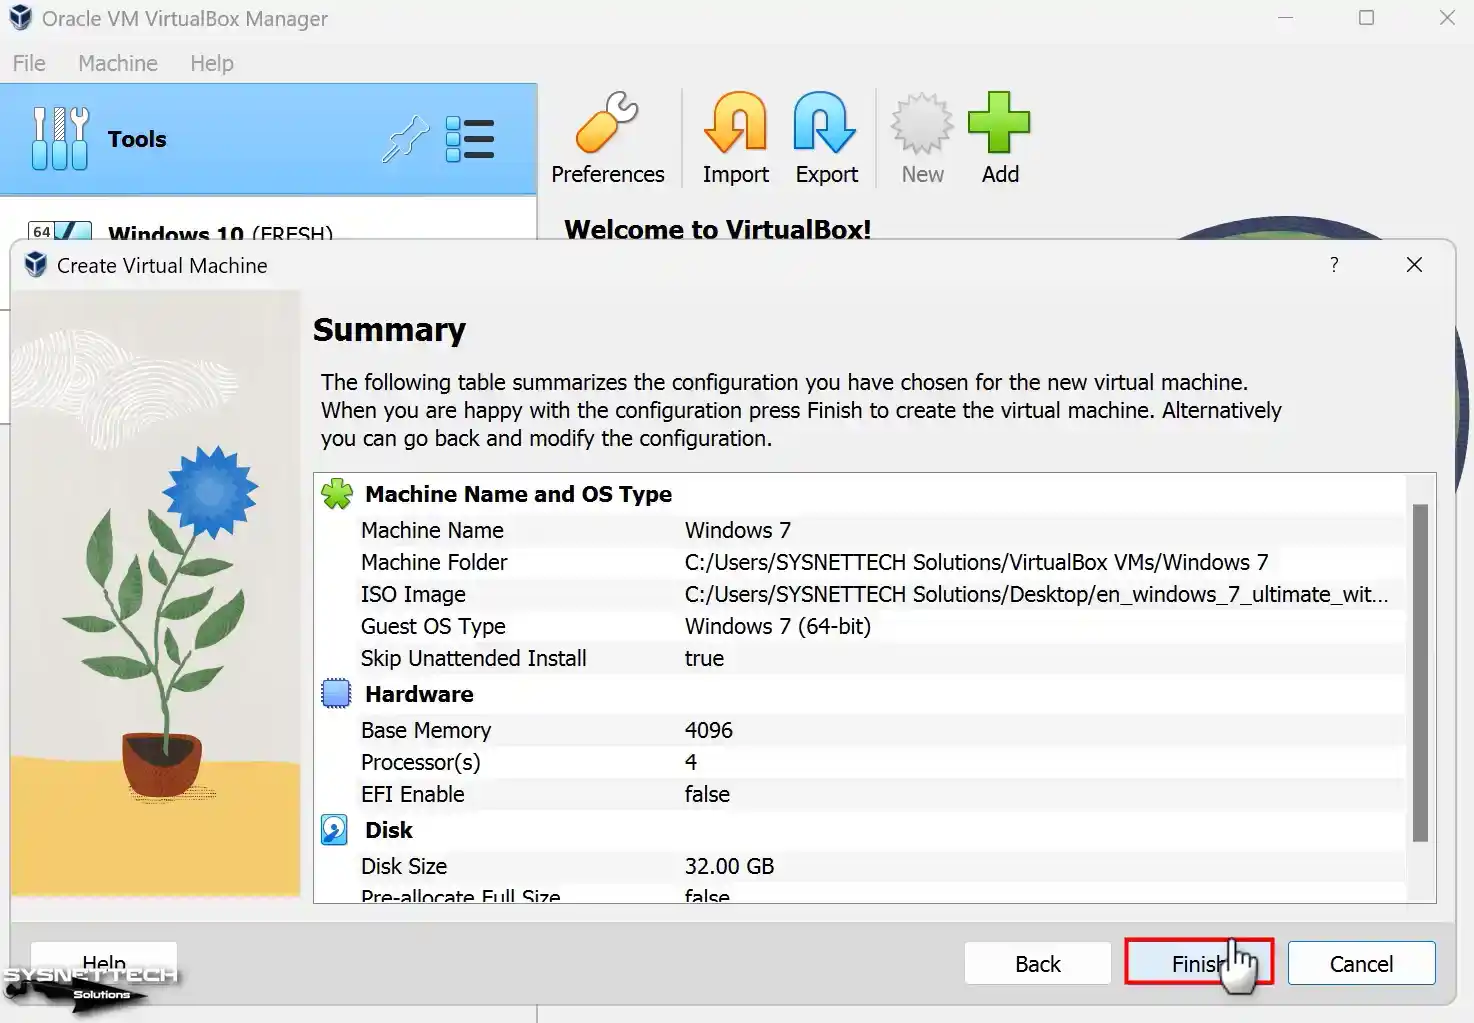
Review the hardware settings of the Windows 7 guest machine you have prepared and close the wizard.
Step 8
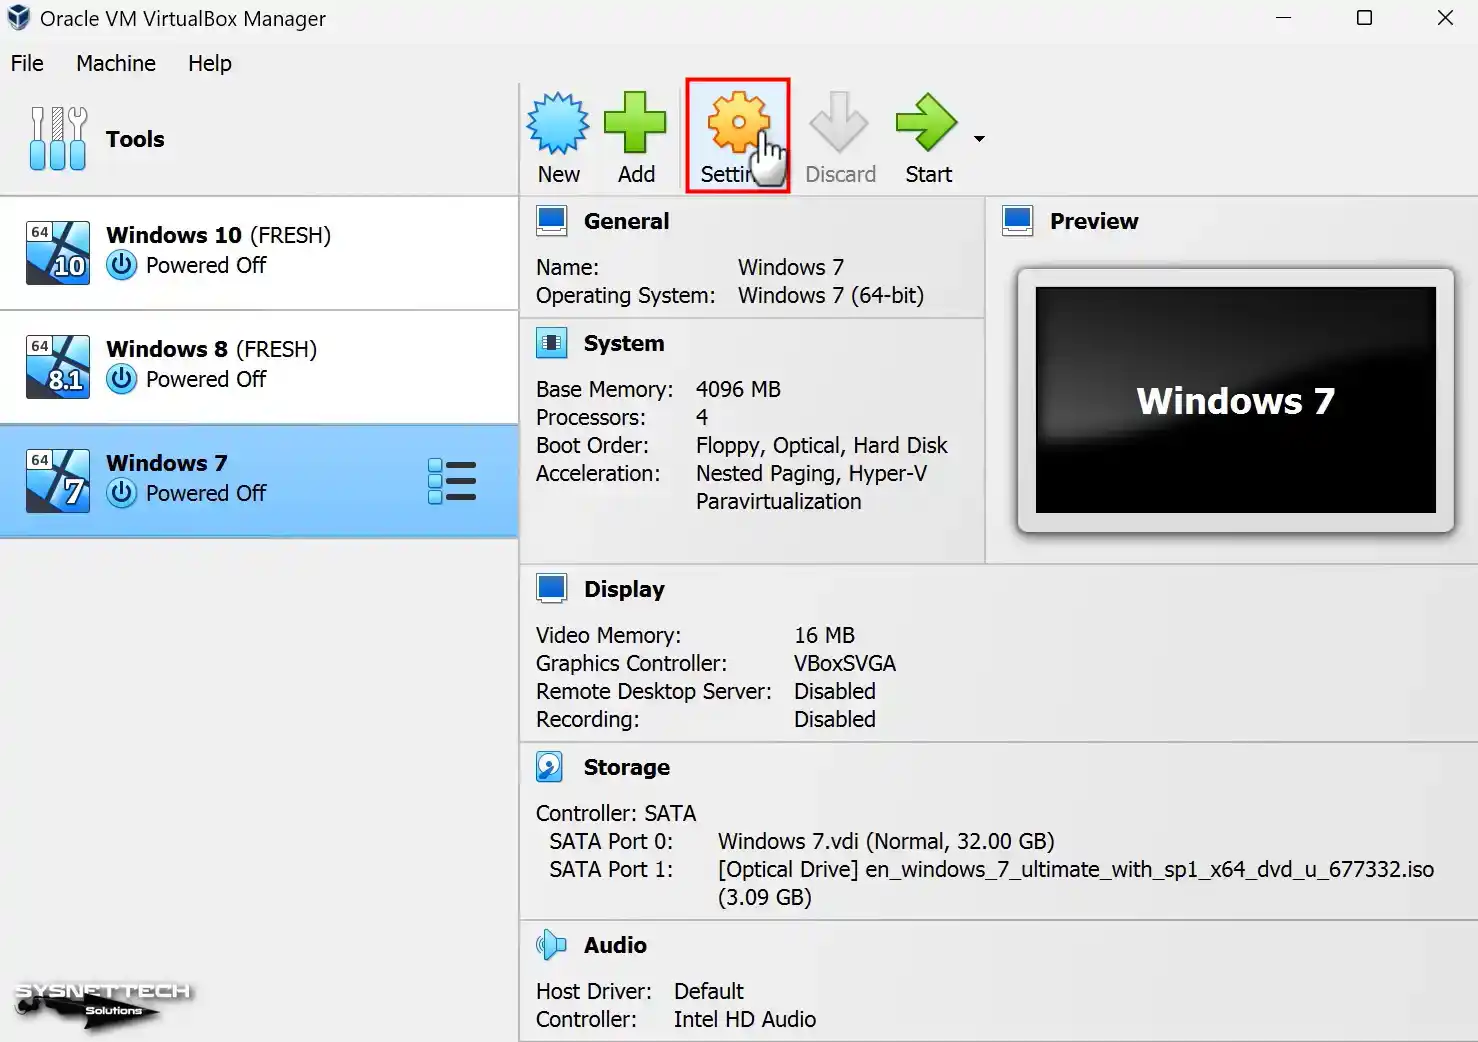
Click Settings to configure the settings of the virtual computer you created more professionally.
Step 9
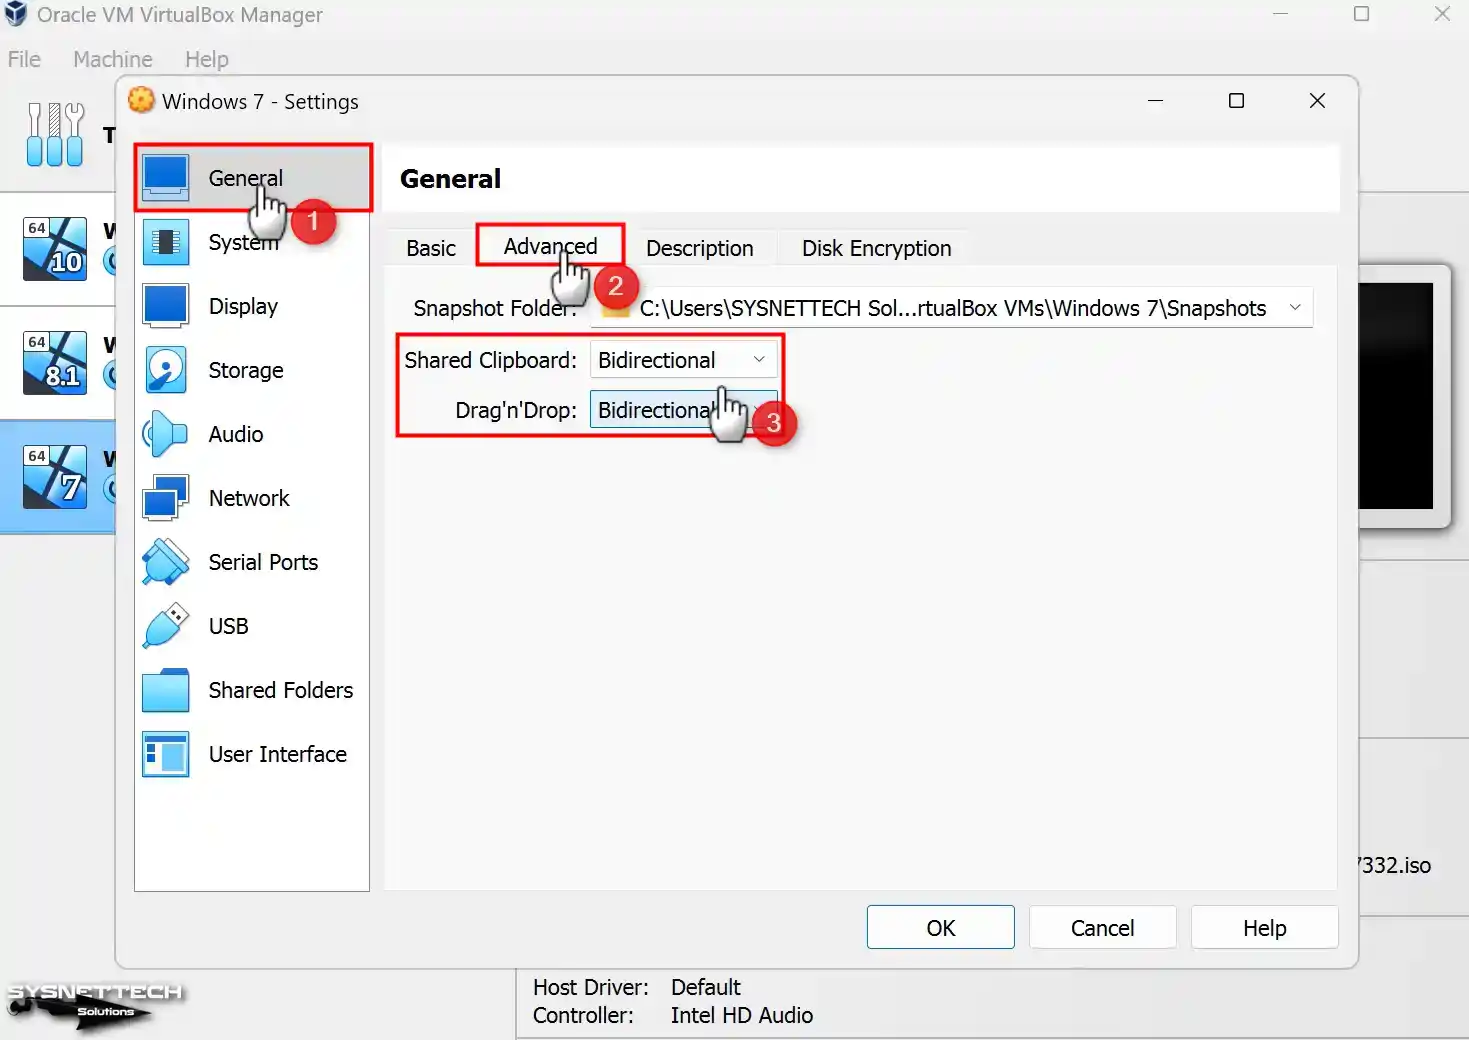
In Windows 7 VM settings, you need to make some settings for file and text transfer. First, go to the General tab. Then, open the Advanced tab.
Here, you have the options Shared Clipboard and Drag and Drop. For this Windows 7 VM, set the options to Bidirectional. This way, you can copy files and text between the host and the VM. Also, file transfer will be possible using drag and drop.
Step 10
There are some steps required to install Windows or Linux operating systems on a physical computer. First, you need to change the boot order in the BIOS settings.
You also need to insert the installation media of the operating system into the optical drive. Finally, you need to start the computer with the installation media. By following these actions, you can successfully install your operating system.
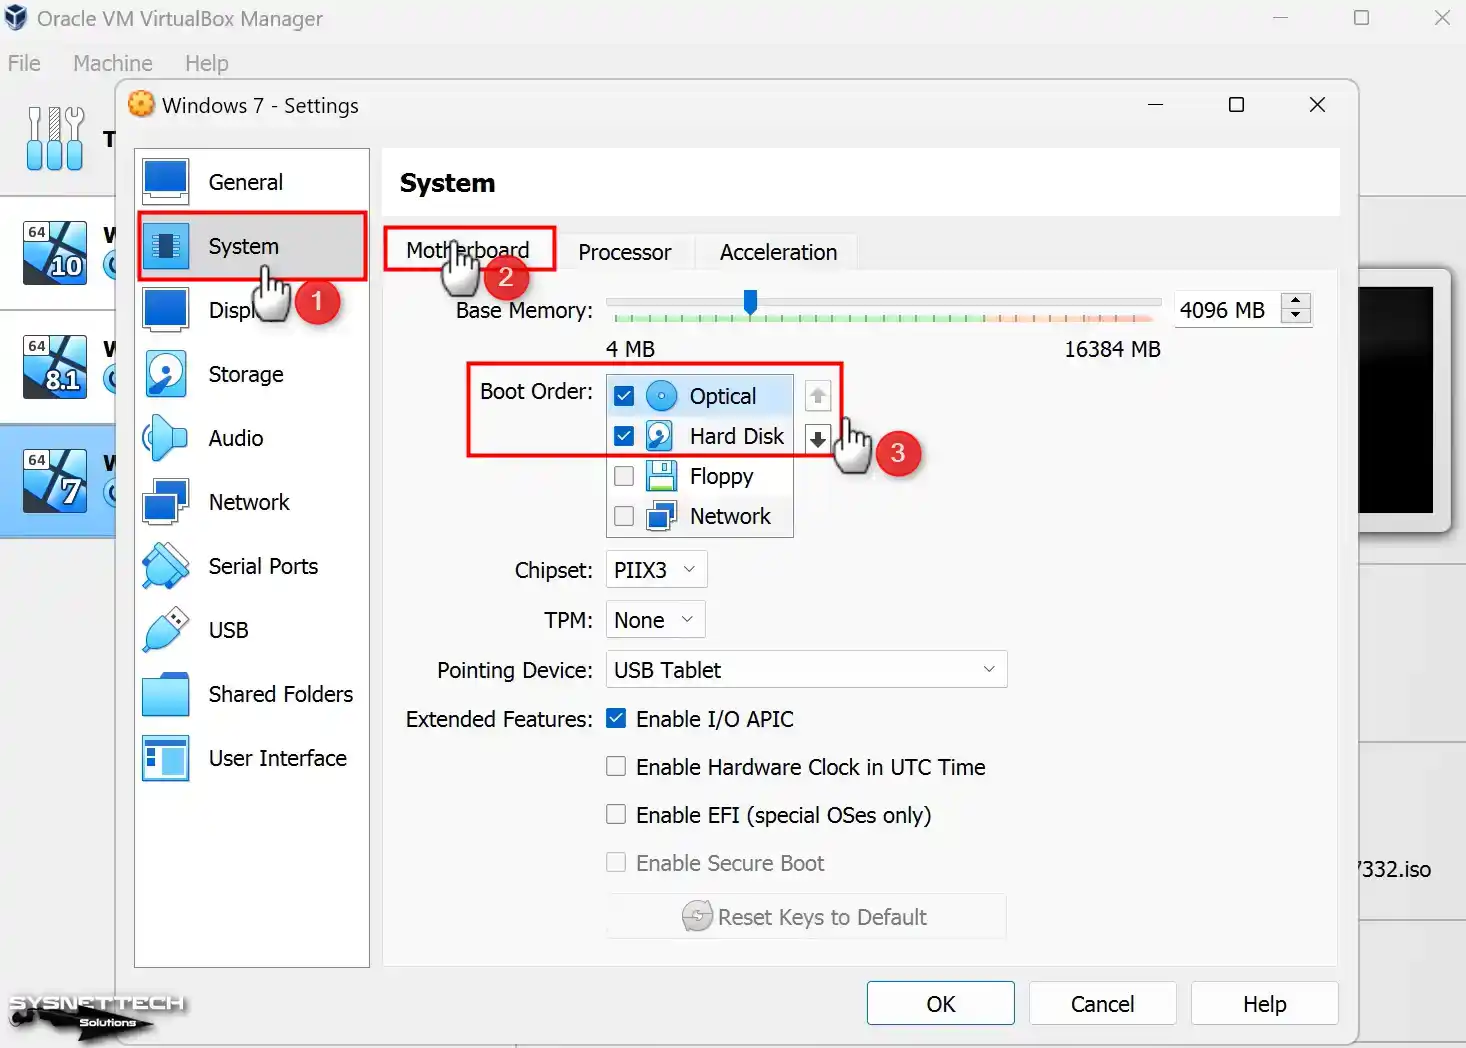
The boot order must be changed when installing a system on virtual machines. You need to set the Boot Order settings of the System / Motherboard hardware in the Windows 7 virtual computer settings. Since Floppy is legacy hardware, turn off the device and configure the first boot order as Optical.
Step 11
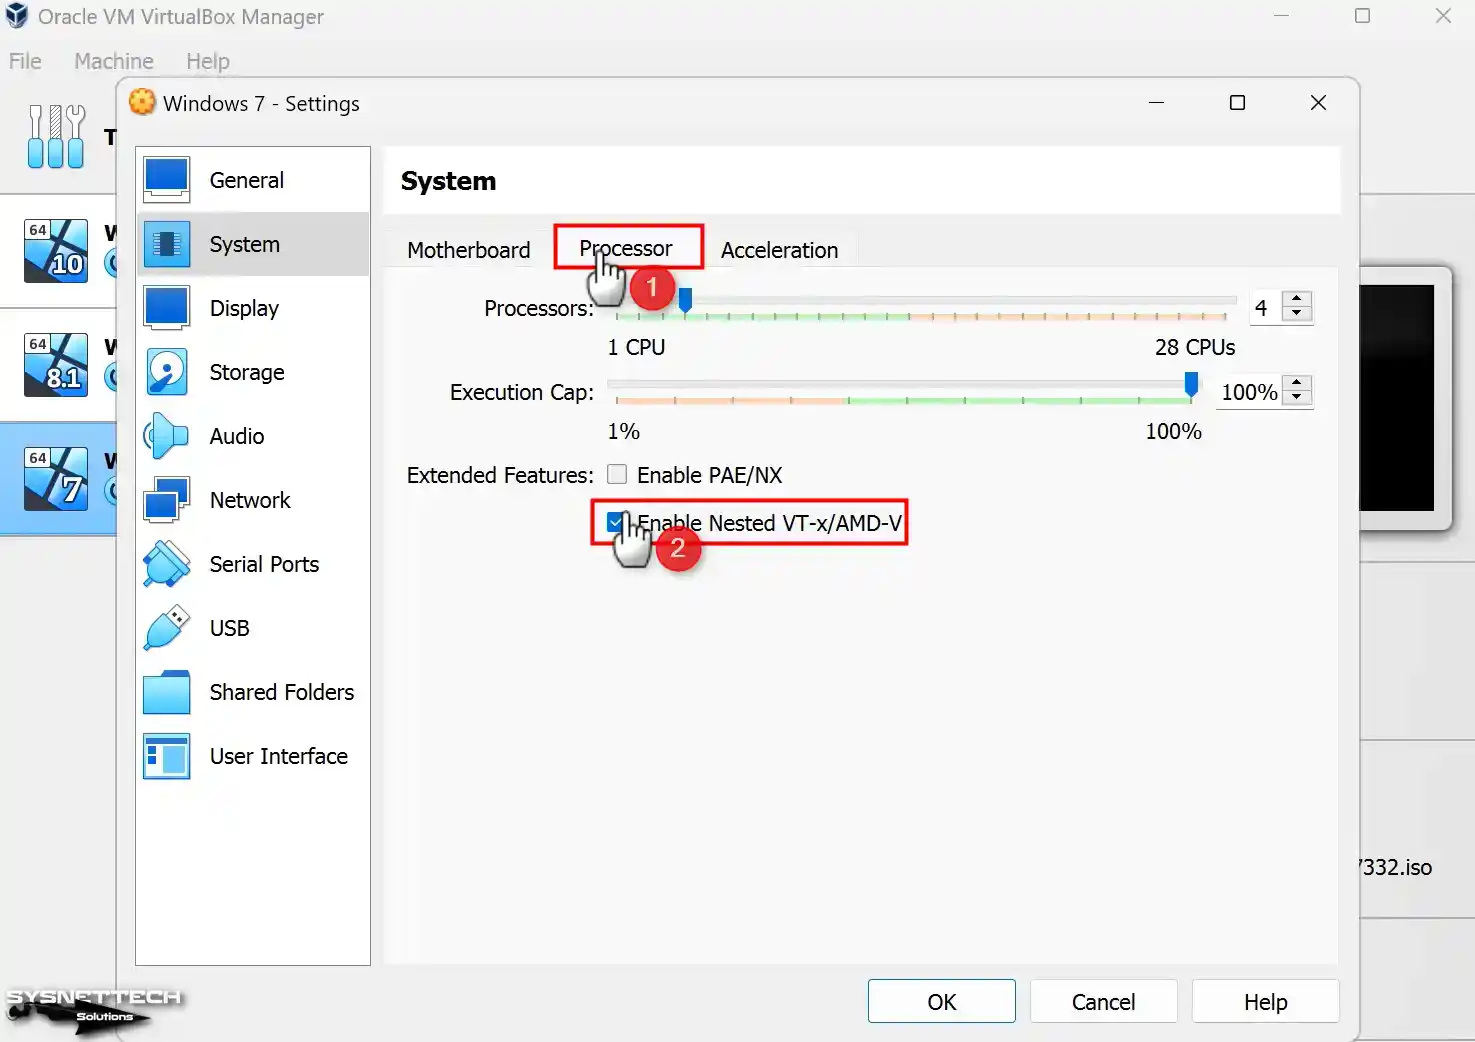
You have the flexibility to add multiple virtual CPUs to the virtual appliance based on the performance capabilities of your host CPU. Specifically for Windows 7, you can configure the Processor set to allocate four virtual CPUs.
Also, you can enable Nested VT-x/AMD-V if you want to operate a VM inside a VM using virtualization software such as VirtualBox on your guest operating system.
Step 12
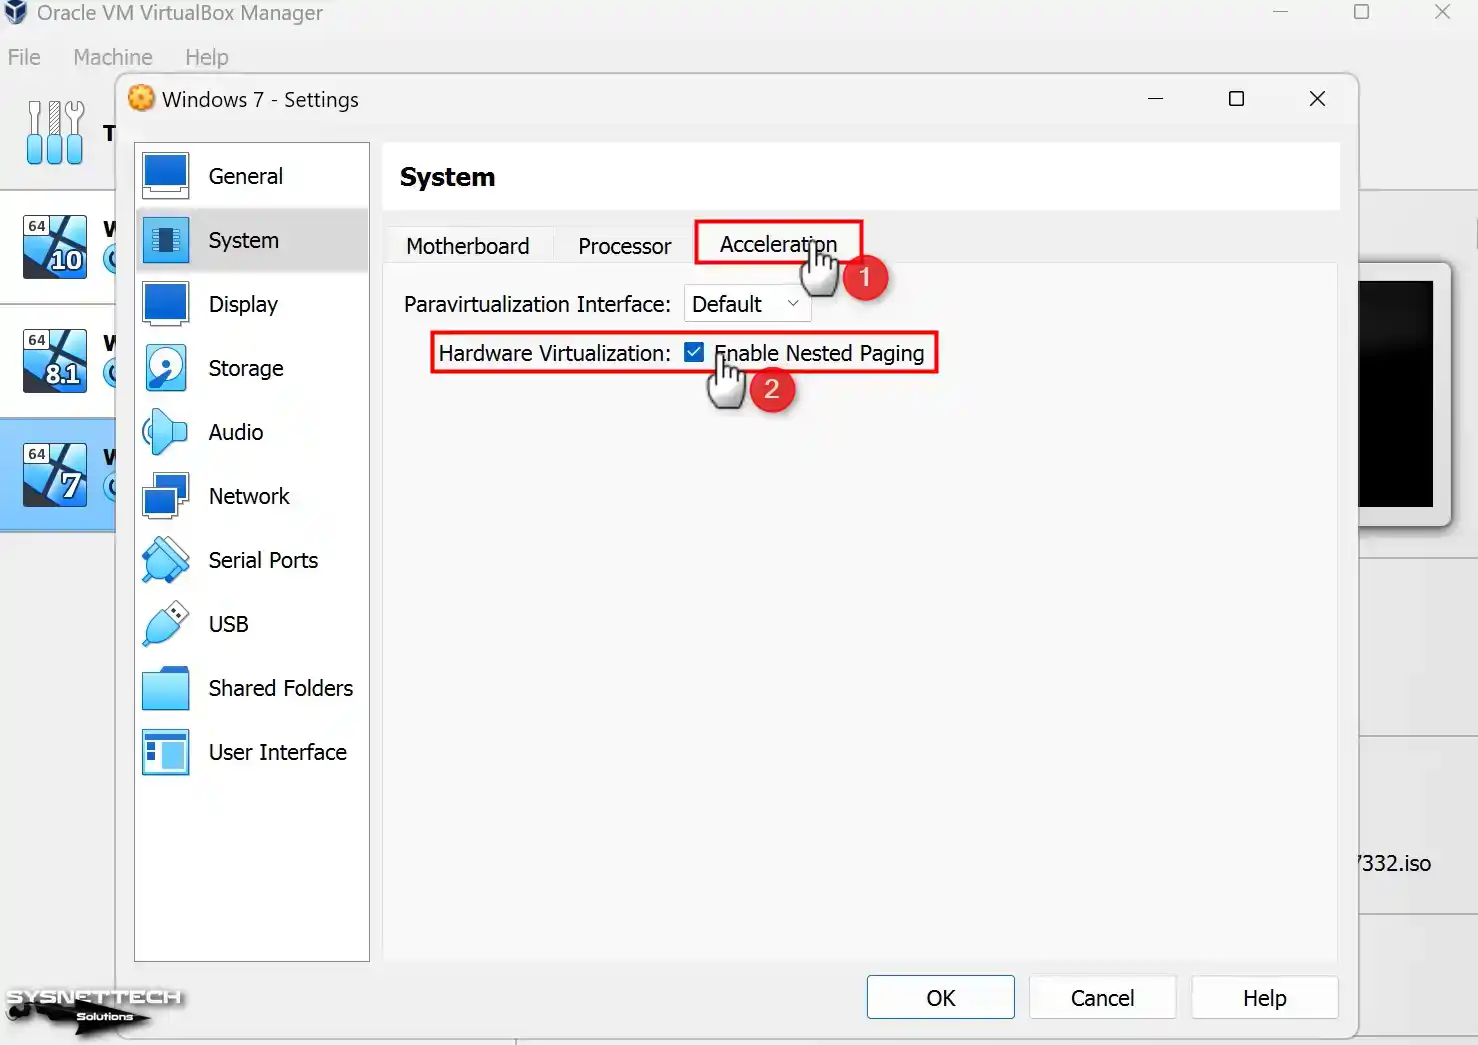
Enable Nested Paging so the guest machine can better access your host’s RAM hardware and improve memory management.
Step 13
Activate the 3D Acceleration option and configure the Video Memory value to 256 MB to improve virtual computer image quality and adequately run applications or games containing 3D graphics.

Step 14
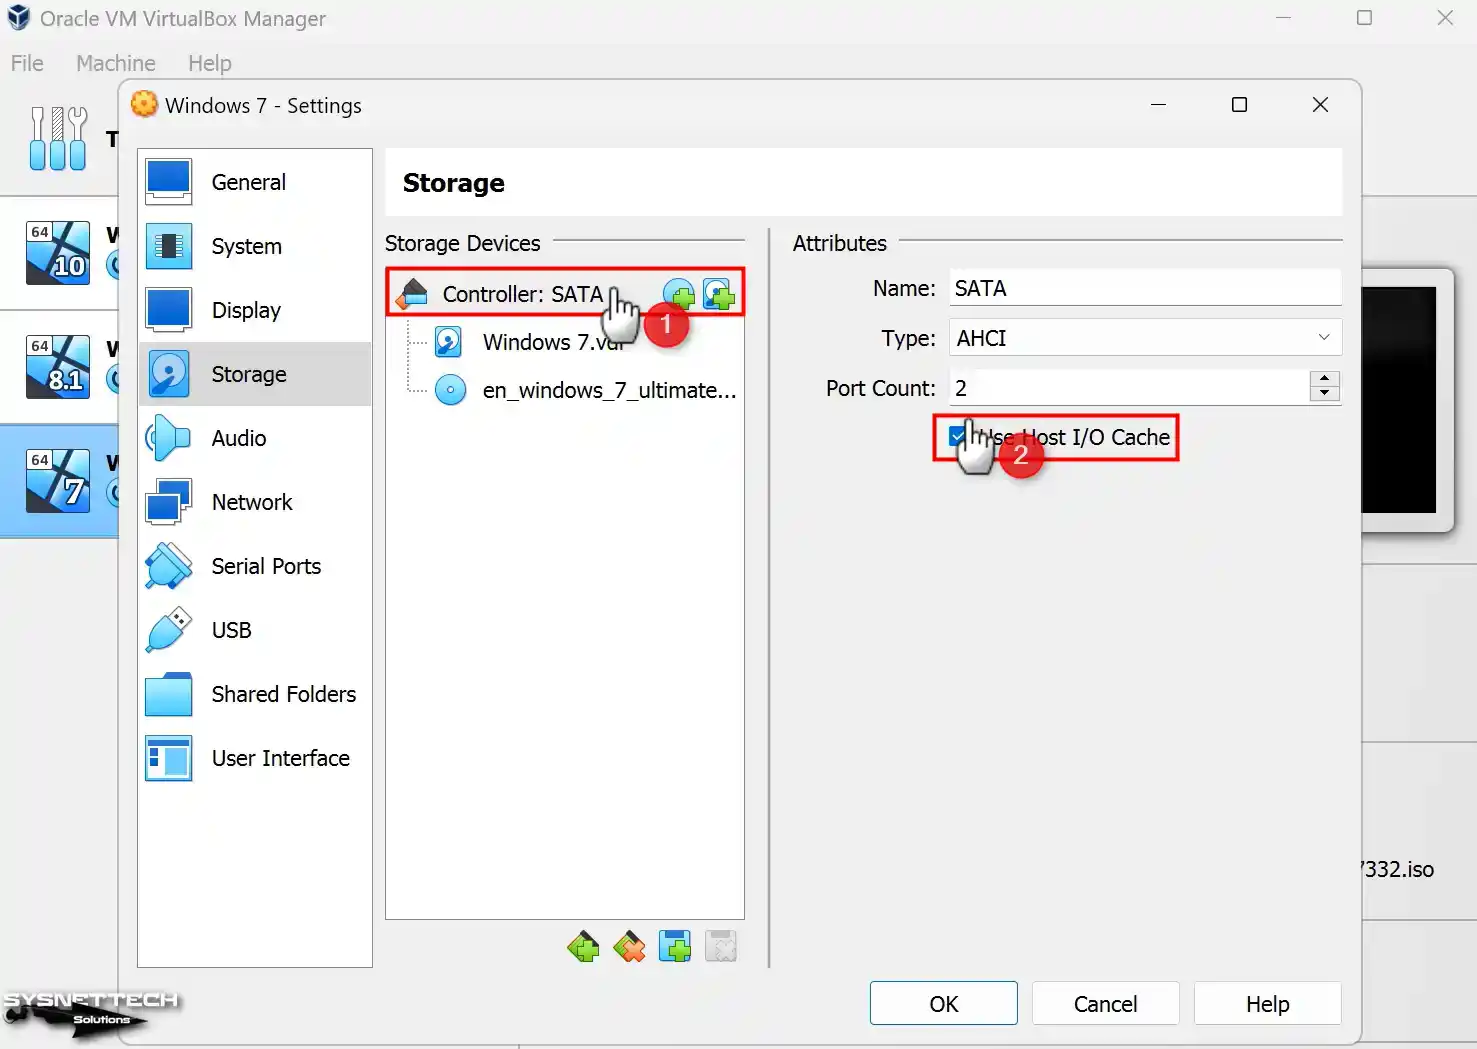
For the performance of the virtual computer, enable the Host I/O Cache feature on the SATA controller in the Storage settings.
Step 15
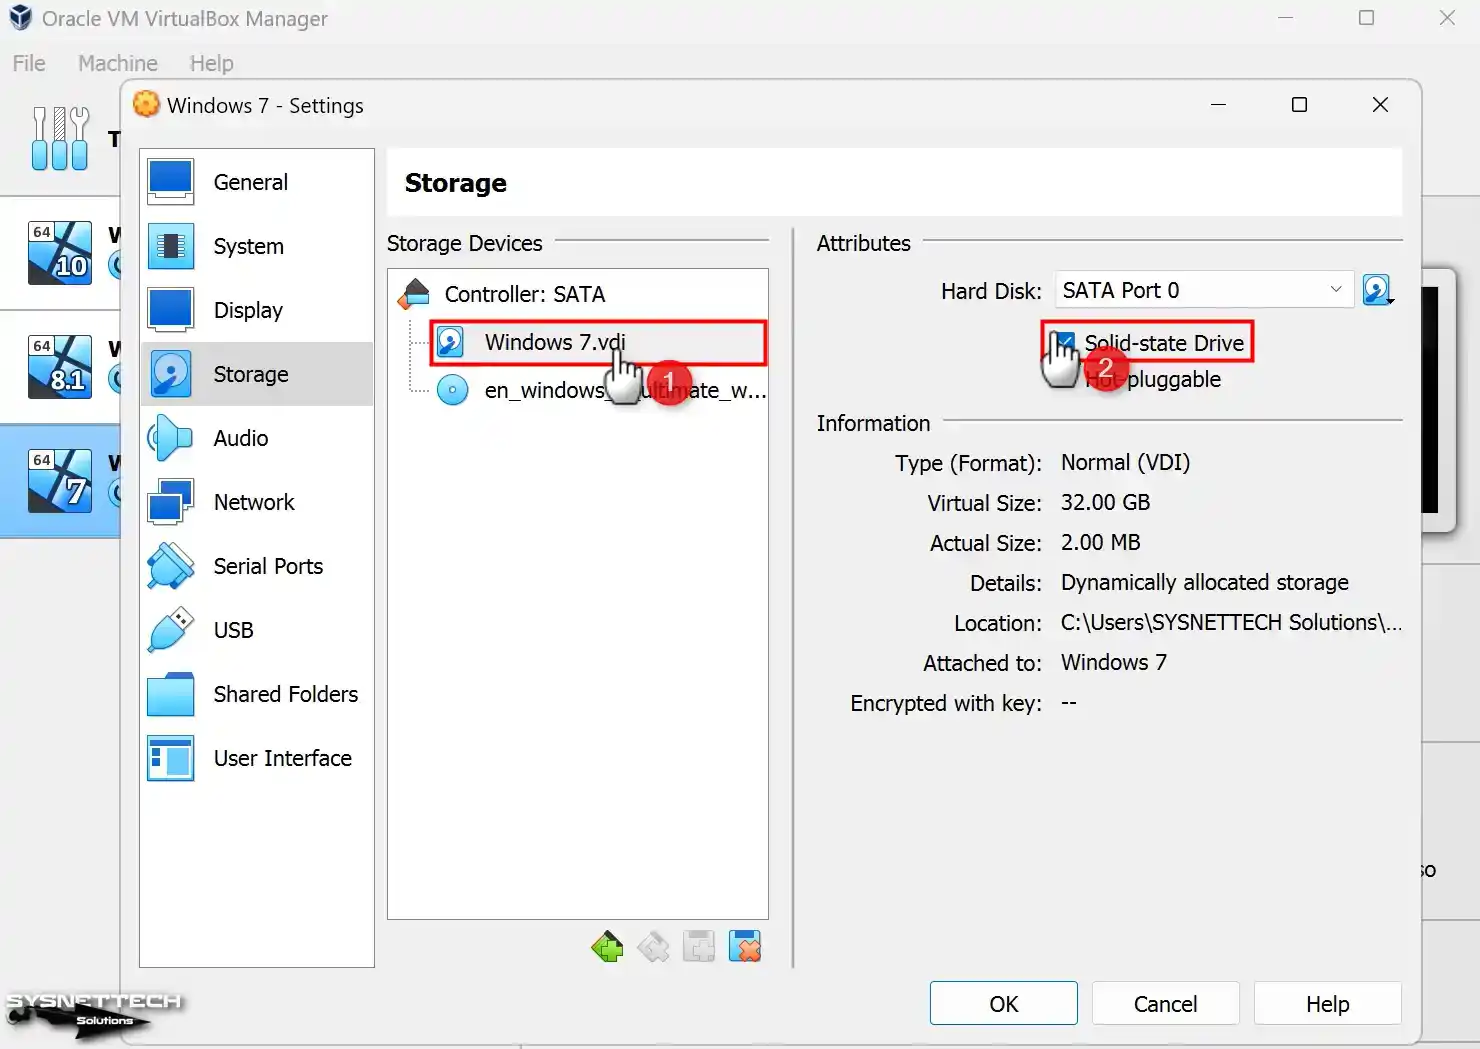
Configure Windows7.vdi virtual disk file as Solid-State Drive (SSD) disk type.
Step 16
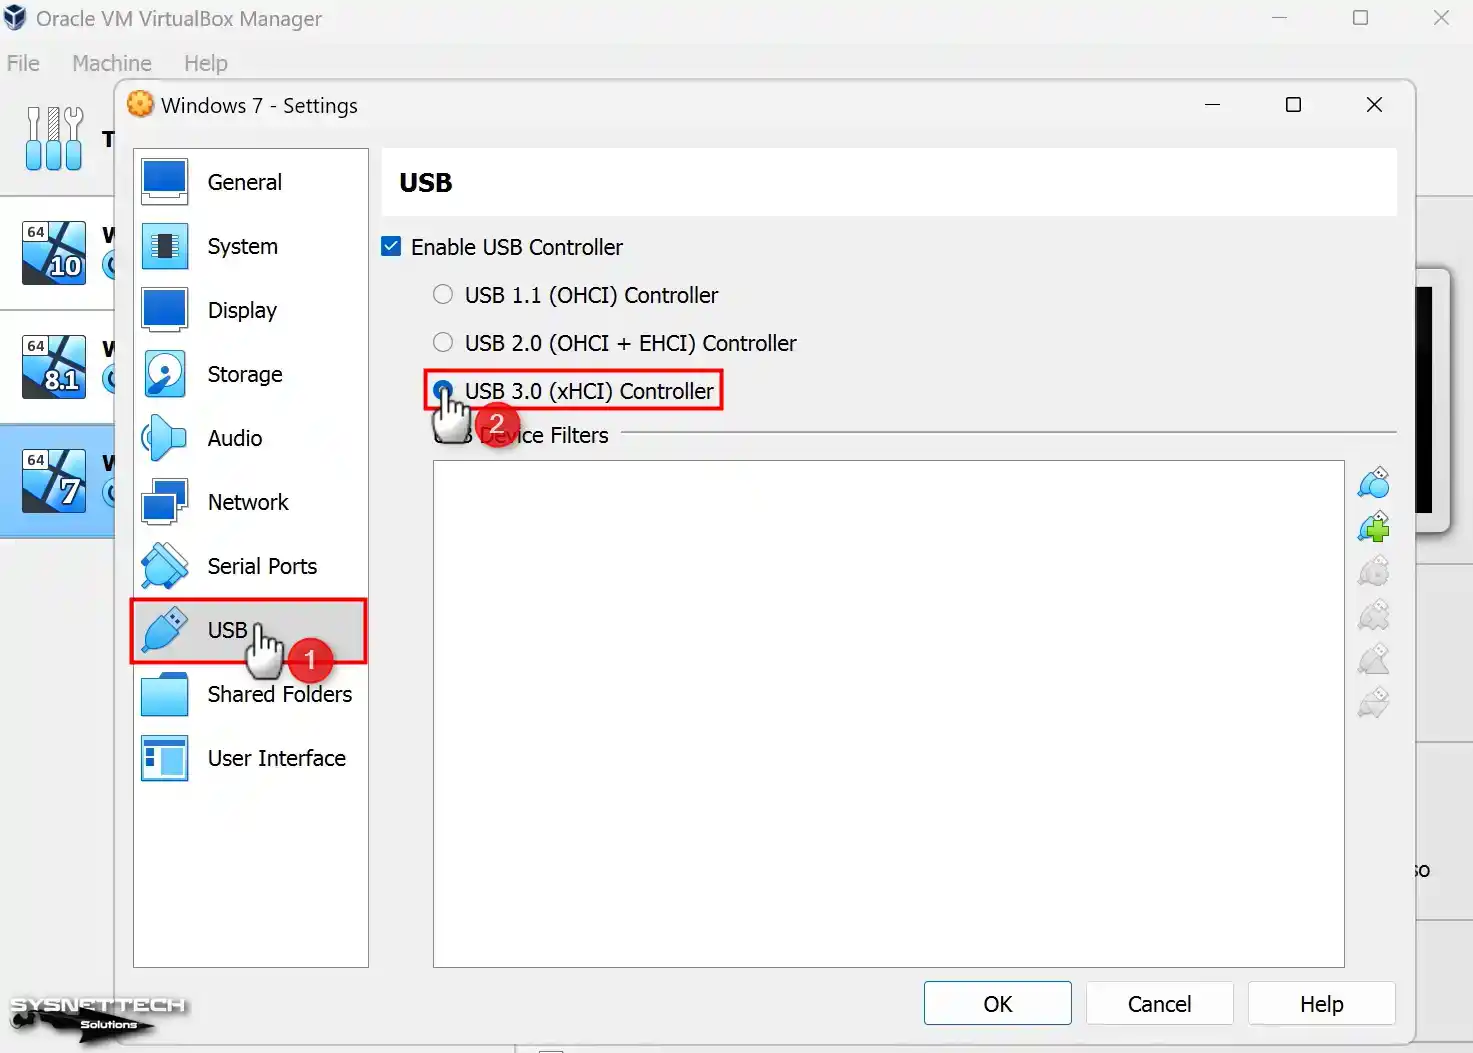
In your virtual computer, make sure that the 3.0 (xHCI) controller is enabled in the USB appliance settings so that you can transfer files faster using a USB 3.x supported storage or flash memory.
Step 17
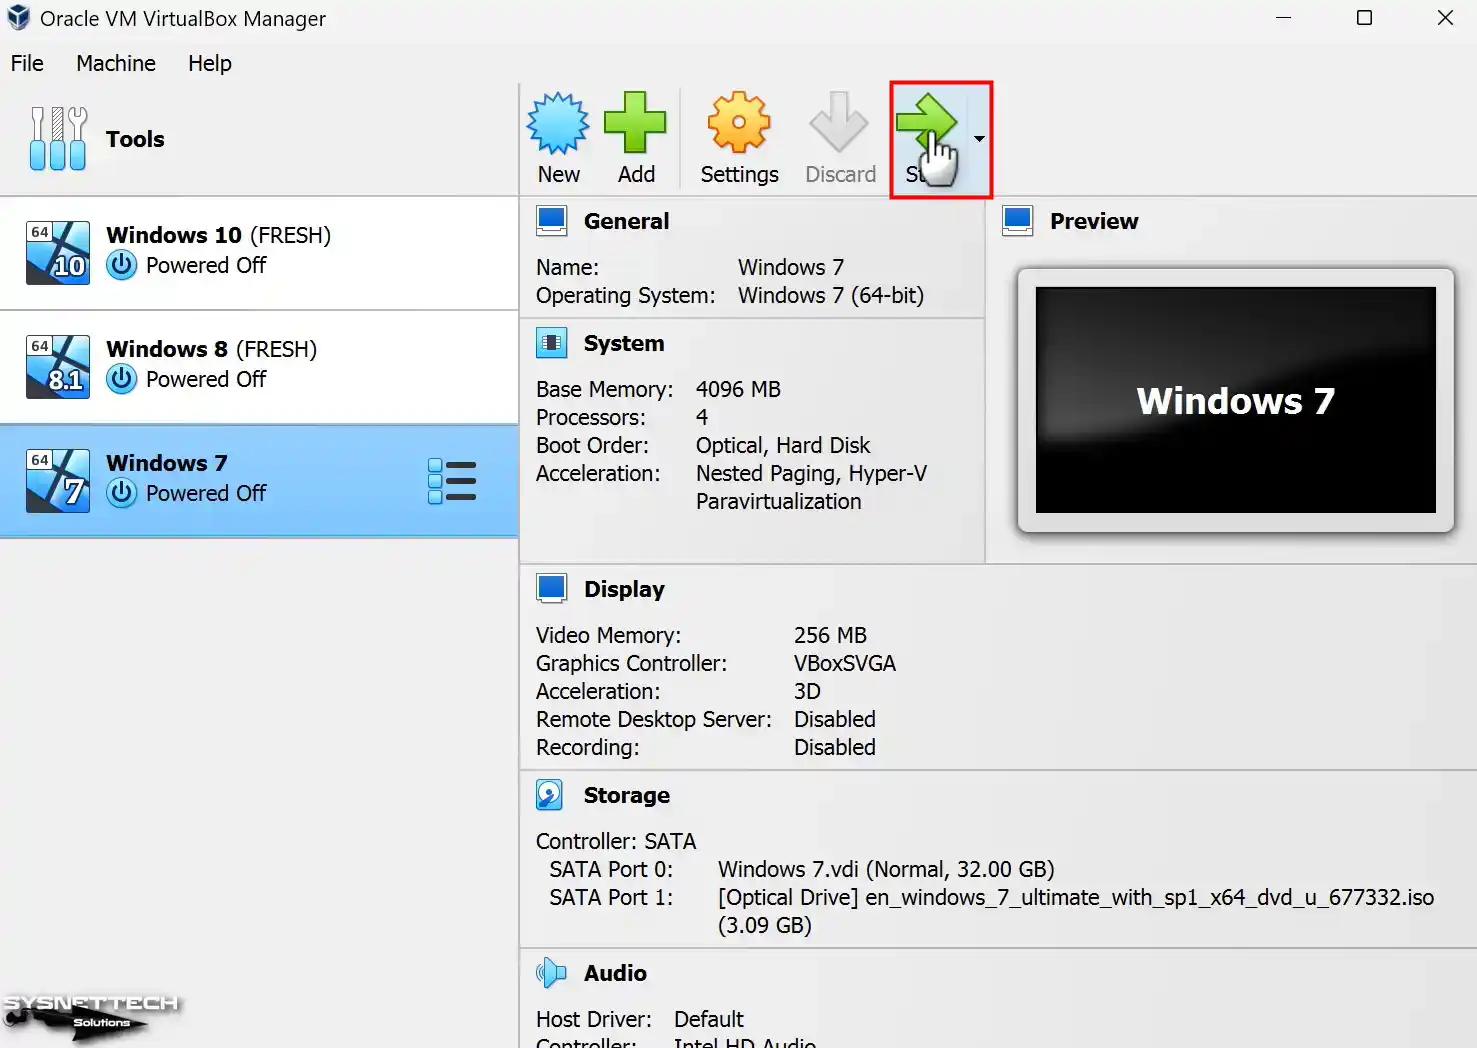
Click the Start button to begin your Windows 7 virtual PC.
How to Install Windows 7 on VirtualBox
Once you have prepared your virtual computer and selected the boot media, you can install Windows 7 using VirtualBox. After launching your virtual machine, you must follow the same installation stages as installing the operating system on a physical computer.
Step 1
When the Windows 7 setup screen opens, select the display language, time settings, and keyboard layout you want to use for your OS and click the Next button.

Step 2
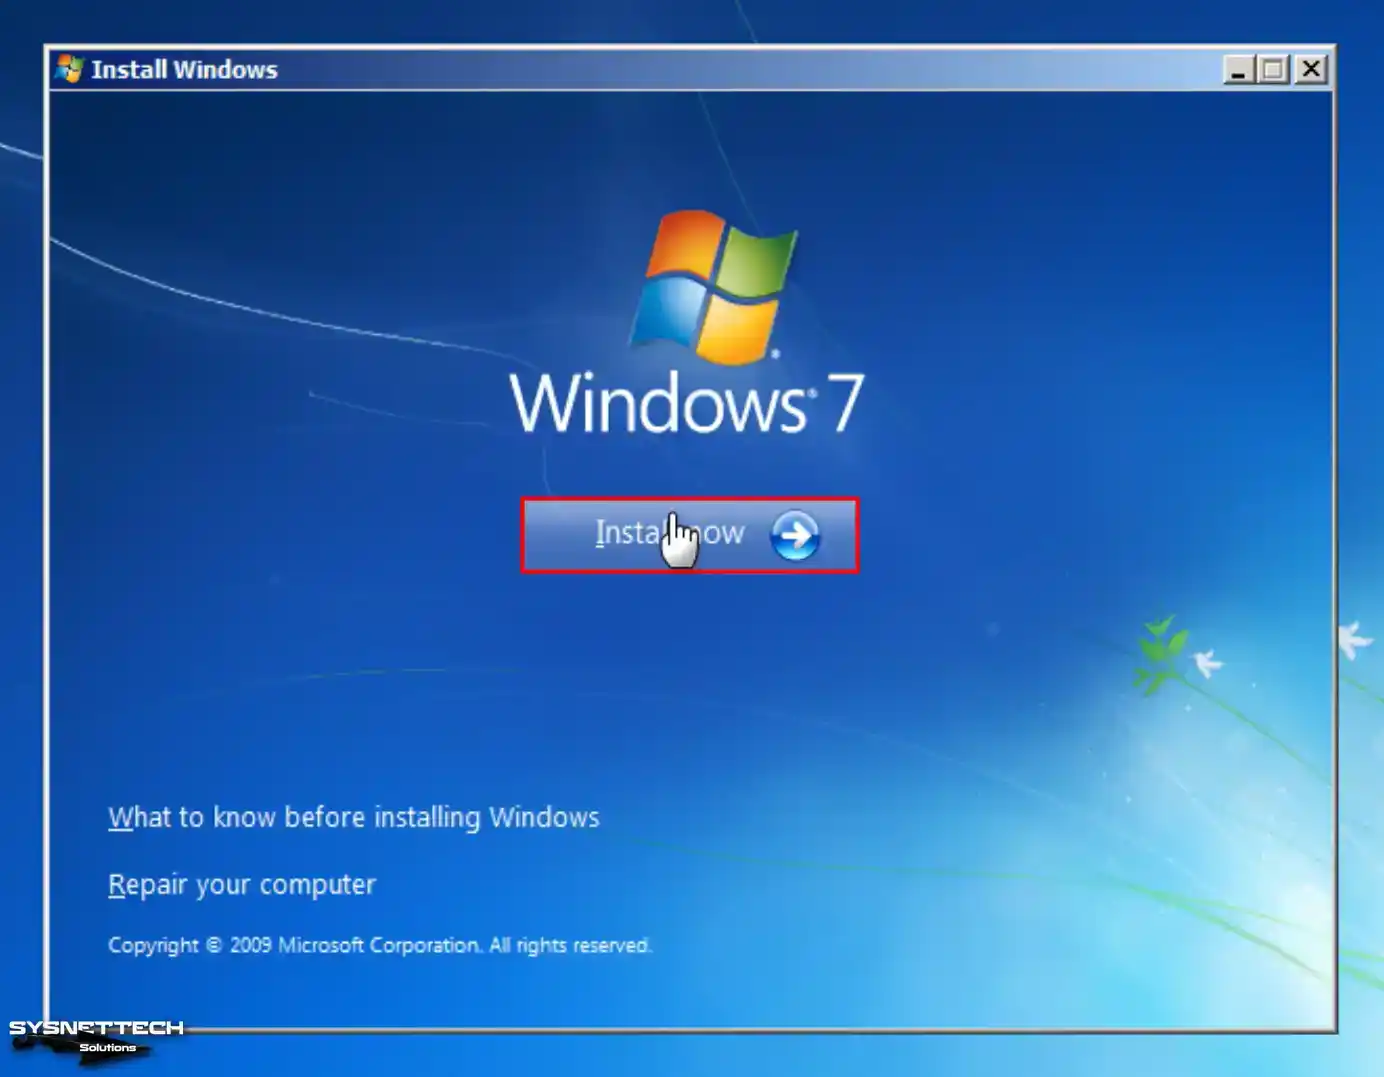
After making the necessary basic settings, click the Install Now button and continue.
Step 3
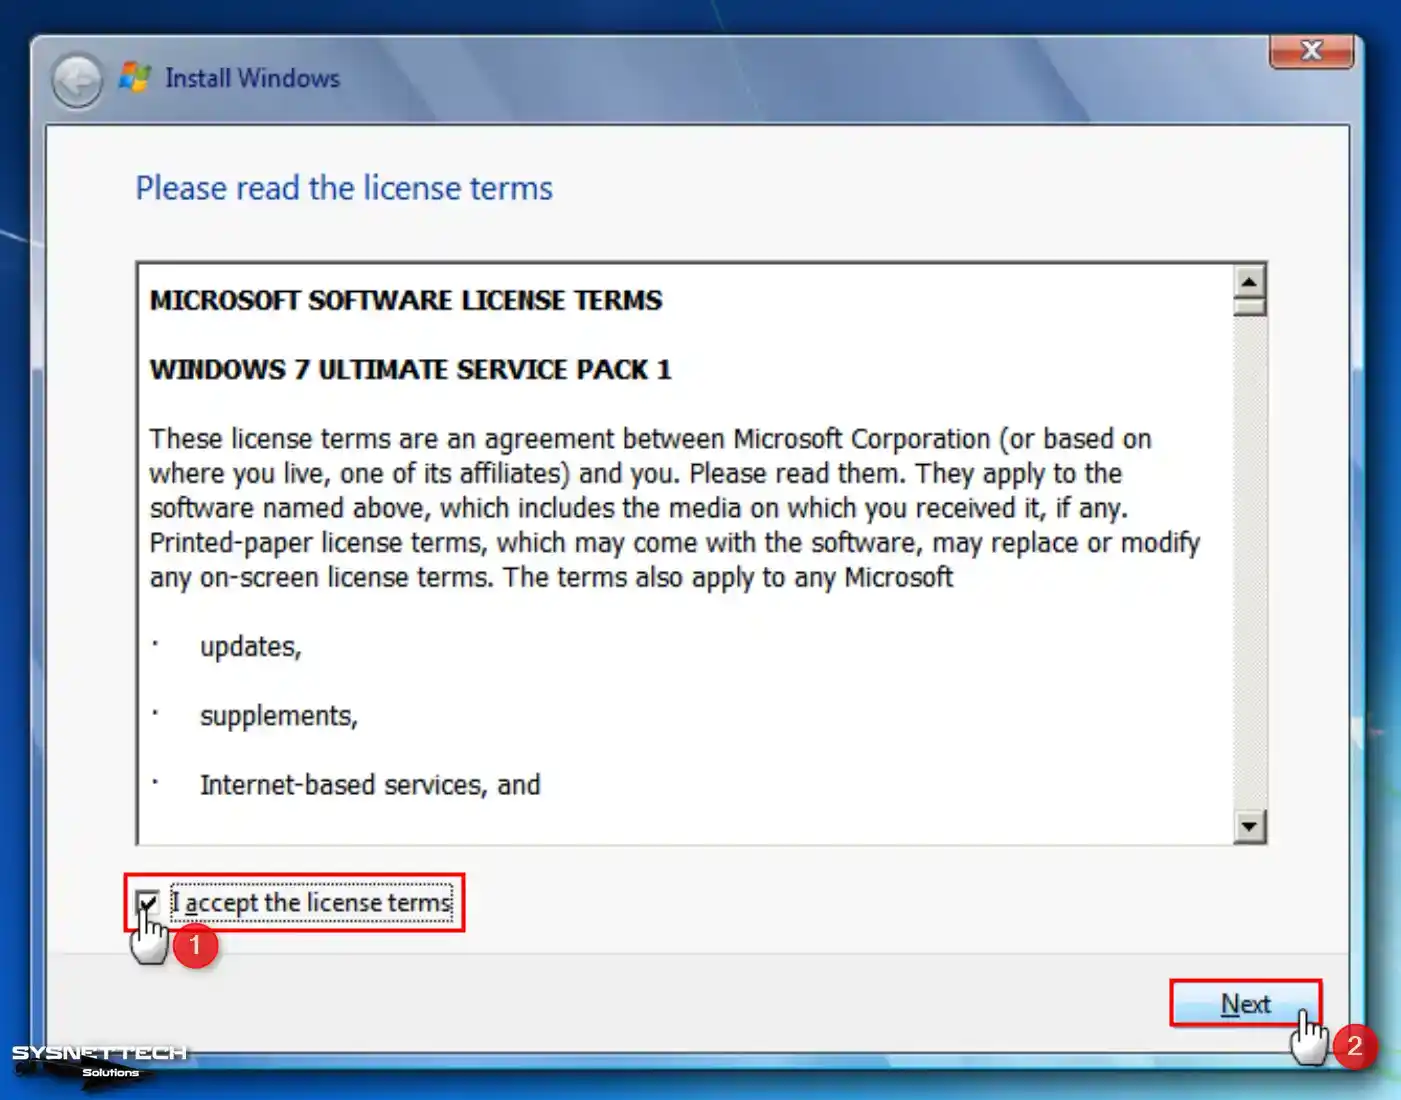
Kindly provide your consent by agreeing to the license agreement for the Windows 7 Ultimate Service Pack 1 (SP1) platform and continue by clicking the “Next” button.
Step 4
Click on the Custom option at this step, as you will perform a clean system installation.

Step 5
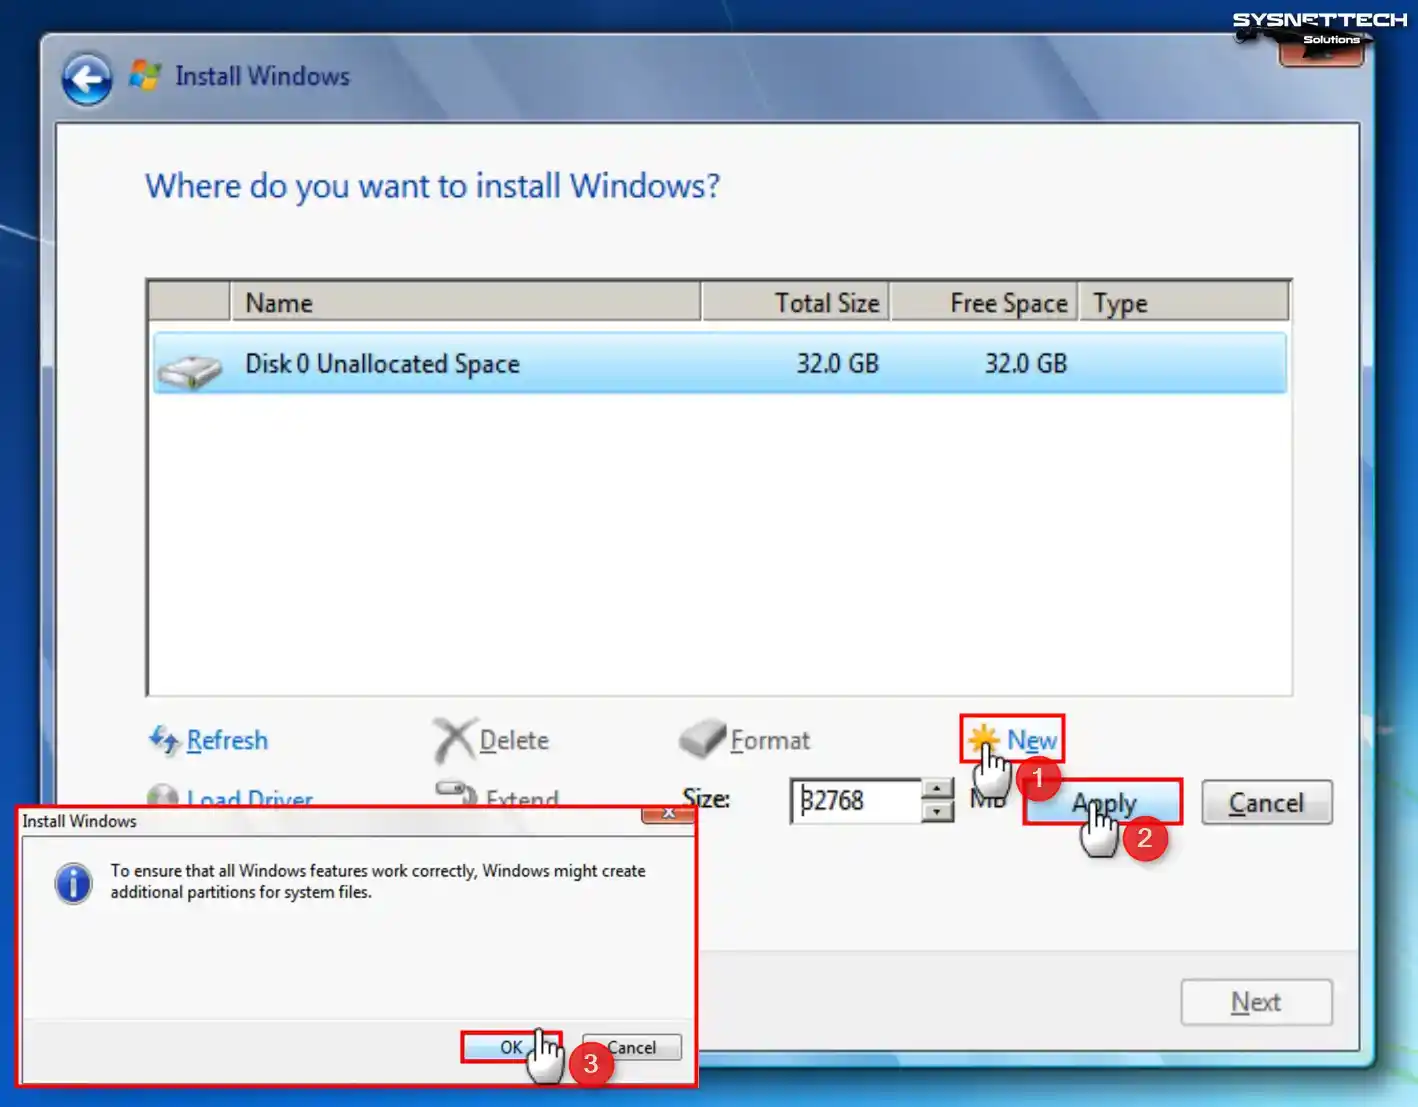
Click Drive Options in the disk configuration window of the Windows setup wizard.
To establish a fresh partition on the virtual disk, choose the disk, select “New,” and then click the “Apply” button to validate the automatic disk space allocation. Also, when you receive an information message that additional fields will be created so that Windows can work correctly, click OK and continue.
Step 6
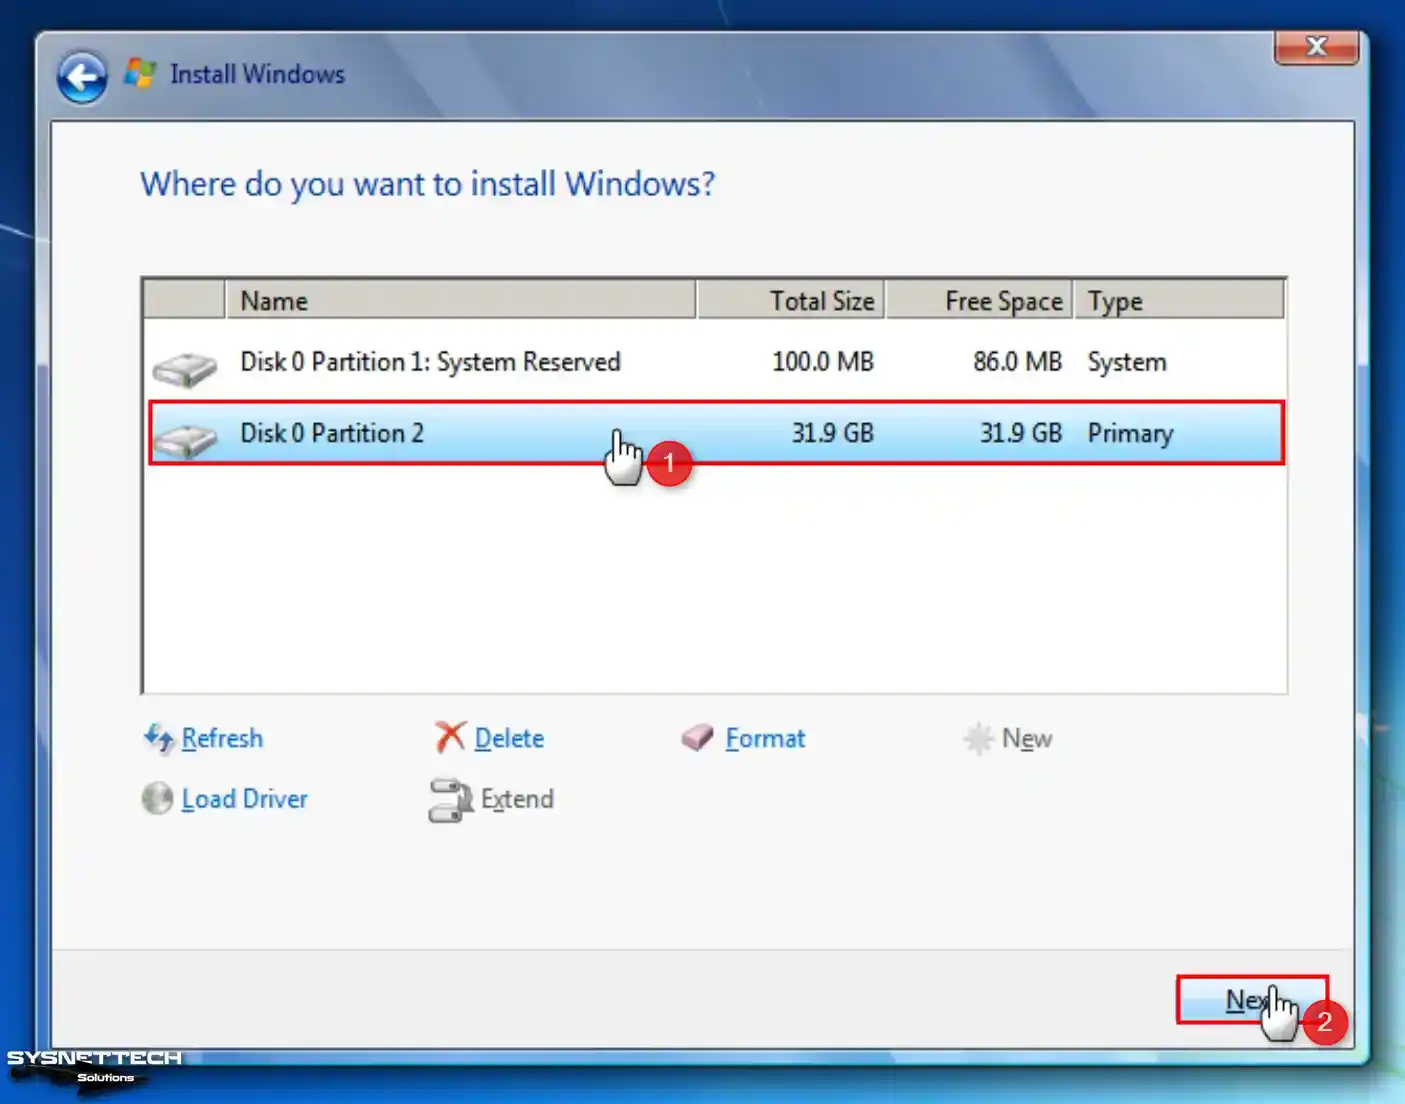
Select the partition you created (Disk 0 Partition 2) and click Next.
Step 7
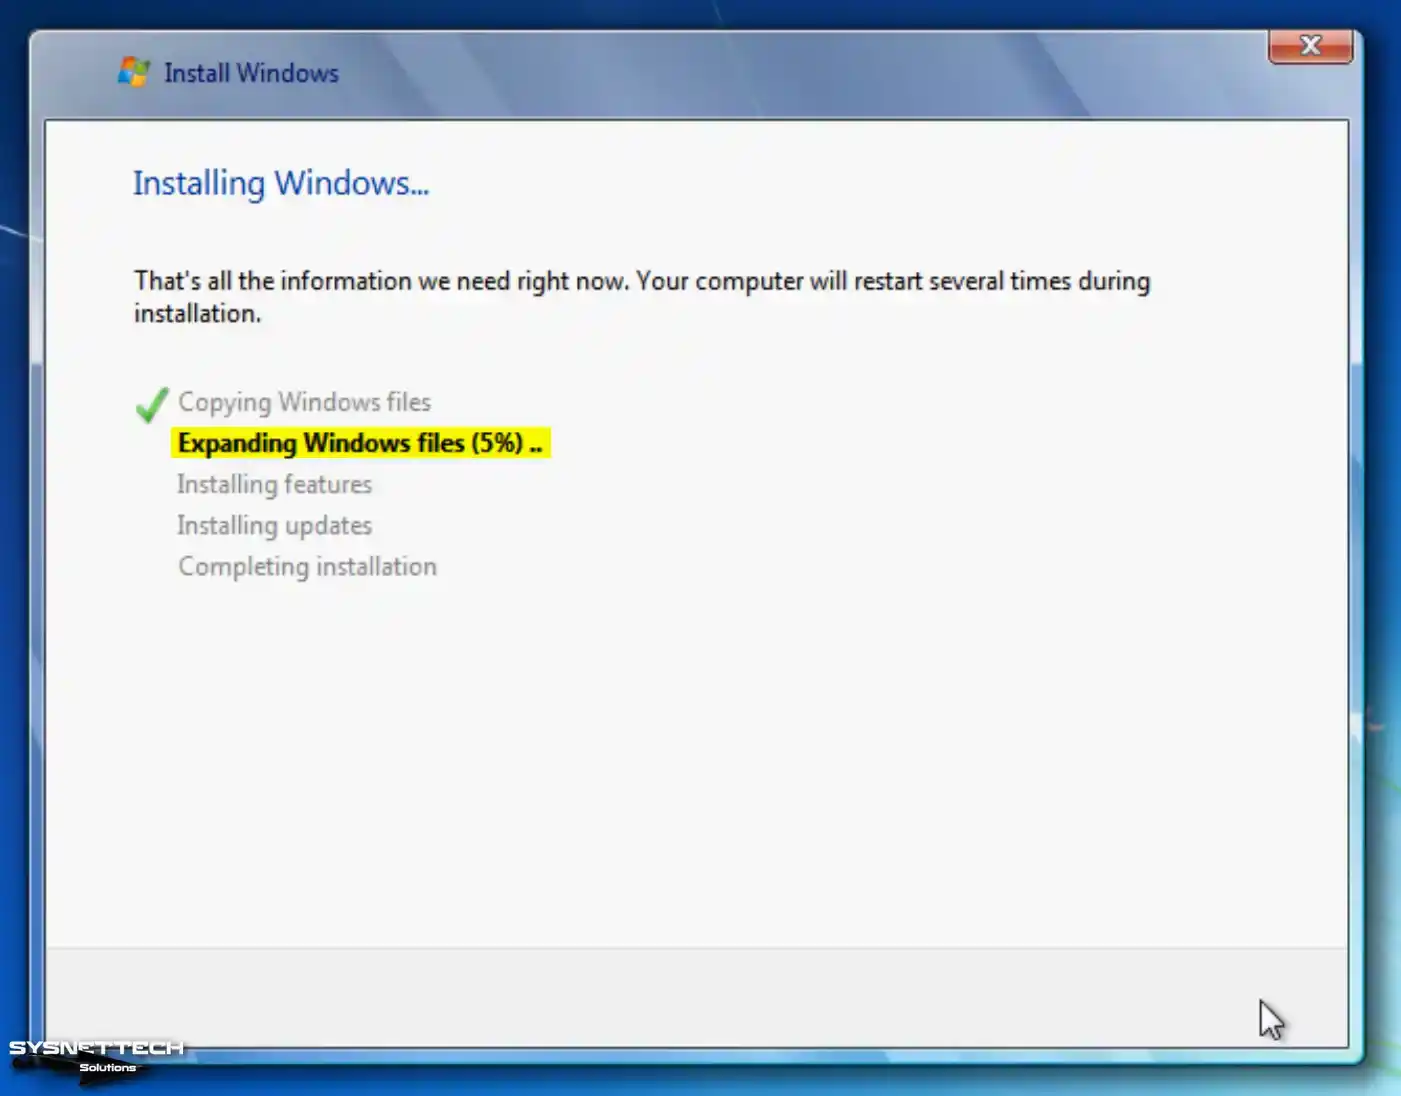
Wait while the setup wizard expands the Windows files for installation.
Step 8
After the installation files are copied to the disk, wait to restart your virtual computer within the specified time or directly click the Restart Now button.

Step 9
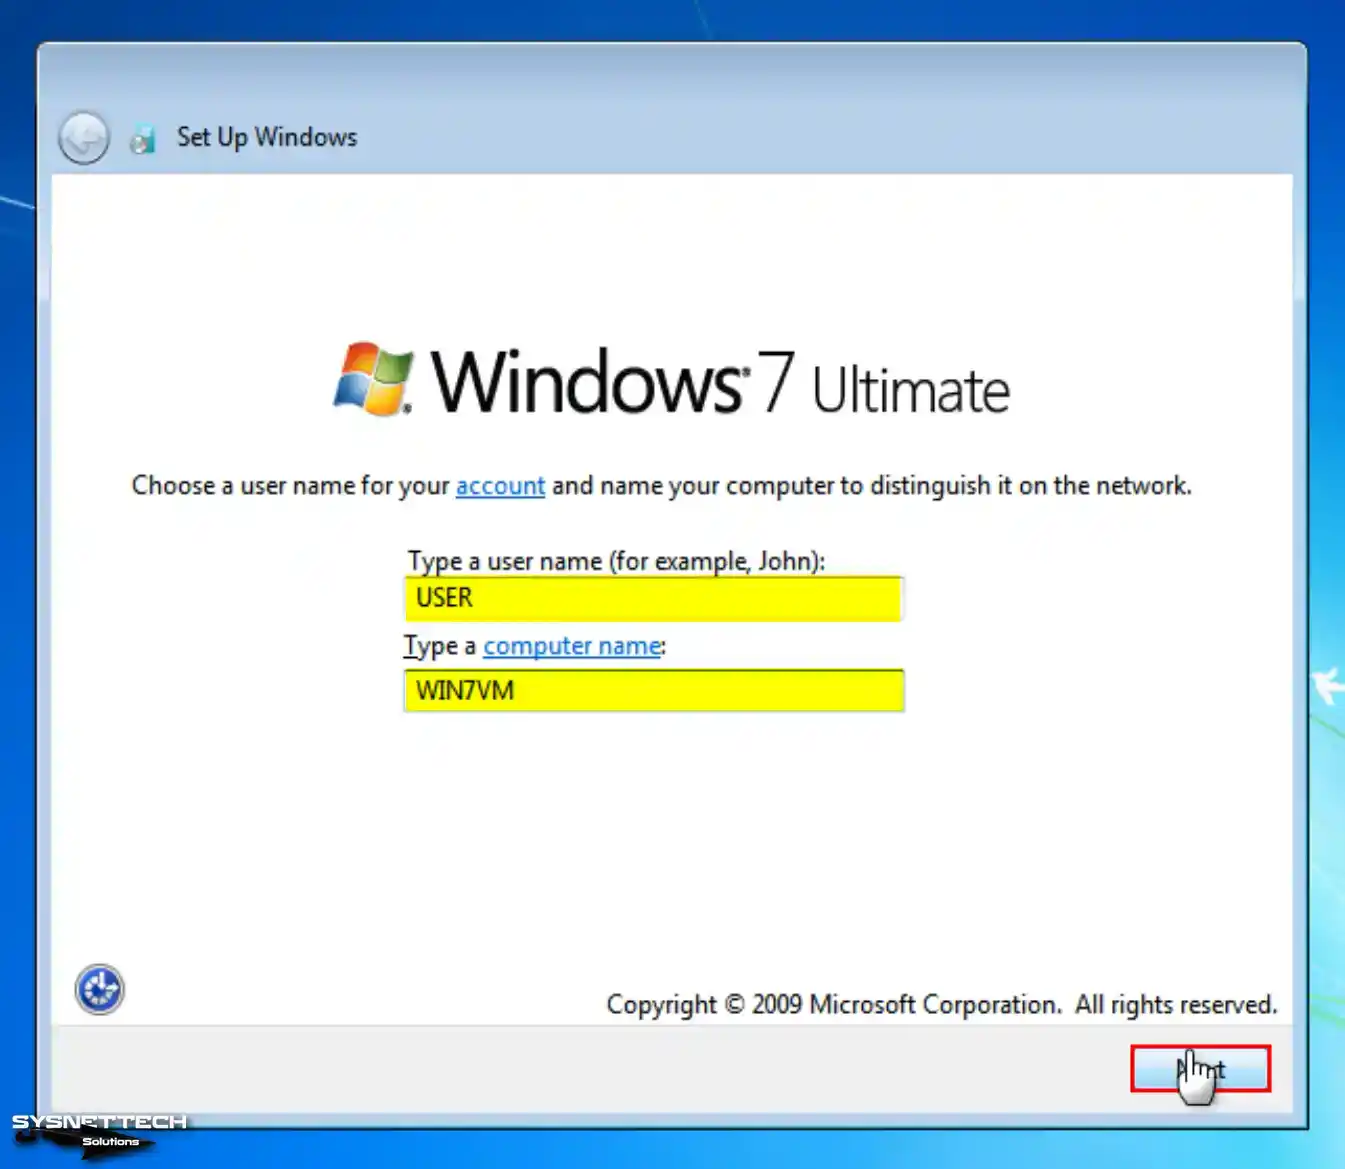
After your system restarts, type a new name for your user account and the computer name and click Next.
Step 10
To configure a password for your virtual system, kindly complete the necessary fields depicted in the image provided and proceed accordingly. If you would instead not create a password, kindly click the “Next” button.

Step 11
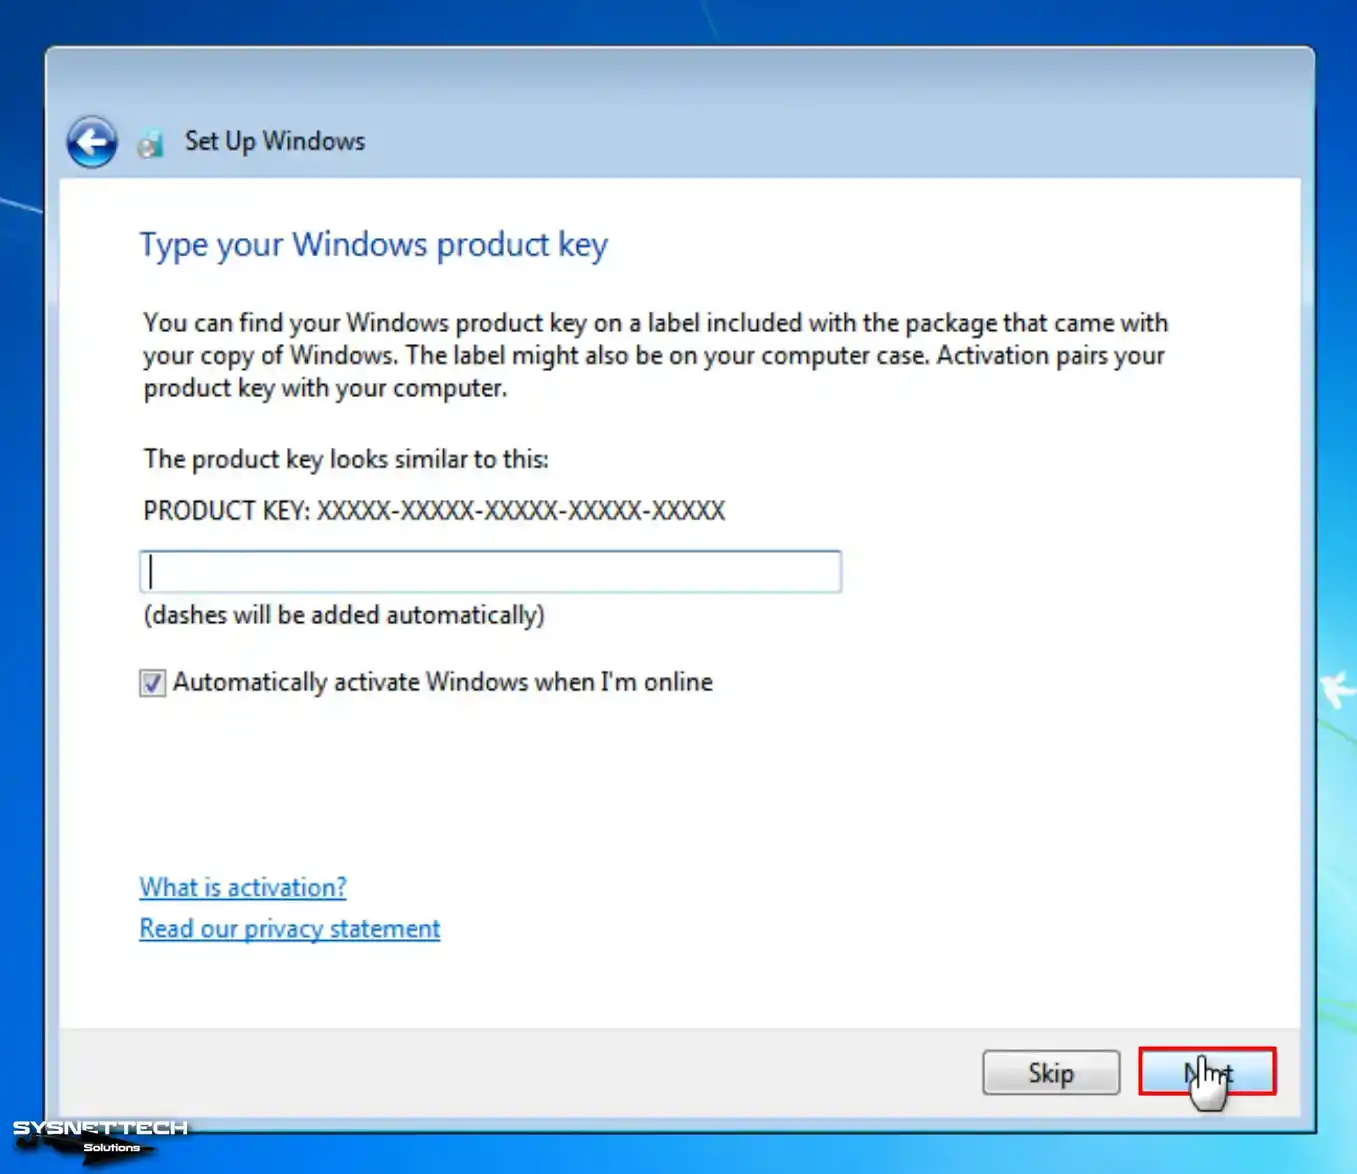
To use a licensed operating system on your guest machine, type your product key and click Next. Suppose you select Automatically Activate Windows When I’m Online after typing your product key. In such a scenario, your system will be activated automatically upon accessing the Internet.
If you do not hold a Windows 7 product key, you can continue by clicking Skip or Next.
Step 12
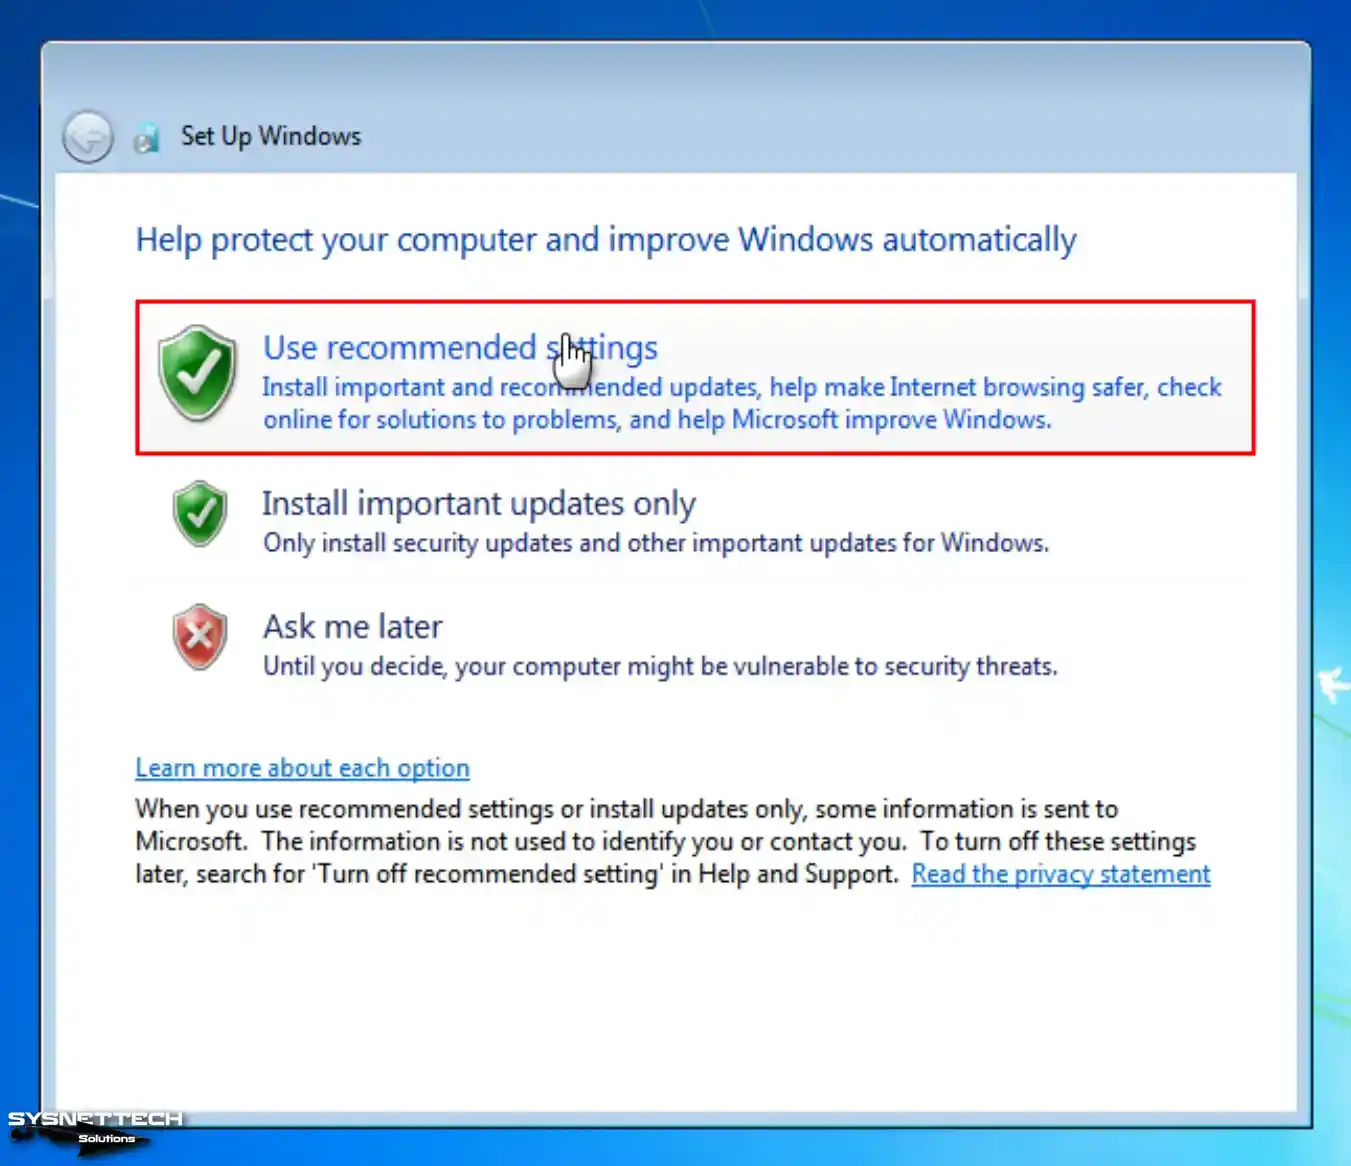
Click Use Recommended Settings for Windows firewall and system updates.
Step 13
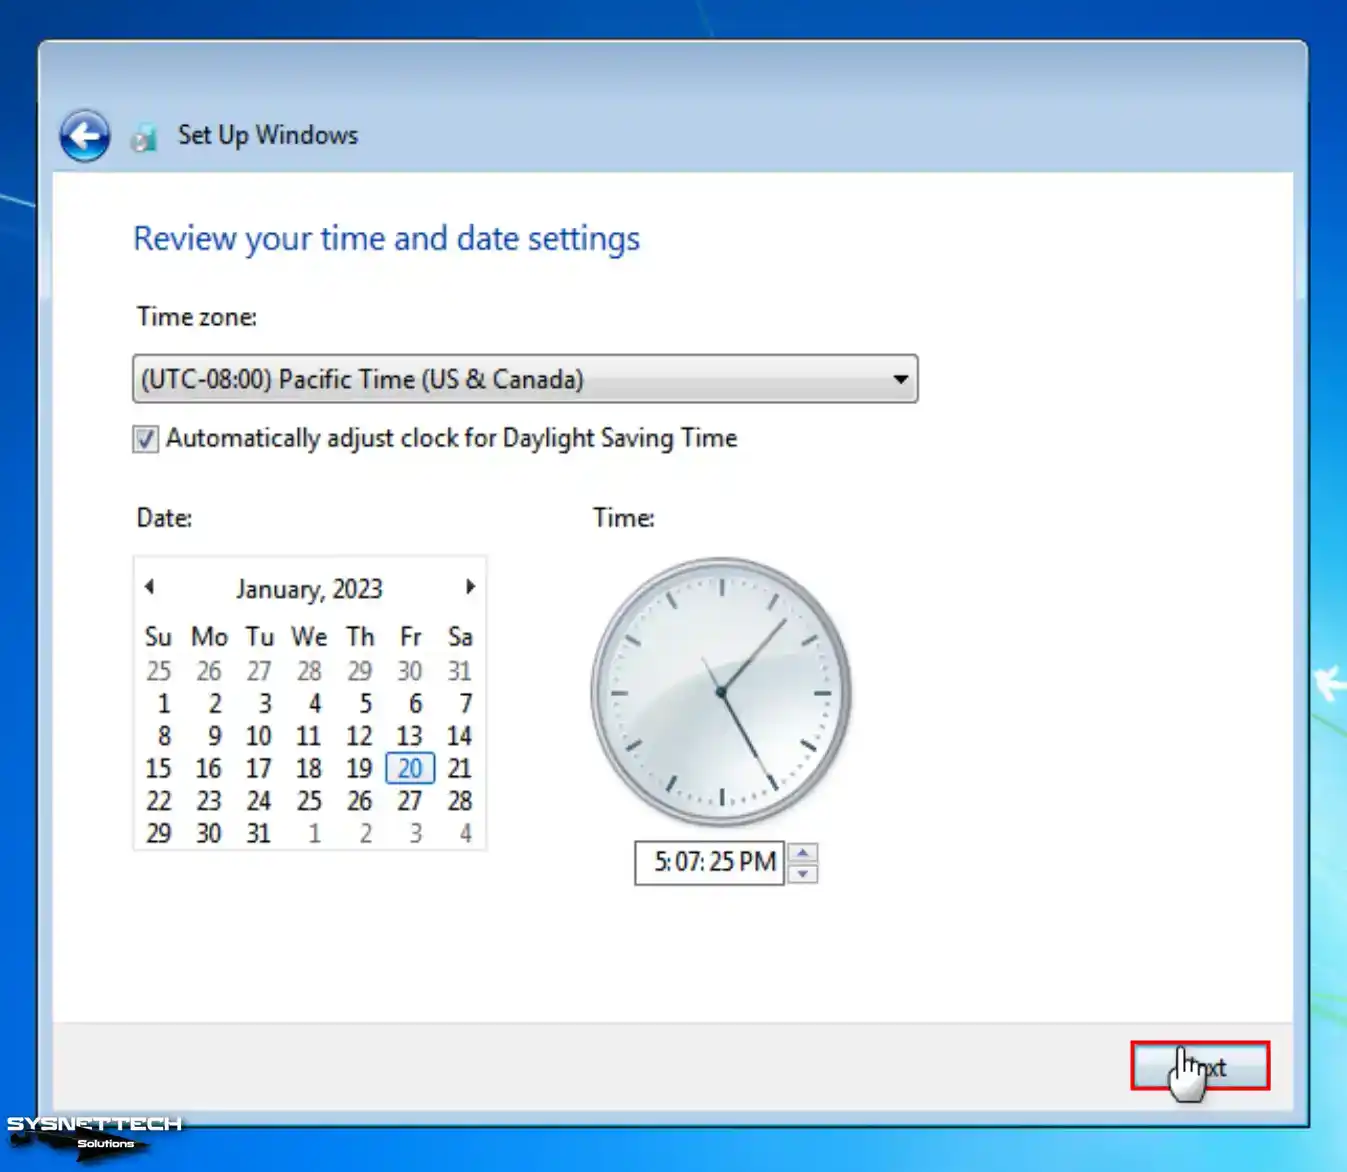
Choose your time zone according to your country and make your date settings.
Step 14
Select the current location of your virtual computer for network and sharing settings.

Step 15
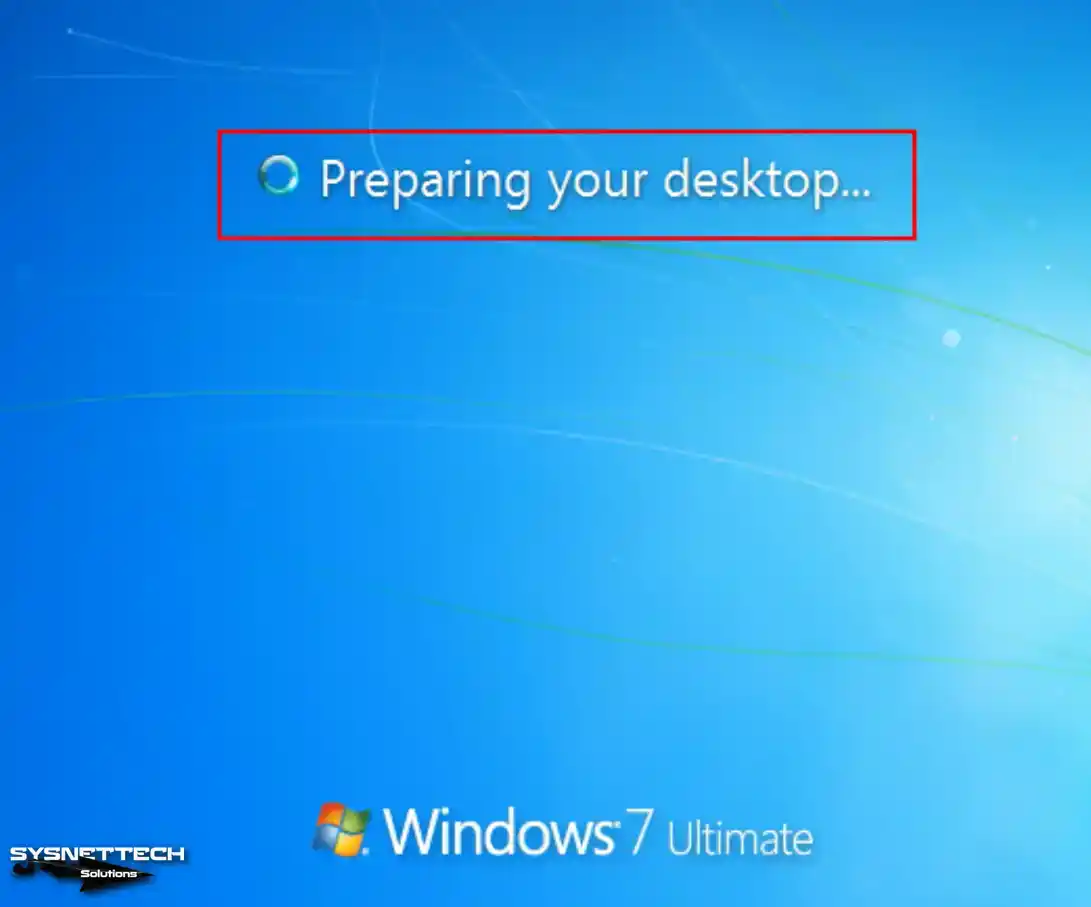
Wait while the Windows 7 desktop layout is being prepared.
Step 16
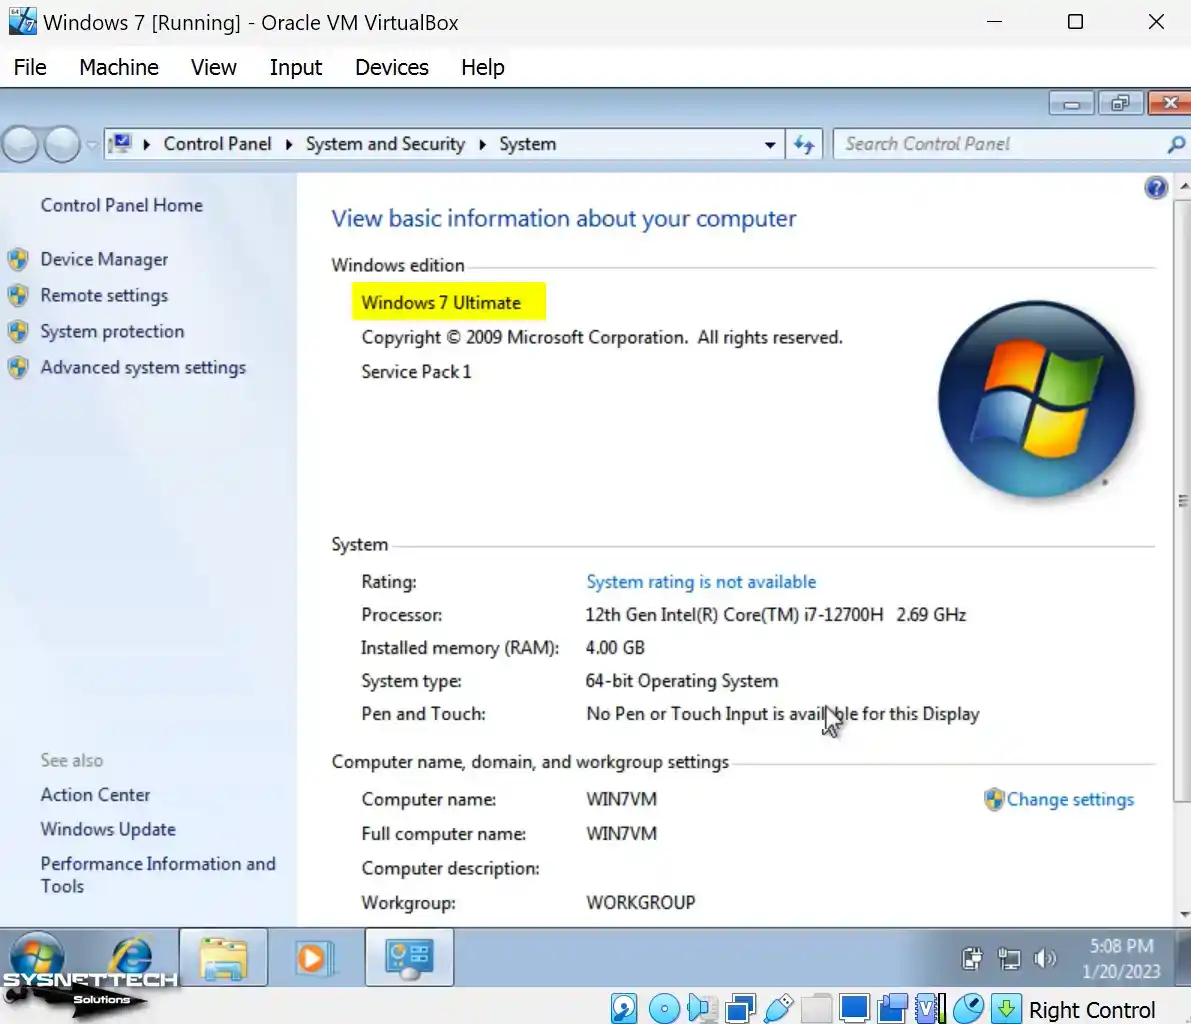
To examine the system properties of Windows 7, you can right-click on My Computer and subsequently select Properties.
How to Install Guest Additions in Windows 7 VM
After installing Windows 7 on the virtual computer, you must install Guest Additions to configure the screen resolution as full screen, use it in scale mode, and copy files to the host.
Step 1
Before installing Guest Additions on Windows 7, open Device Manager on your virtual machine and check for drivers that have not been installed or drivers that need to be installed correctly.
When you examine the image below, you can see that the driver for the Base System Device and Standard VGA Graphics Adapter devices is not installed.

Step 2
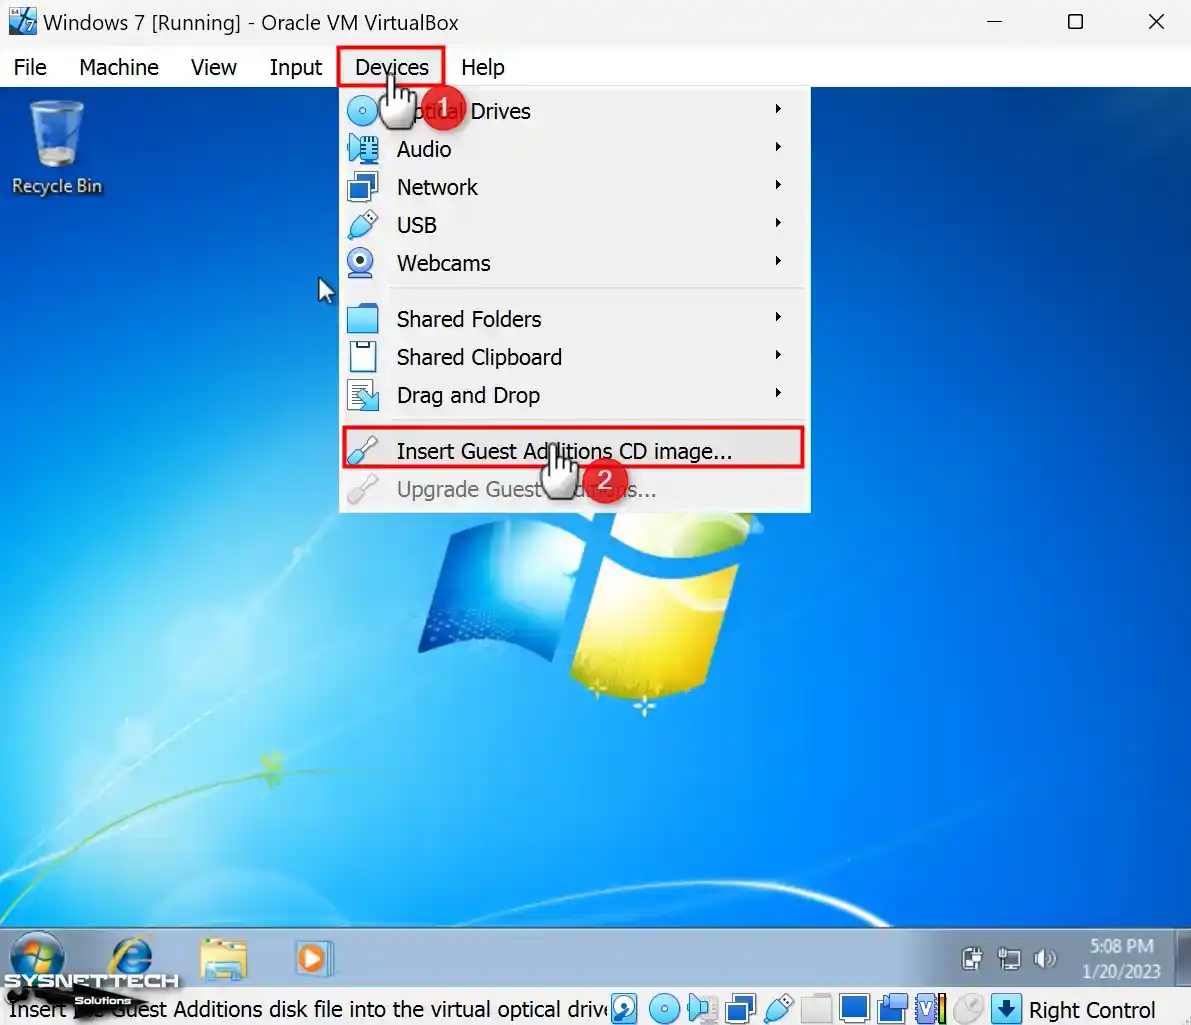
Click Devices / Insert Guest Additions CD Image in the Oracle VM VirtualBox tool menu.
Step 3
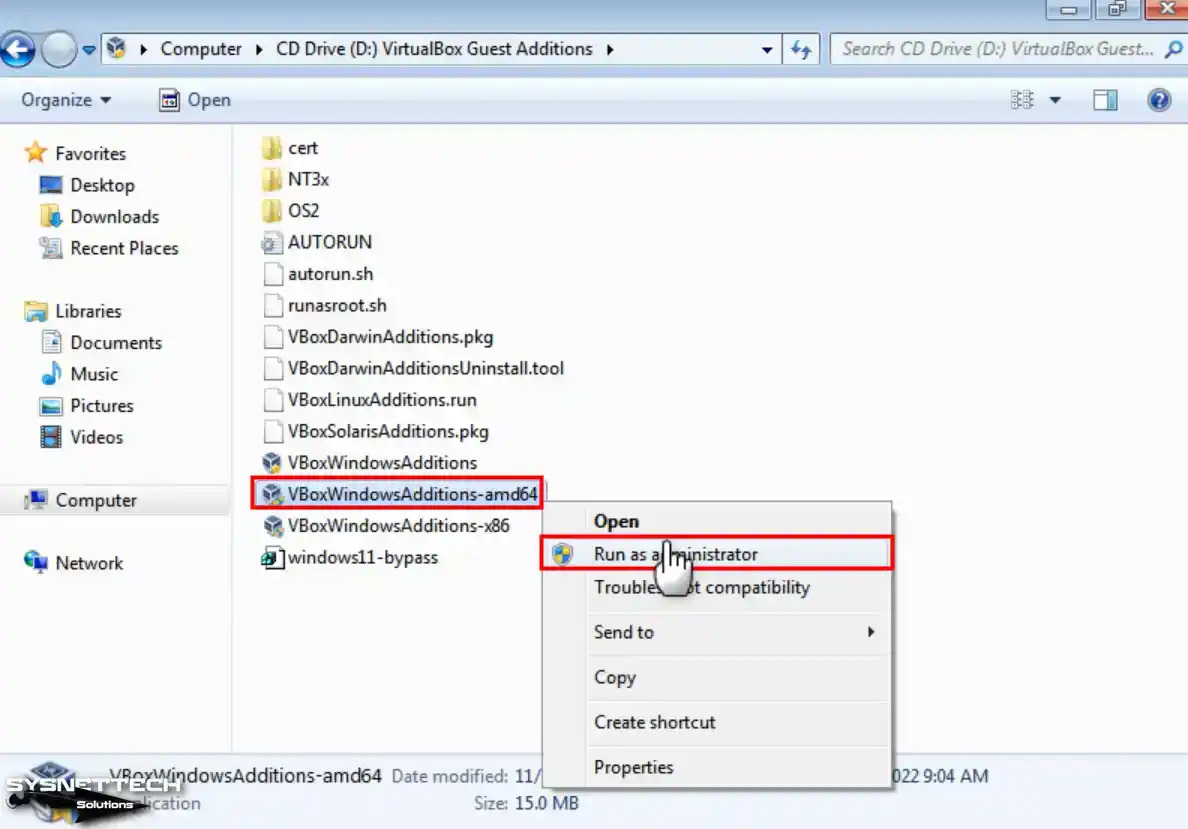
If the image file of the guest addons is not detected automatically on the guest machine, open My Computer, and after viewing the contents of the image file, run the VBoxWindowsAdditions-amd64 file as an administrator and hit the Yes button in the User Account Control window.
Step 4
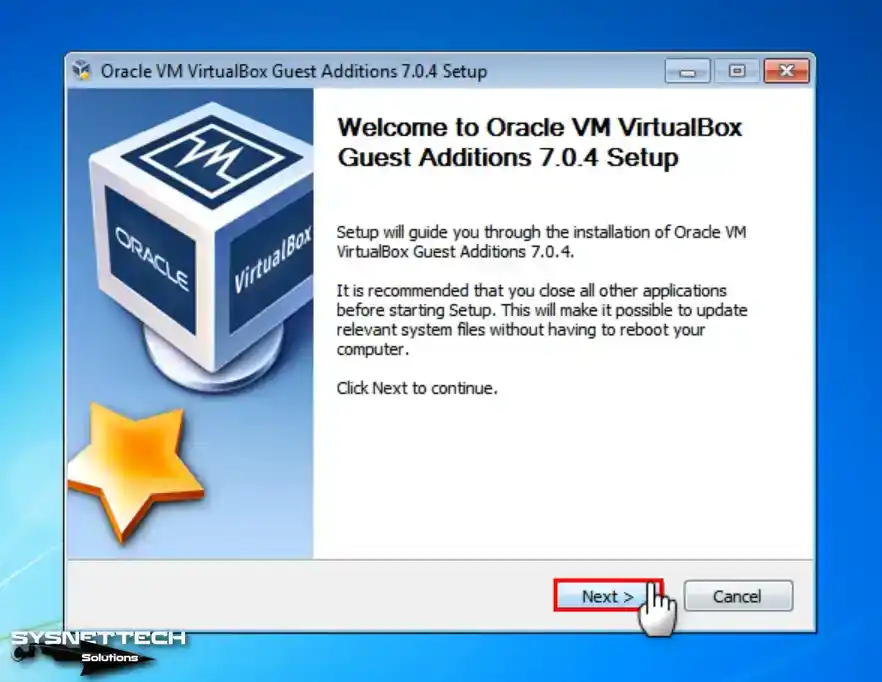
When the Guest Additions setup wizard opens, click Next directly.
Step 5
Leave the installation location of guest additions as default in your virtual system.

Step 6
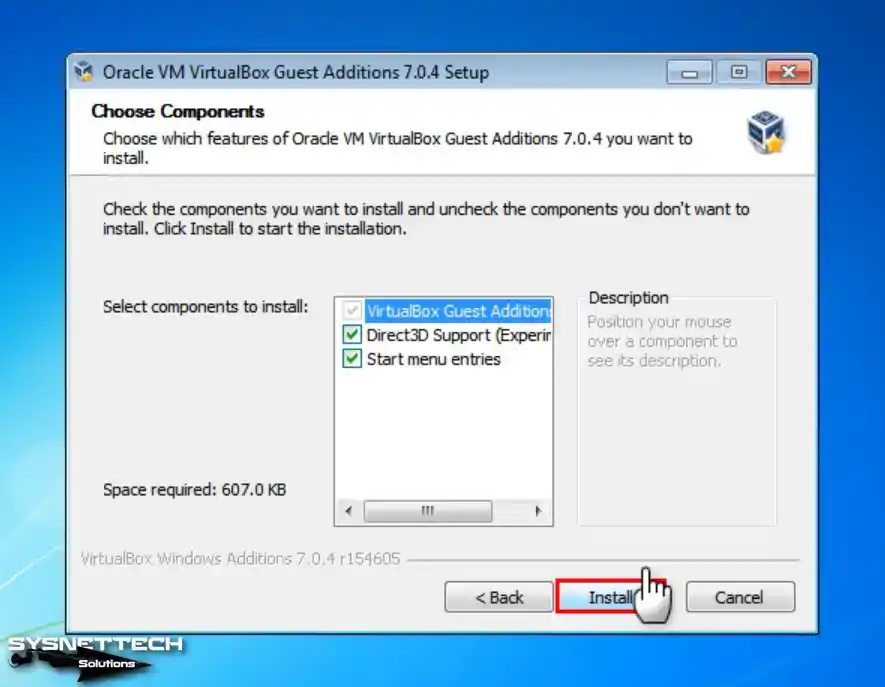
Check that the Direct3D feature is enabled in the Choose Components window and click the Install button.
Step 7
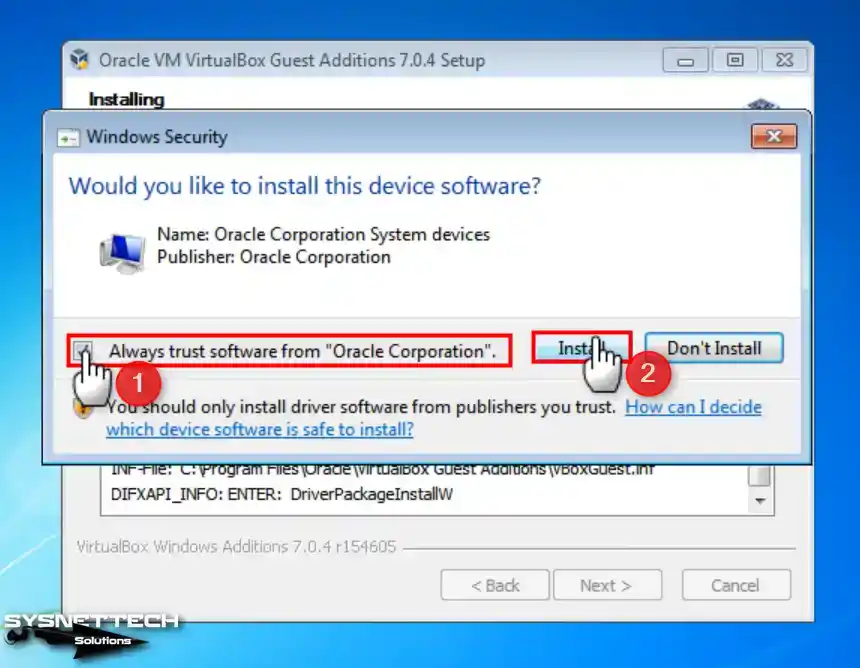
Check the option always to trust the software from Oracle and click the Install button again.
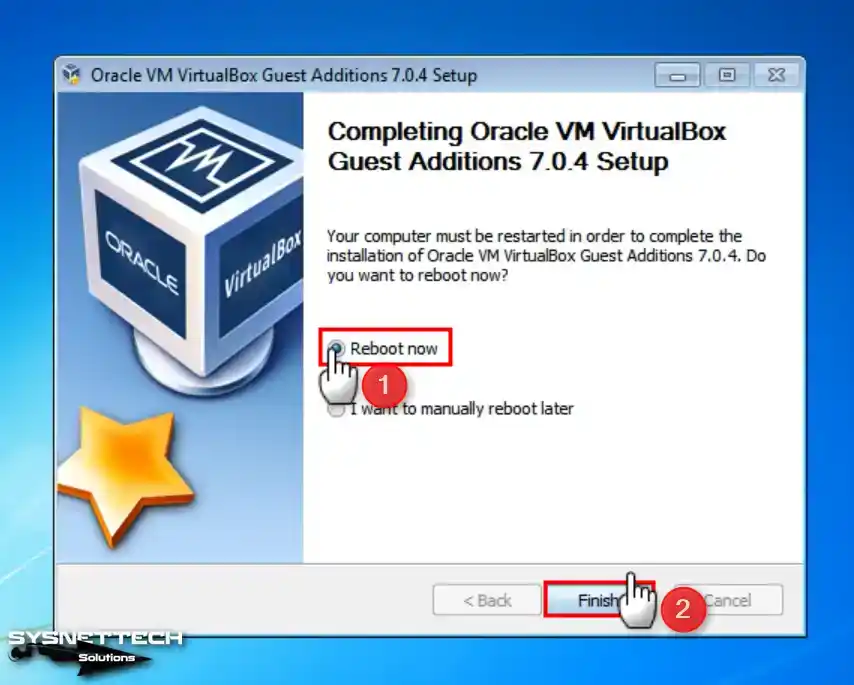
Step 8
Once the guest plugins are installed on the guest machine, please restart your system to confirm the changes take effect.
Step 9
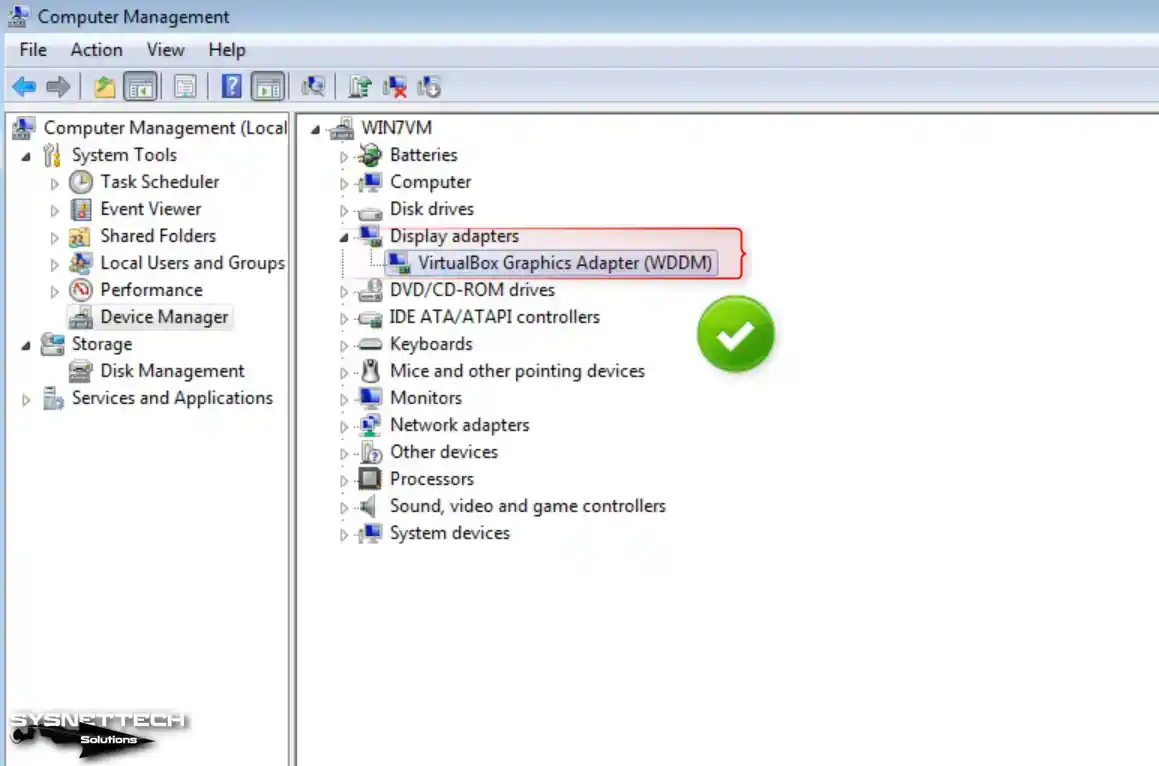
When your guest machine is turned on, open Device Manager again and check that the drivers for the graphics adapter and other devices are installed correctly.
Step 10
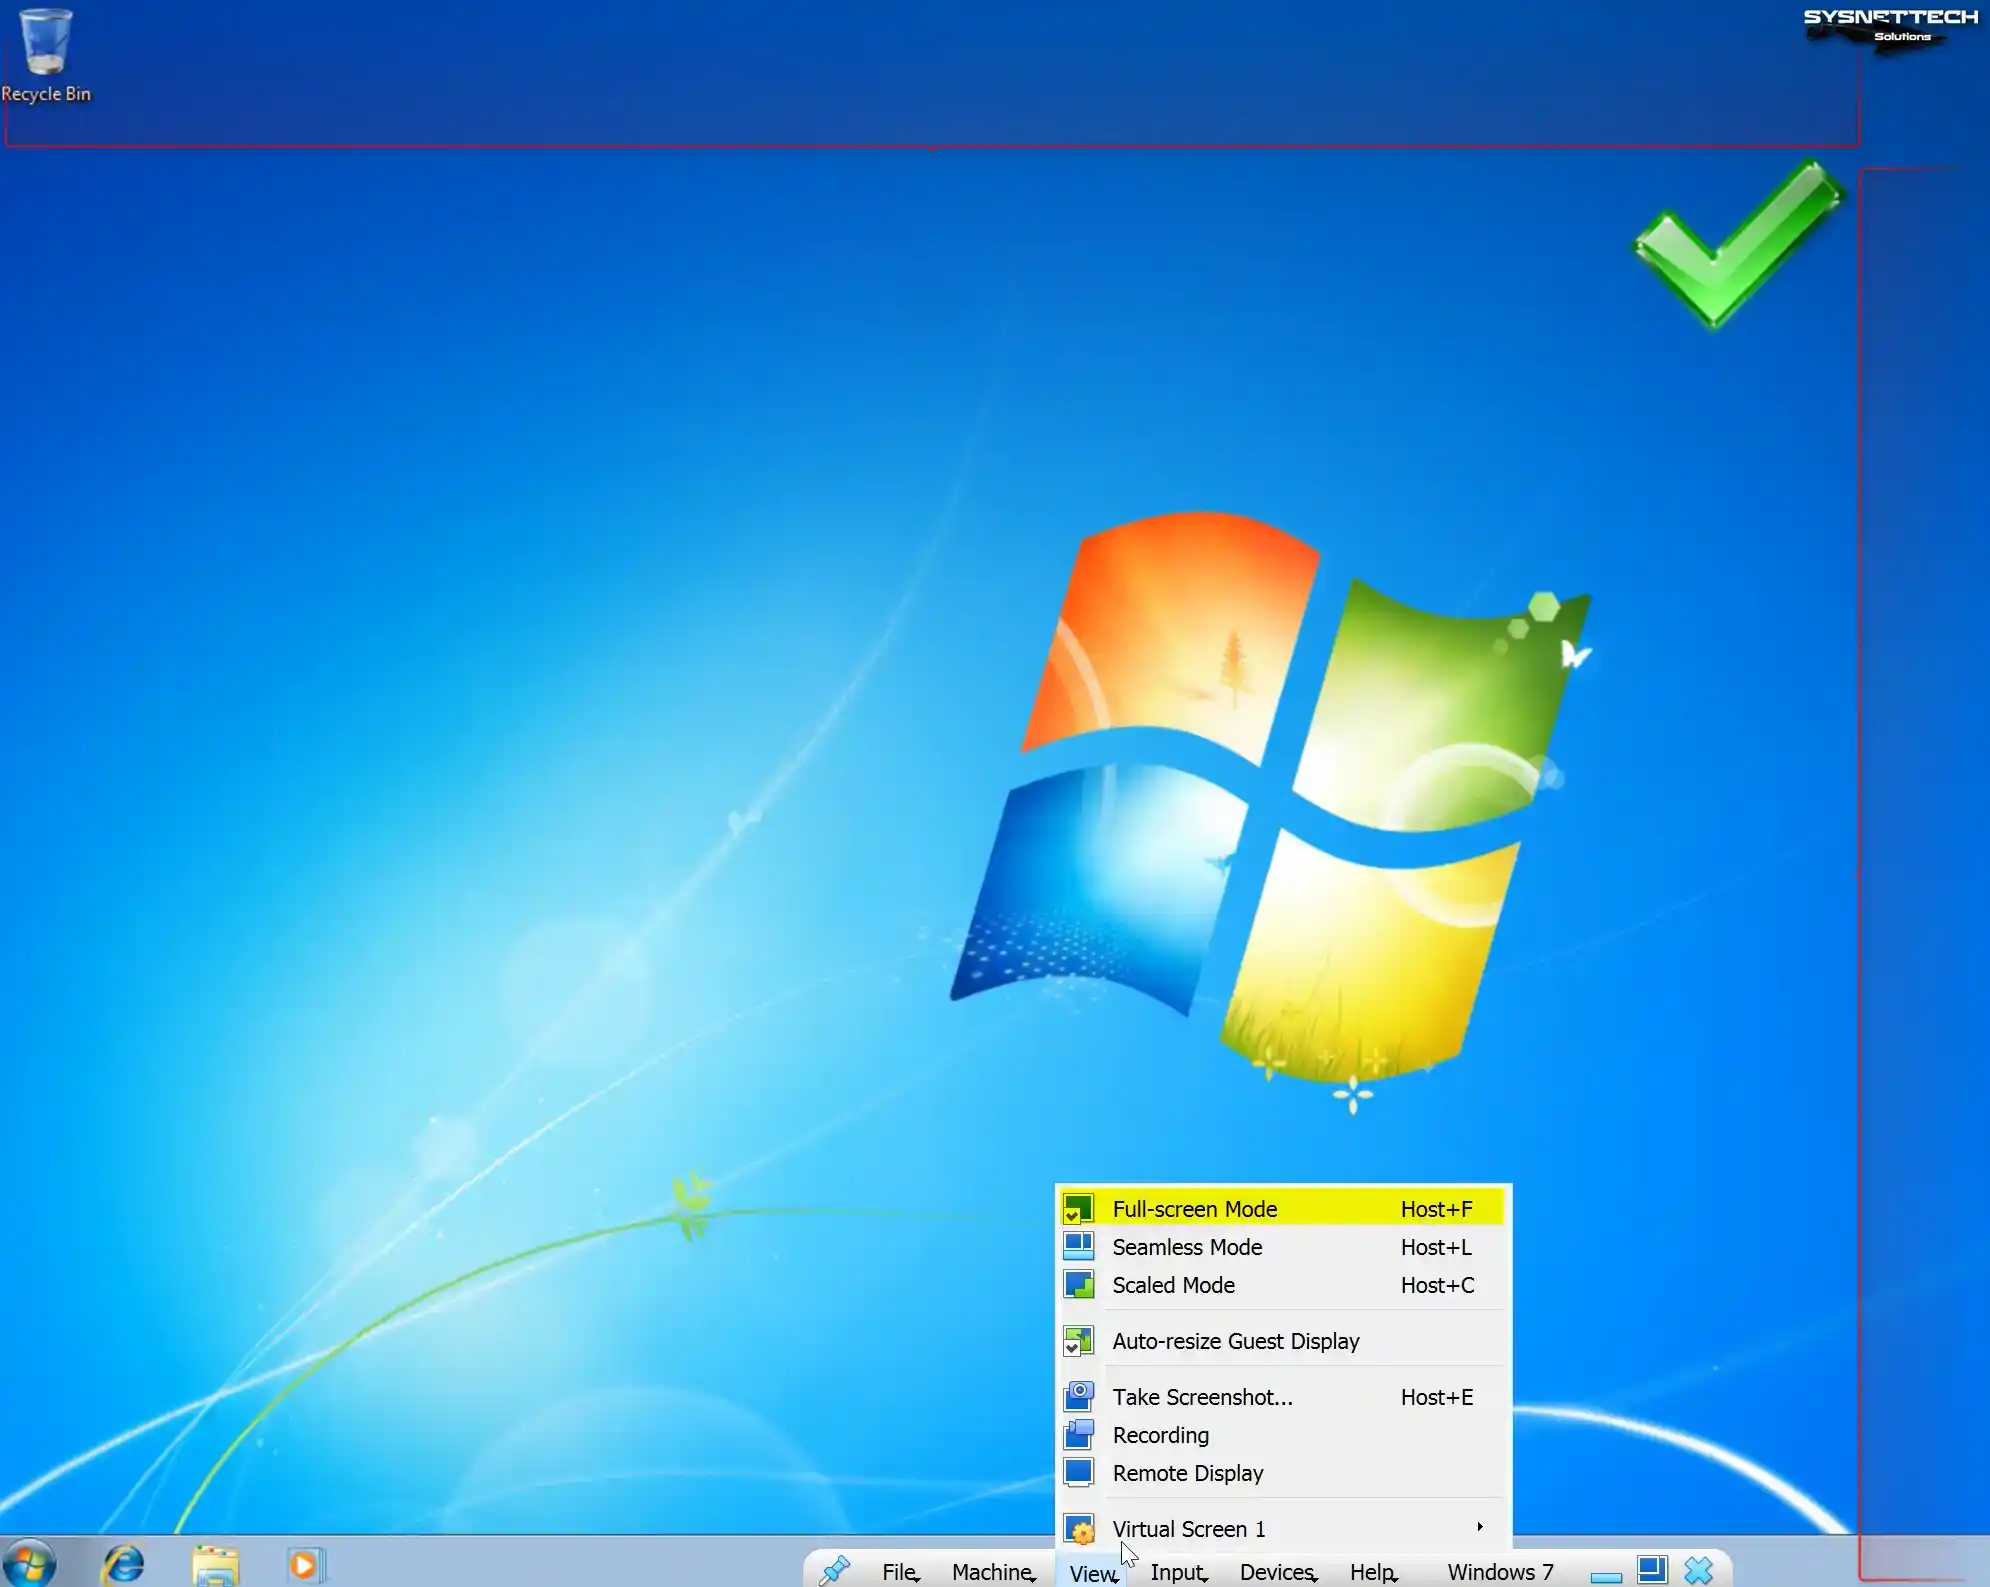
Click View / Full-Screen Mode from the tool menu to adapt your Windows 7 VM to your host’s screen size. Nevertheless, you possess a 2K or 4K display. In that case, it is crucial to remember that adjusting the display scale settings to a higher value in the virtualization software’s configuration will enhance the text size of the operating system.
Step 11
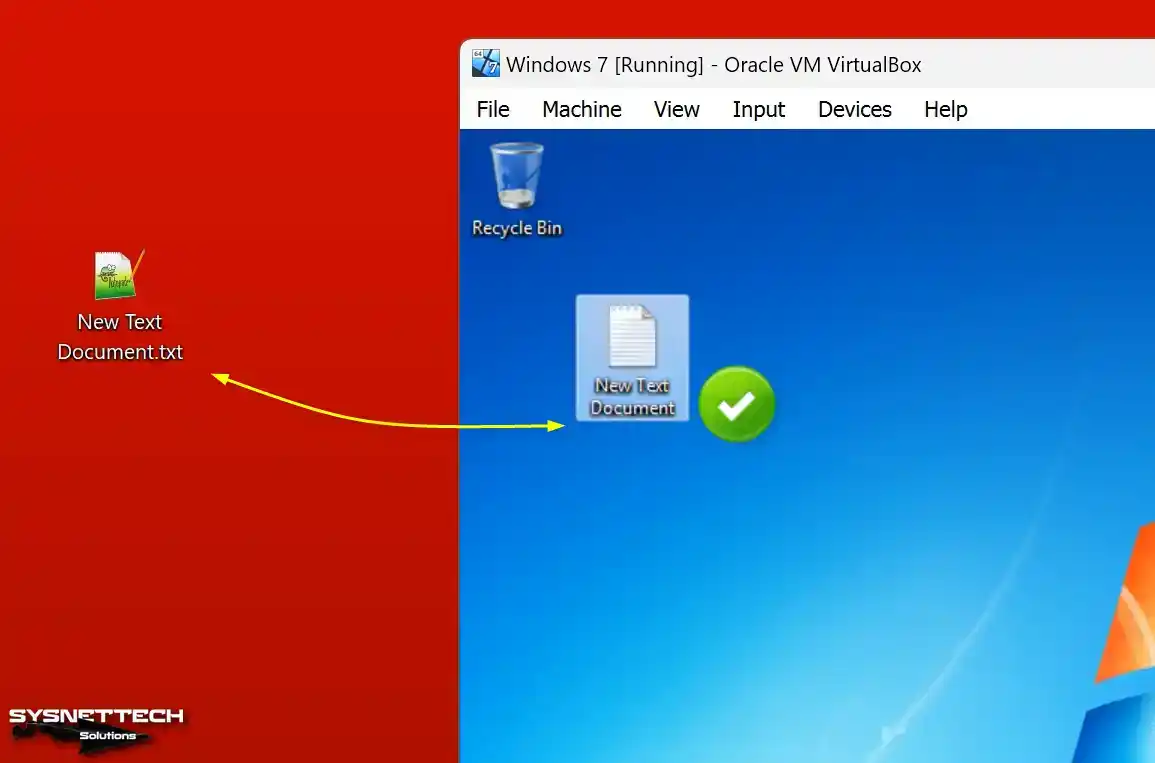
Kindly generate a new text document on your host computer and proceed by dragging and dropping it into the desktop location of your virtual PC. Upon reviewing the image below, you will observe a smooth and error-free file transfer.
How to Test Internet Connection
You can see that the network settings are configured when you want to access the Internet through the virtual machine. This is because the VirtualBox network services are running correctly in your host’s background.
Step 1
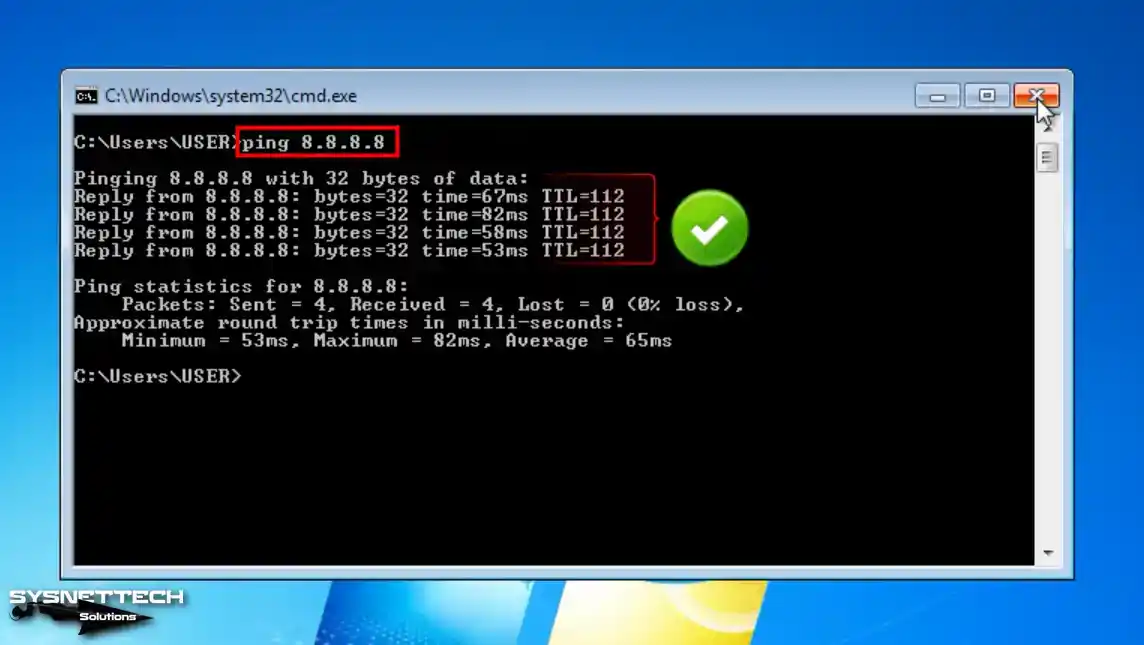
Open the CMD command prompt on your guest machine, ping 8.8.8.8, and check that it can access Google servers.
Step 2
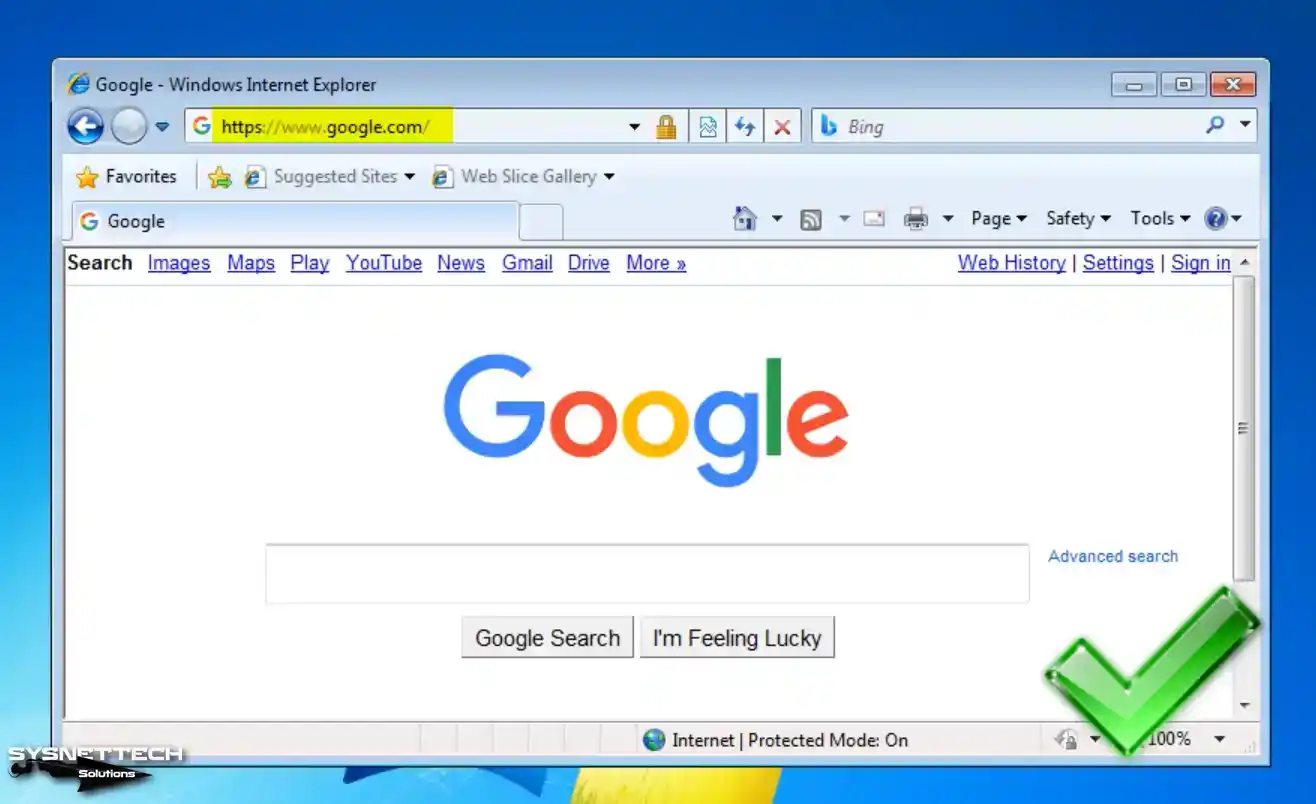
Once the ping is successfully executed, a connection with the Google search engine will be established using Internet Explorer. Verify that your Internet settings are accurately configured.
How to Configure Shared Folder
Although the drag-and-drop file transfer between the host and the virtual PC is working, sometimes copying files to the virtual machine may take time. It is valuable to create a Shared Folder to avoid such problems.
Step 1
Click Devices / Shared Folders / Shared Folders Settings on the Win7 guest machine.

Step 2
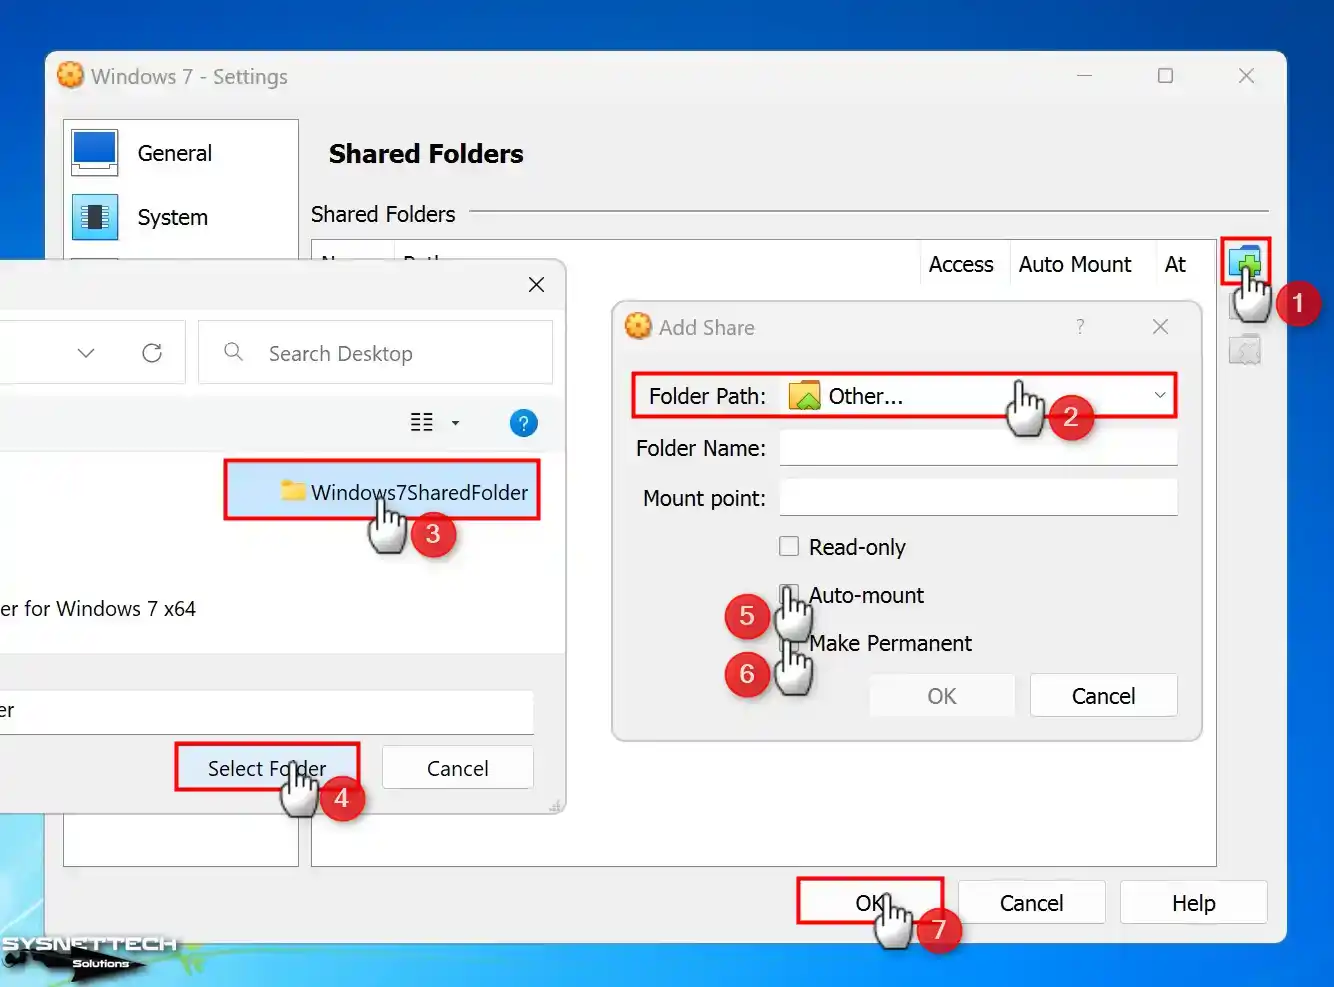
When Shared Folders opens its settings, click the green + button and open the sharing settings. In the Add Share window, select a common folder between your host and your VM for the Folder Path.
Enable Auto-Mount and Make Permanent to map the shared folder as a network drive and on My Computer. After checking the location of the public folder again, click OK.
Step 3
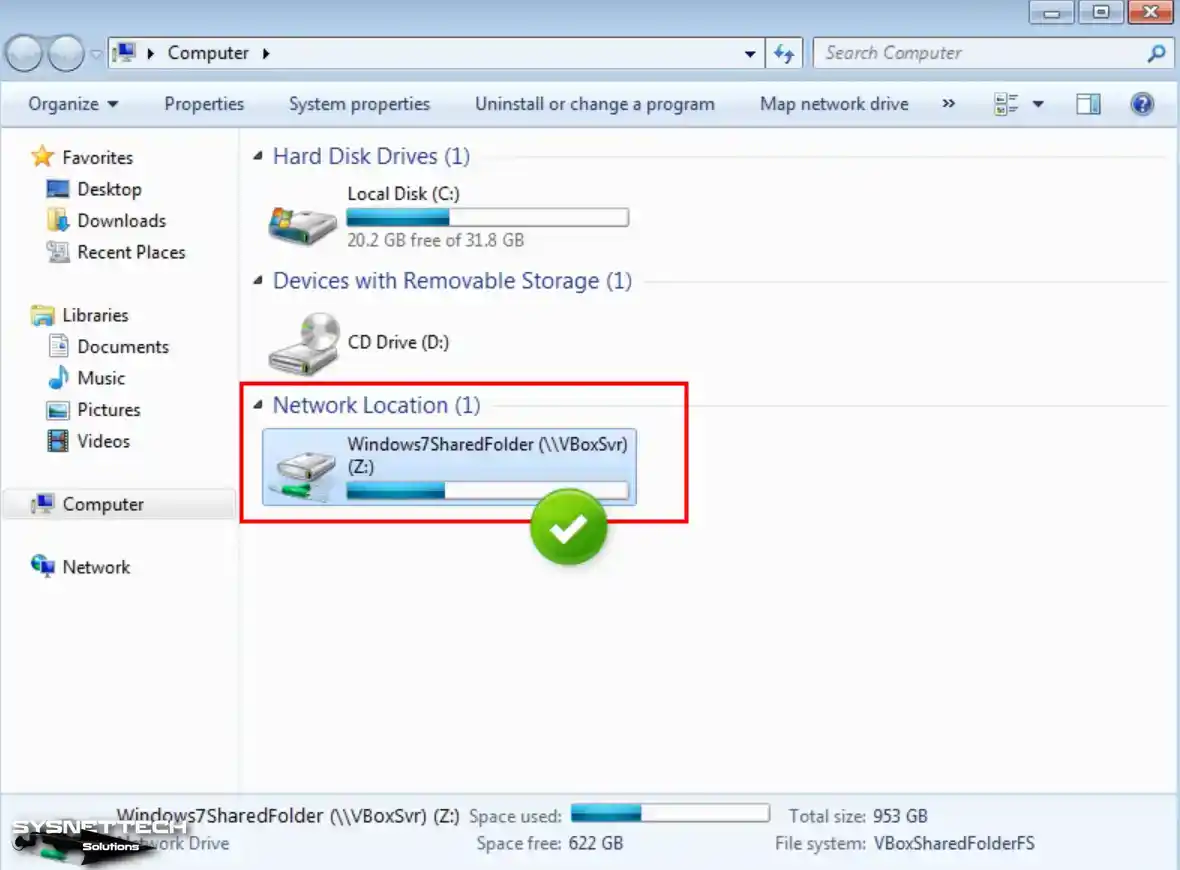
Check that you can go to the shared folder via the My Computer shortcut of the virtual machine.
Also, check that the VBOXSVR device is available on the network. If VBOXSVR is not visible, you can access the Shared Folder after enabling the network and sharing settings.
Step 4
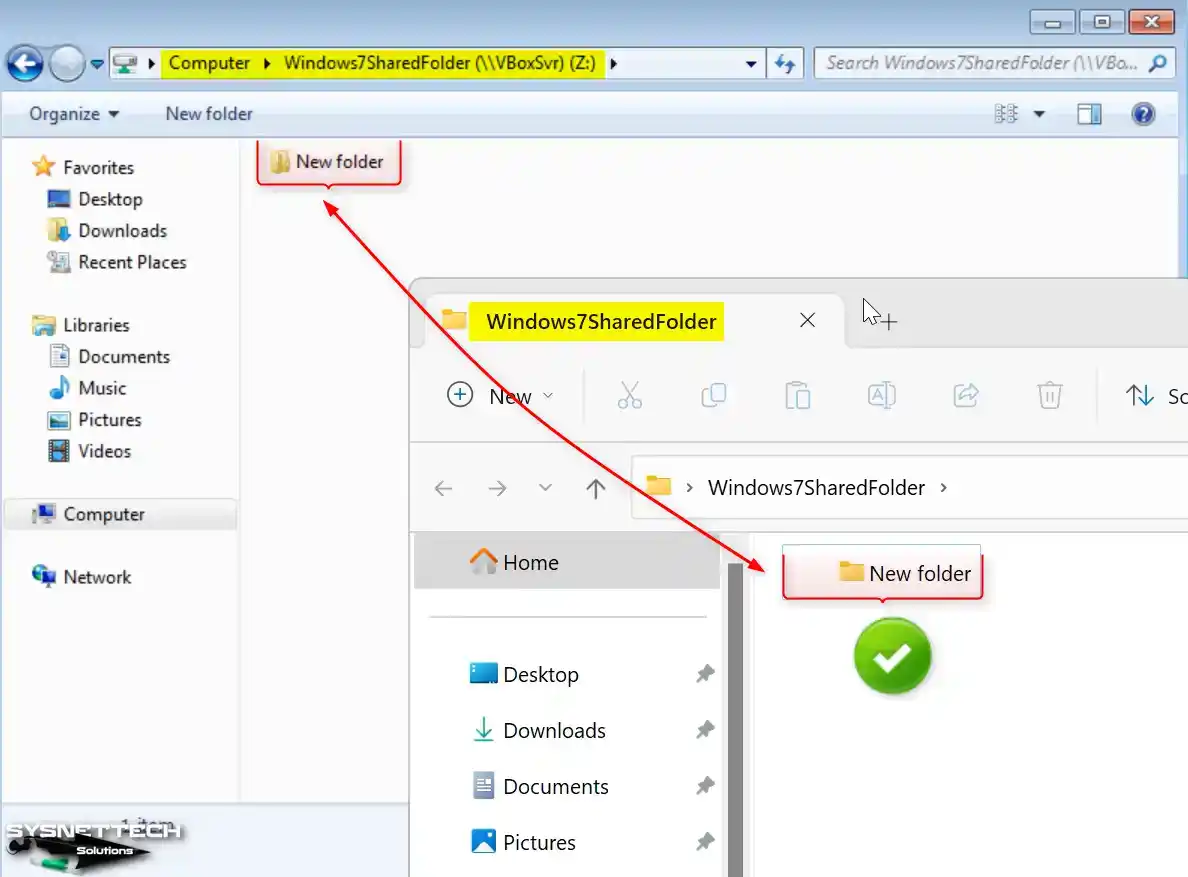
It will instantly be synchronized when you create a file or folder from your host system and a guest machine in the shared folder.
How to Install USB Driver and Use Flash Memory in VM
To use USB devices such as Flash Memory on a Windows 7 guest machine, you must enable USB 3.0 in the VM’s settings.
Step 1
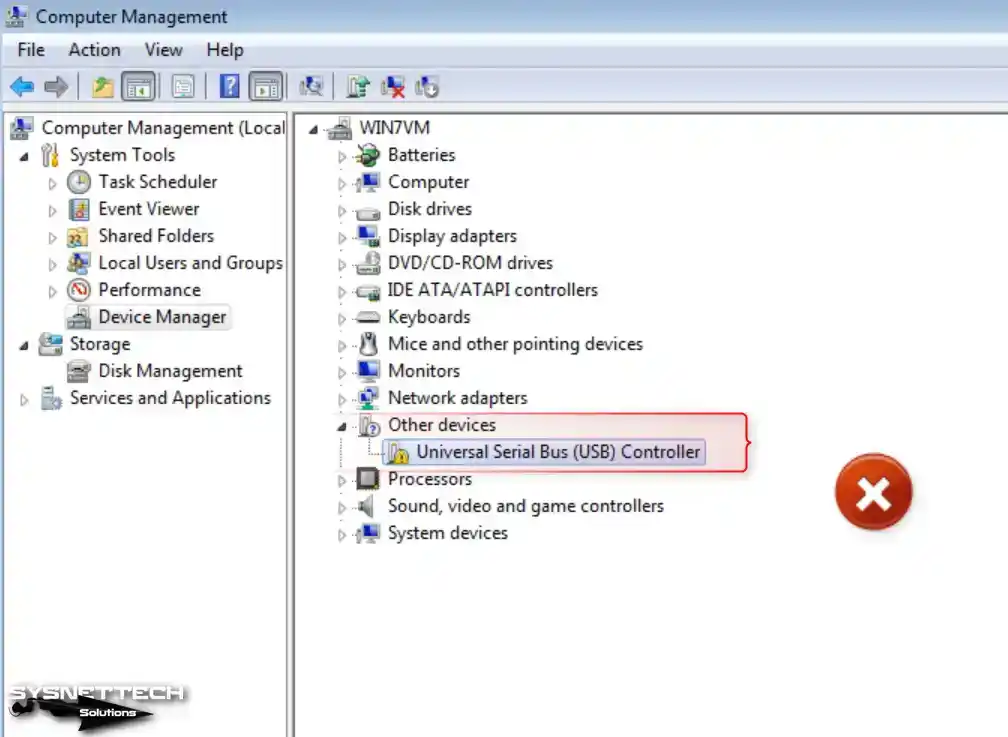
Upon launching your virtual machine, you will notice that the Universal Serial Bus (USB) Controller device driver is not automatically installed within the device manager. Download the USB 3.0 driver package for Windows 7 64 Bit from the table below the article to your host and copy the installation files to the VM.
Step 2
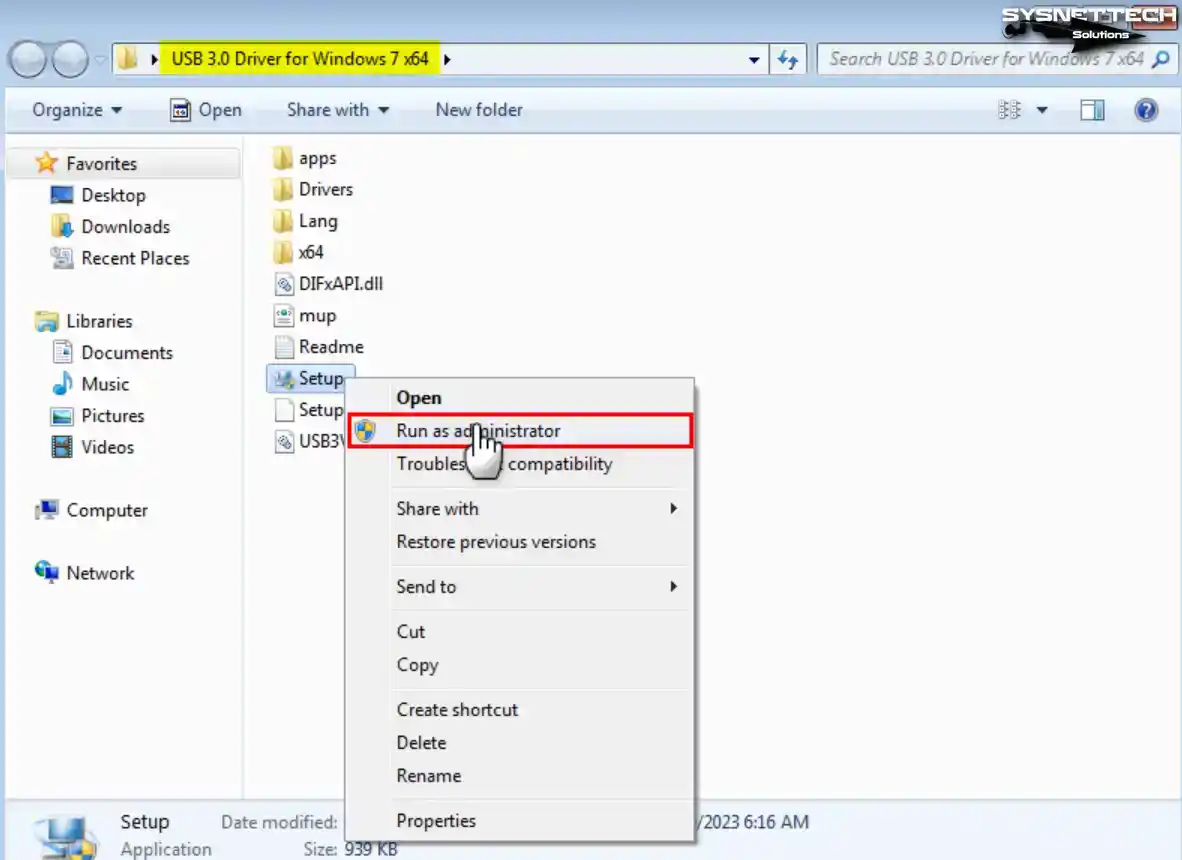
Open the USB 3.0 Driver folder and run the Setup file as an administrator.
Step 3
After checking the drivers to be installed on your system in the Intel USB 3.0 eXtensible Host Controller Driver window, click Next.

Step 4
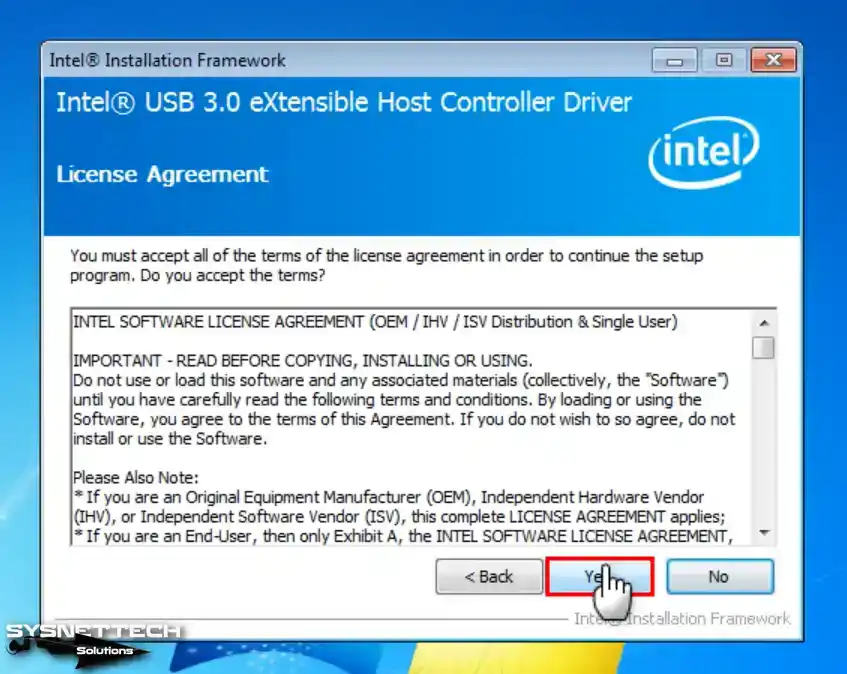
Click Yes to accept the USB 3.0 Driver’s license agreement and continue.
Step 5
Click Next in the information window, informing you not to run the USB driver from a USB storage device.

Step 6
While installing USB 3.0 drivers on Windows 7, the device manager configures the devices automatically.
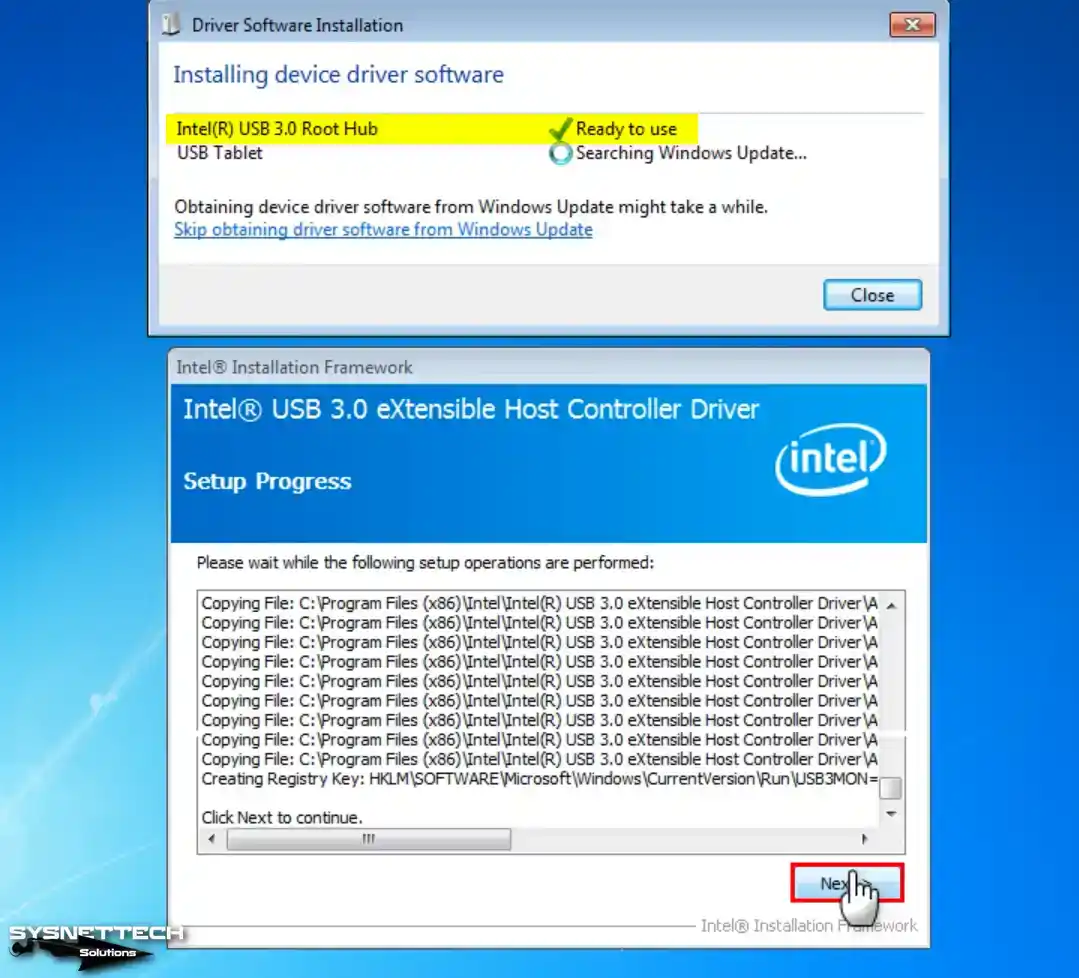
Step 7
Click the Finish button when the USB setup wizard is complete.
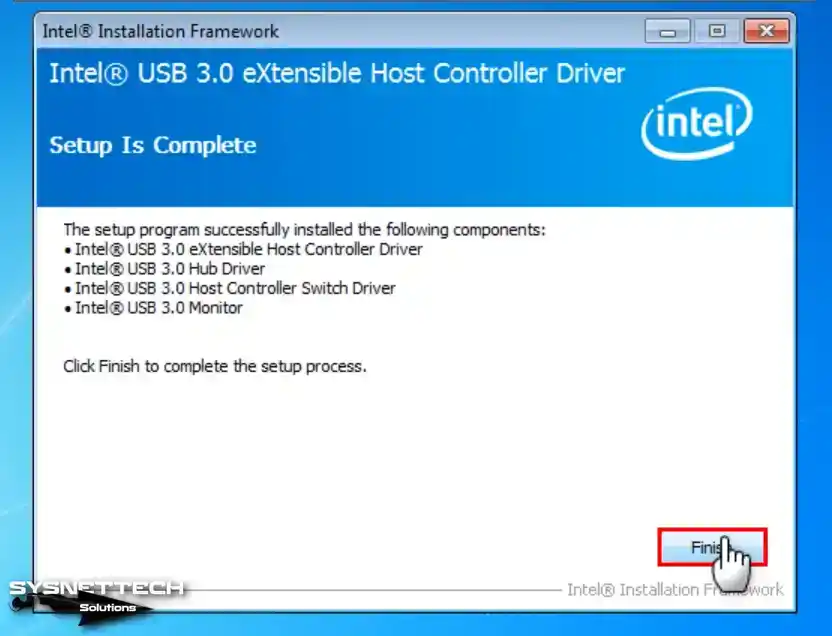
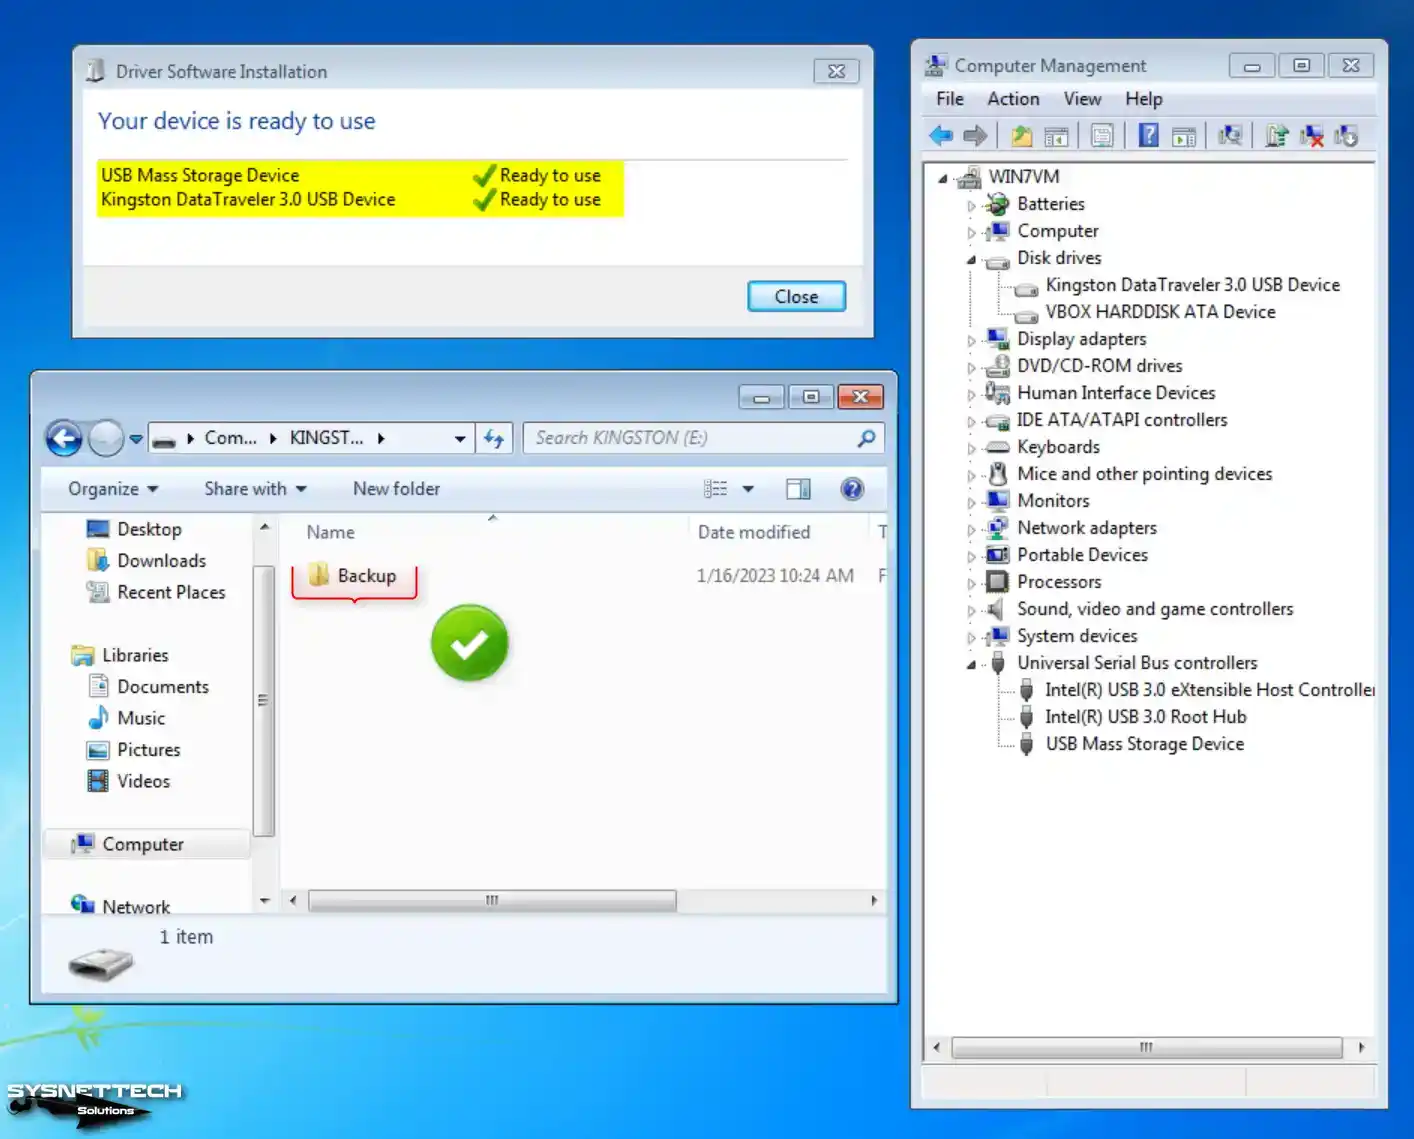
Step 8
Connect a USB 3.0/3.1 compatible flash stick to any ports on your host PC and create a folder named Backup as an illustrative example.
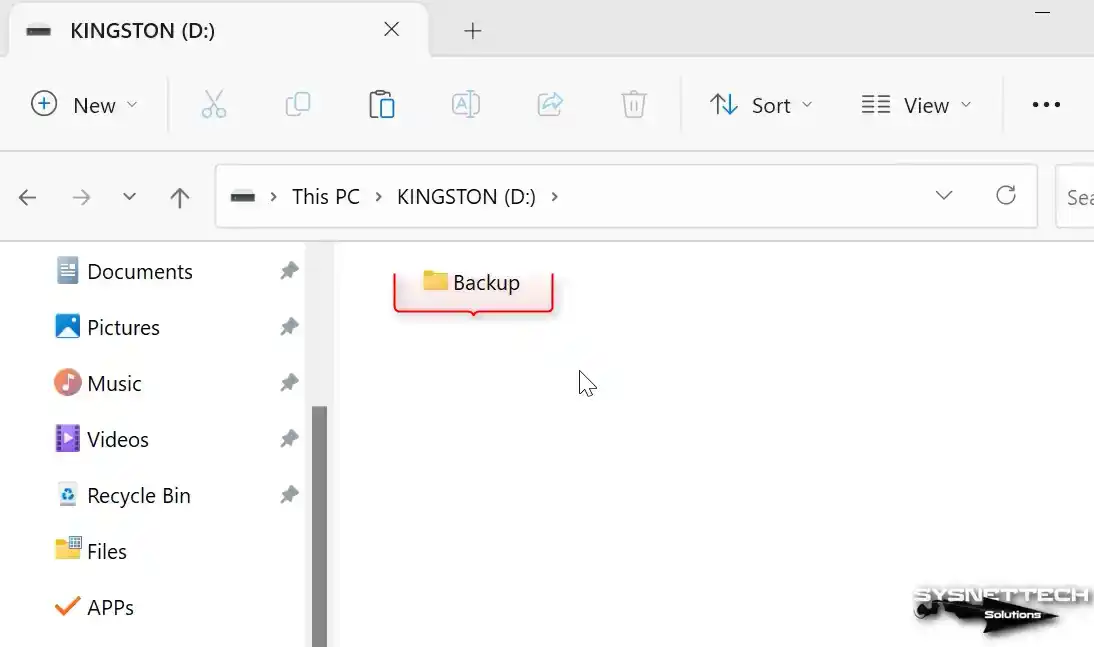
Step 9
Click Devices / USB / Kingston DataTraveler 3.0 (Name of Your USB Device) on the Windows 7 guest machine.
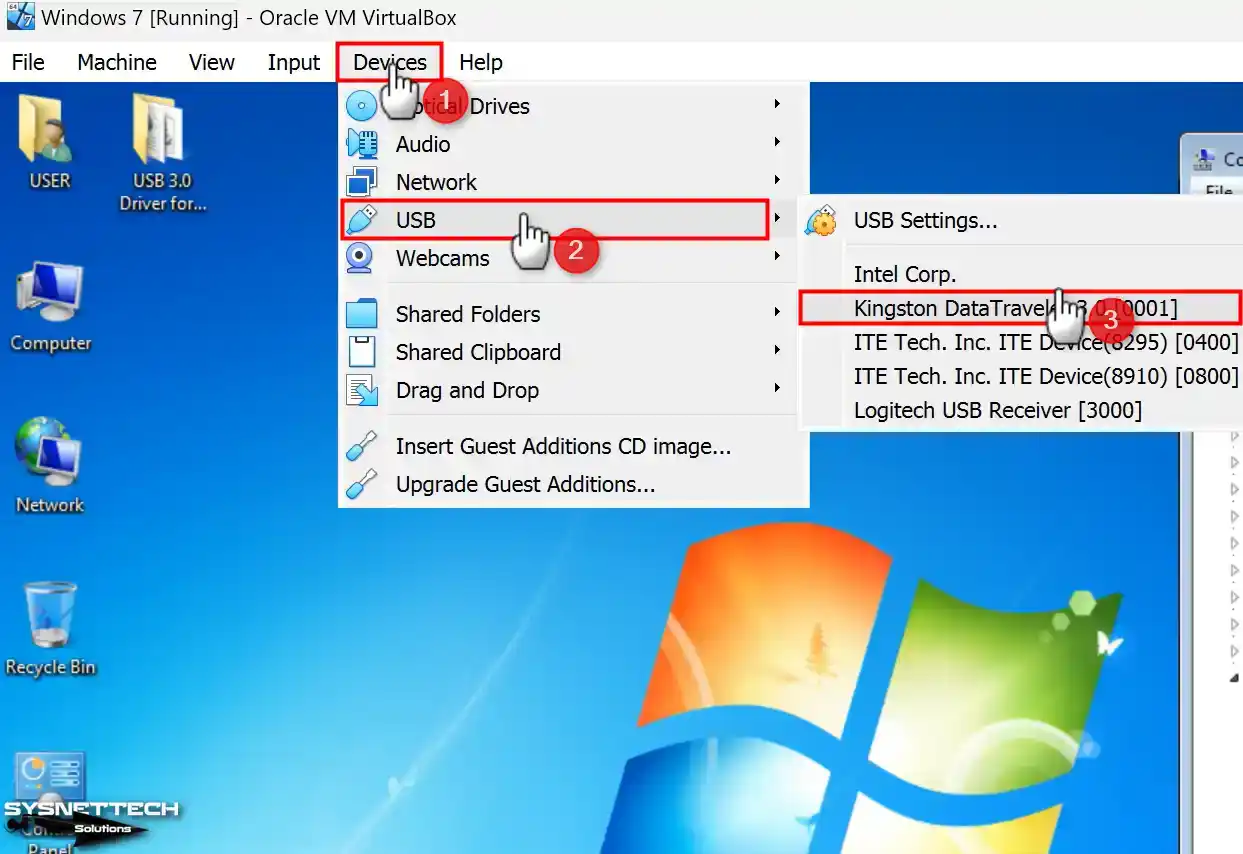
Step 10
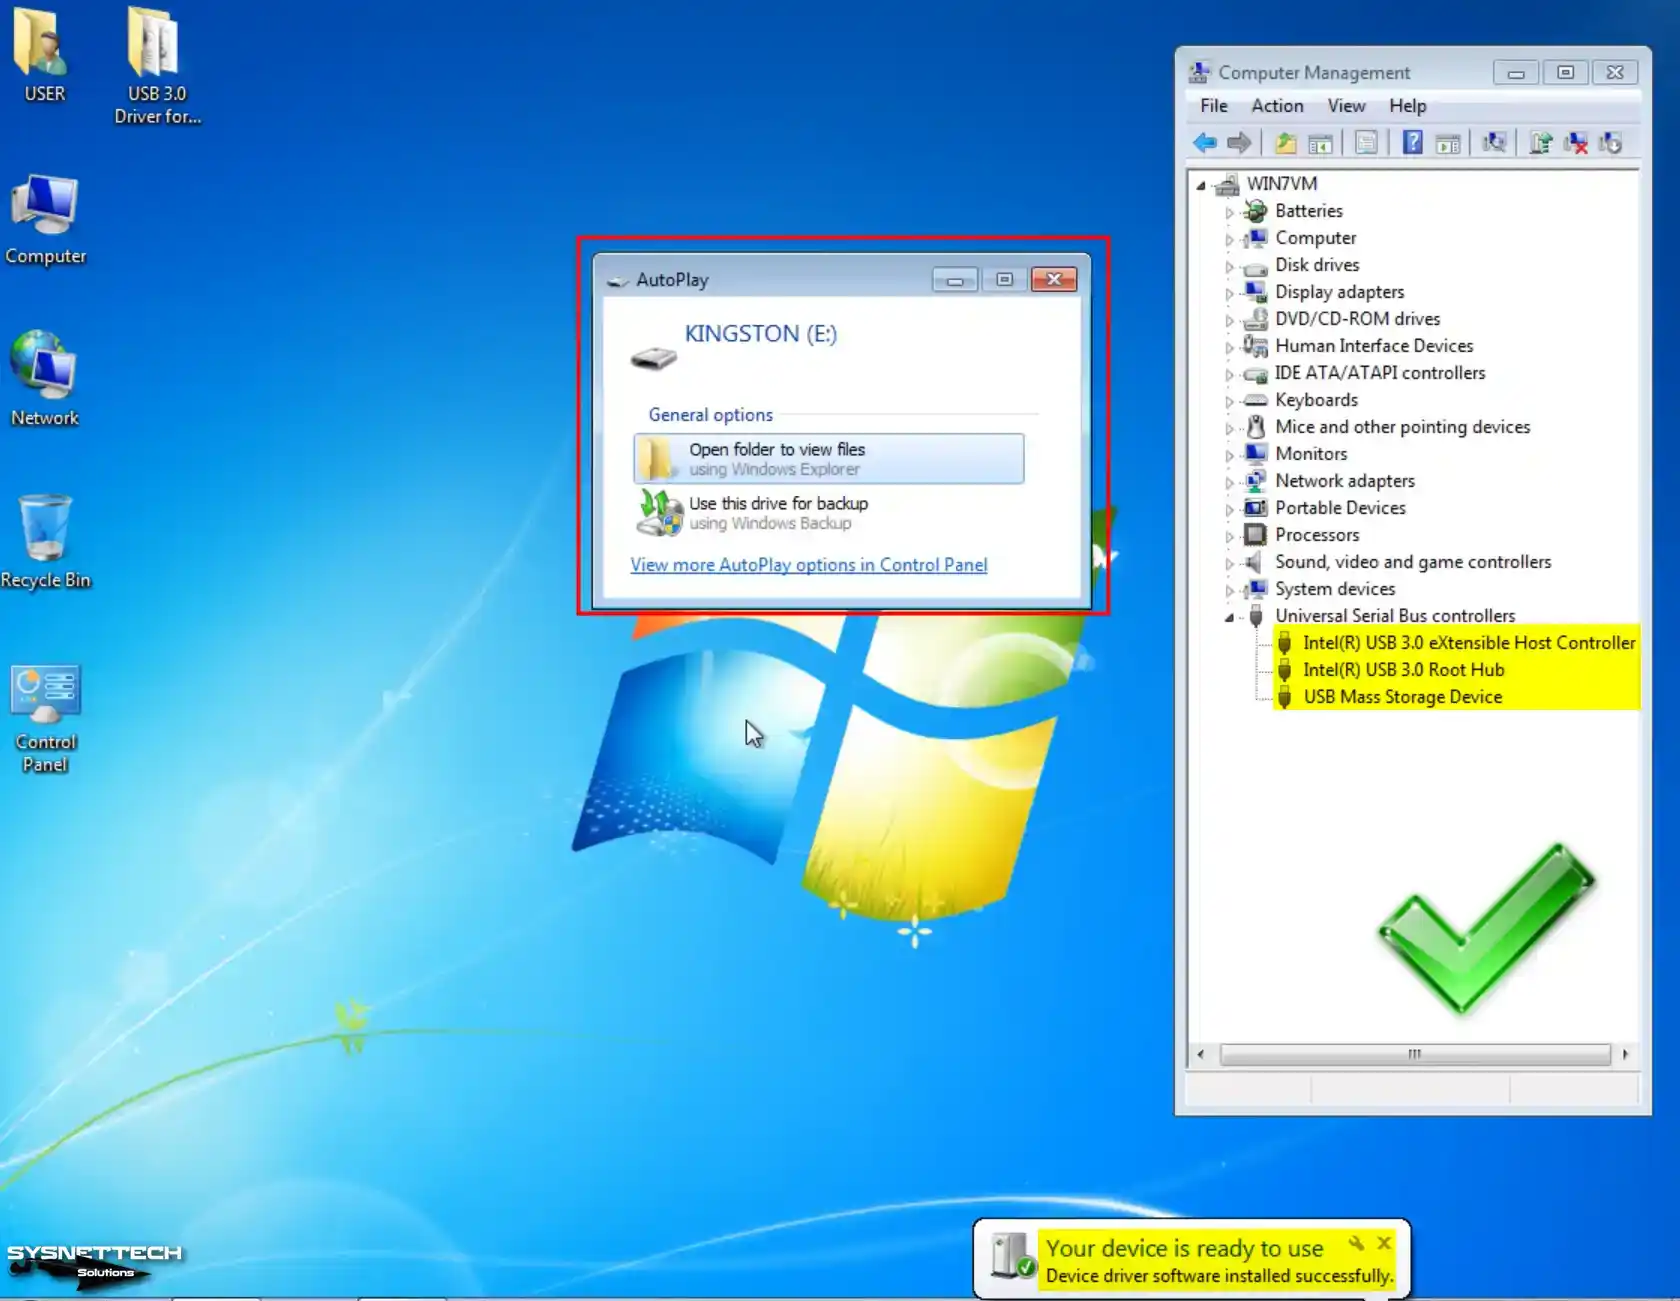
Your USB 3.0 memory inserted in your host machine will be automatically identified to your virtual computer.
- Intel(R) USB 3.0 eXtensible Host Controller
- Intel(R) USB 3.0 Root Hub
- USB Mass Storage Device
Step 11
Upon navigating to My Computer on your guest machine, you will observe successfully mounting your USB 3.0 or 3.1 flash memory within the virtual system.
Video
Installing Old Versions
Windows 7 ISO ve USB 3.0 Driver
Conclusion
In summary, you can install Windows 7 OS on even your newest PC without any problems with Oracle VM VirtualBox. Although current devices no longer support Windows 7 on physical machines, we can use virtualization software. Tools like VirtualBox allow us to run old operating systems safely and efficiently.
By following all the steps I mentioned in this article, you can create a Windows 7 virtual machine. You can also do compatibility tests and experience using your old software. Plus, system security is critical when experimenting with old operating systems. Therefore, you can run your virtual system independently of your host.


Also you can enable aero with guest additions.
What about the .net issues that prevent you from installing lots of programs. Is there some sort of unofficial support for this?
Once you find which net framework-based program to install, you can run the software you want after installing the relevant version.
Just my $0.02 in installation of Windows 7 in Oracle VM VirtualBox or VMWare Player..
HOW TO INSTALL WINDOWS 7 – STEP 0:
Make sure Virtualization for CPU is enabled in BIOS. If Virtualization is not enabled, VirtualBox/VMWare won’t run. By default, Virtualization is usually enabled but some system may have this disabled.
Are the steps basically the same if my host computer is running Ubuntu 24?