In this article, we will build the network settings of virtual machines on the VM Workstation as Host-Only and test its connections.
How to Configure Host Only Network in VMware Workstation/Player
In our previous articles, we examined how to configure the NAT and Bridged on VMware software. In this article, we will configure the Host-Only networking that is very different from the Bridged and NAT designs.
The main purpose of configuring this virtual network is to enable virtual machines to communicate only among themselves. For example, if you configure the networking settings of two virtual machines named Client1 and Client2 on the VM Workstation as Host-Only, these two VMs will only be able to communicate with each other.
As a result, the virtual machines configured as Host Only networking will not be able to access your physical network and the Internet.
How to Use Host Only on Virtual Network Editor Software
The default settings on Virtual Network Editor when you first install the virtualization program are as follows.
In the network settings on Virtual Network Editor, you can see that VMnet1 is configured as Host Only by default. Now, open the two machines you created earlier.

Now, follow the steps below to design Host-Only networking on VM Workstation 12/14/15.
Step 1
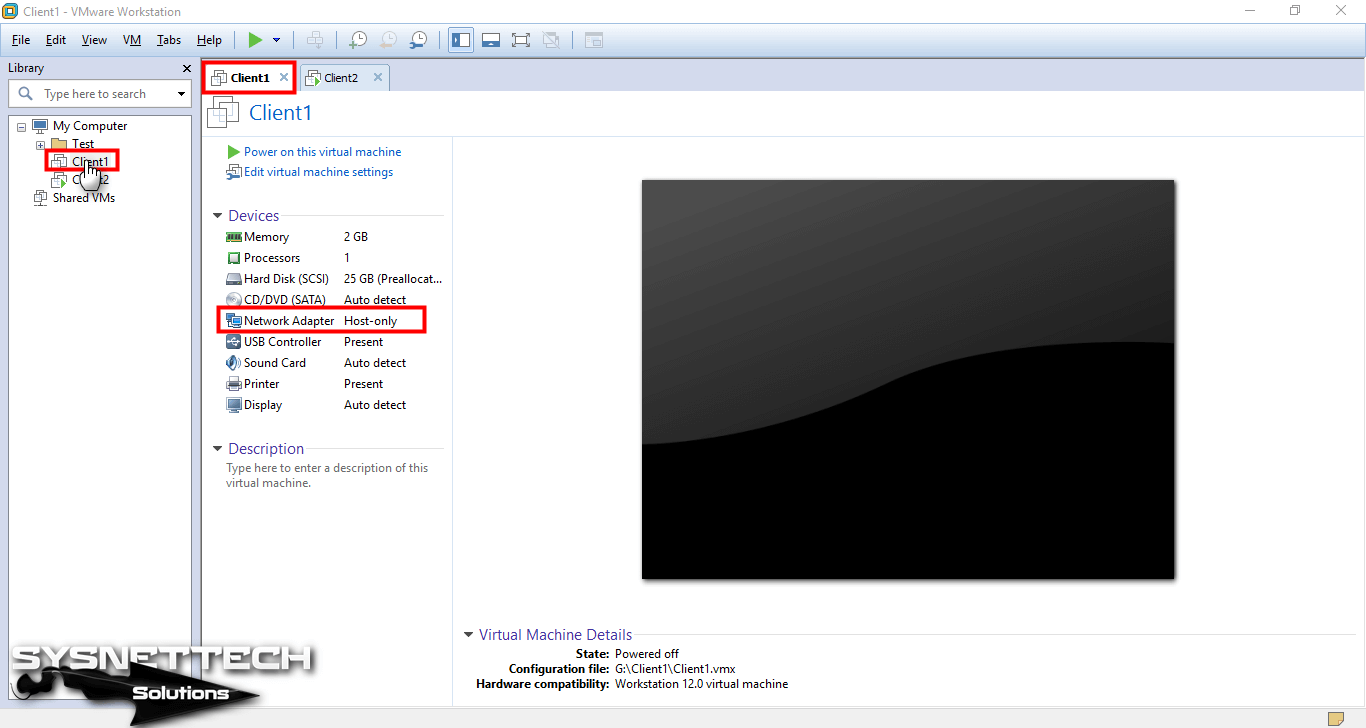
Click Network Adapter to configure the Client1 machine.
Step 2
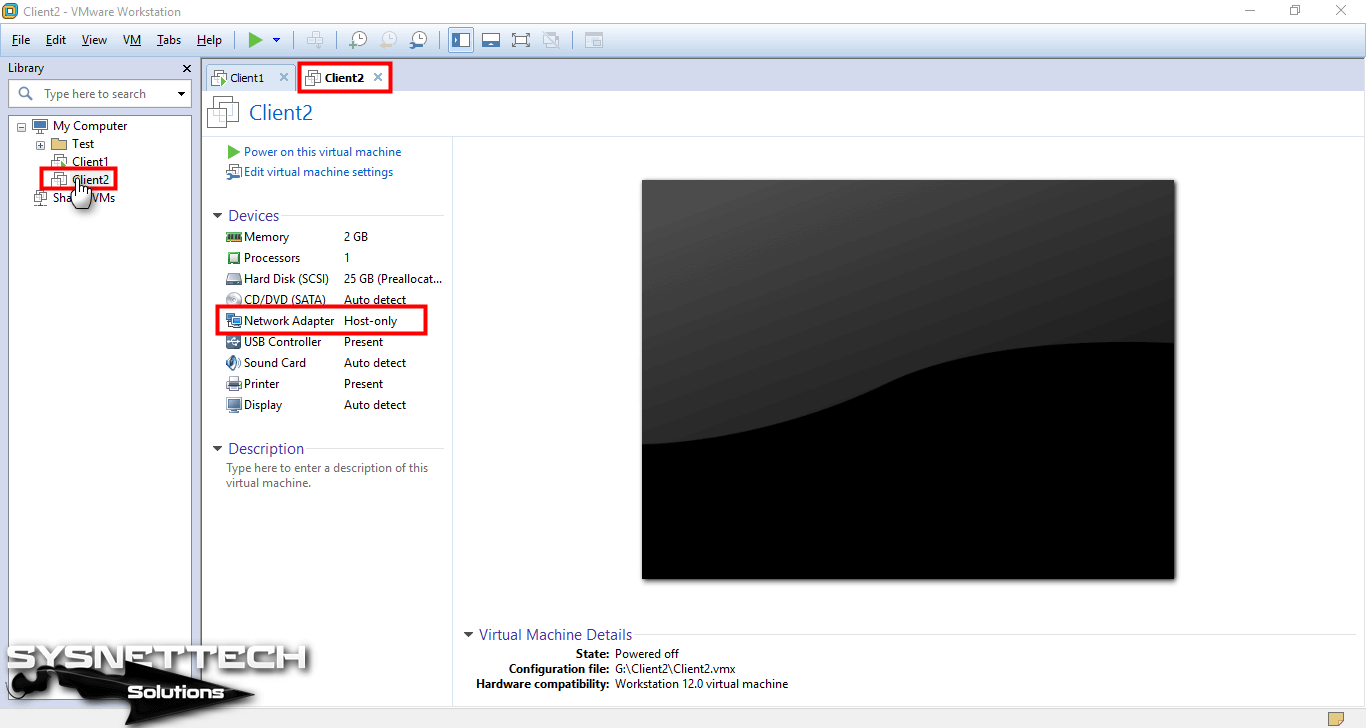
Also, configure the other Client2 machine. Run the machines after setting the network settings of both machines.
Step 3
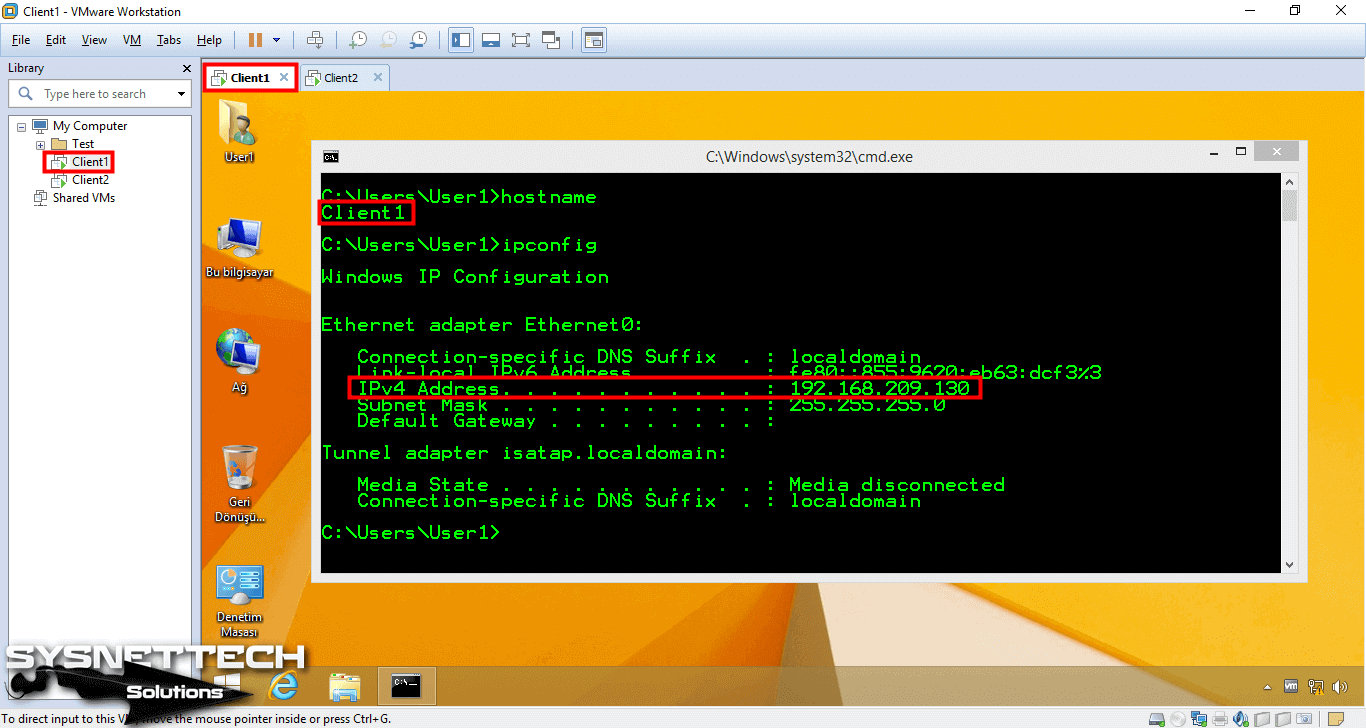
To check the IP address assigned to the Client1 machine, execute ipconfig at the CMD prompt. When you view the image below, you can see that Client1 machine has received the IP address of 192.168.209.130.
Step 4
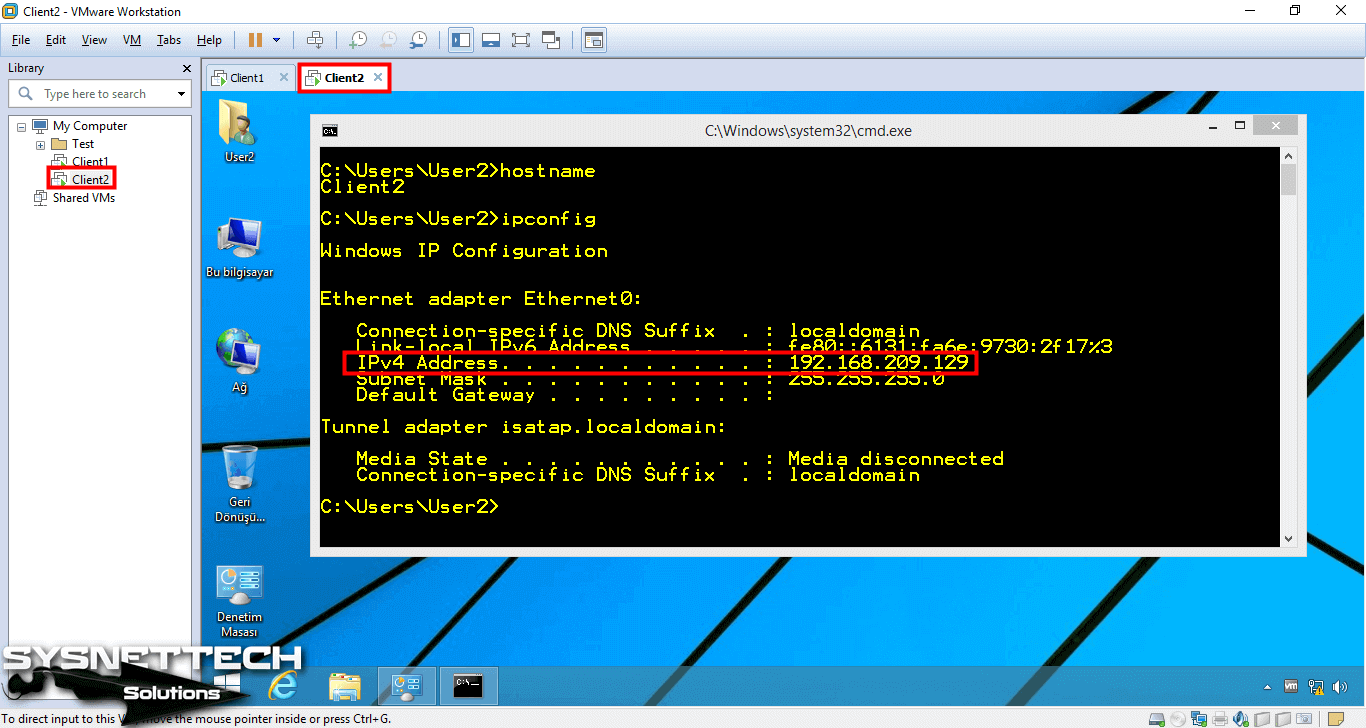
Similarly, the IP address assigned to the Client2 machine is 192.168.209.129.
Step 5
As you can see, Client1 and Client2 virtual machines have received IP addresses via DHCP from the VMnet IP address block configured by default in Virtual Network Editor. The DHCP server is the local DHCP service of VMware.
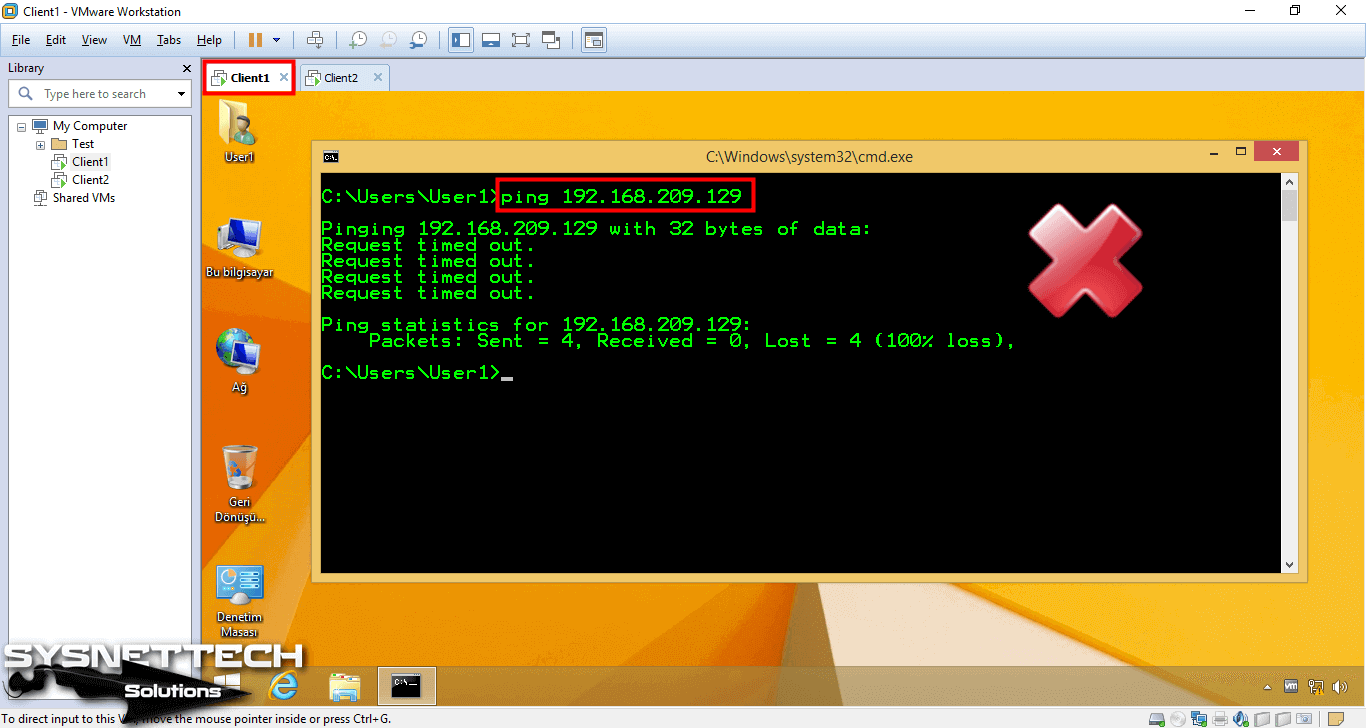
Test the network connection by pinging from Client1 to Client2.
Step 6
Likewise, Ping from Client2 to Client1 machine.

Step 7
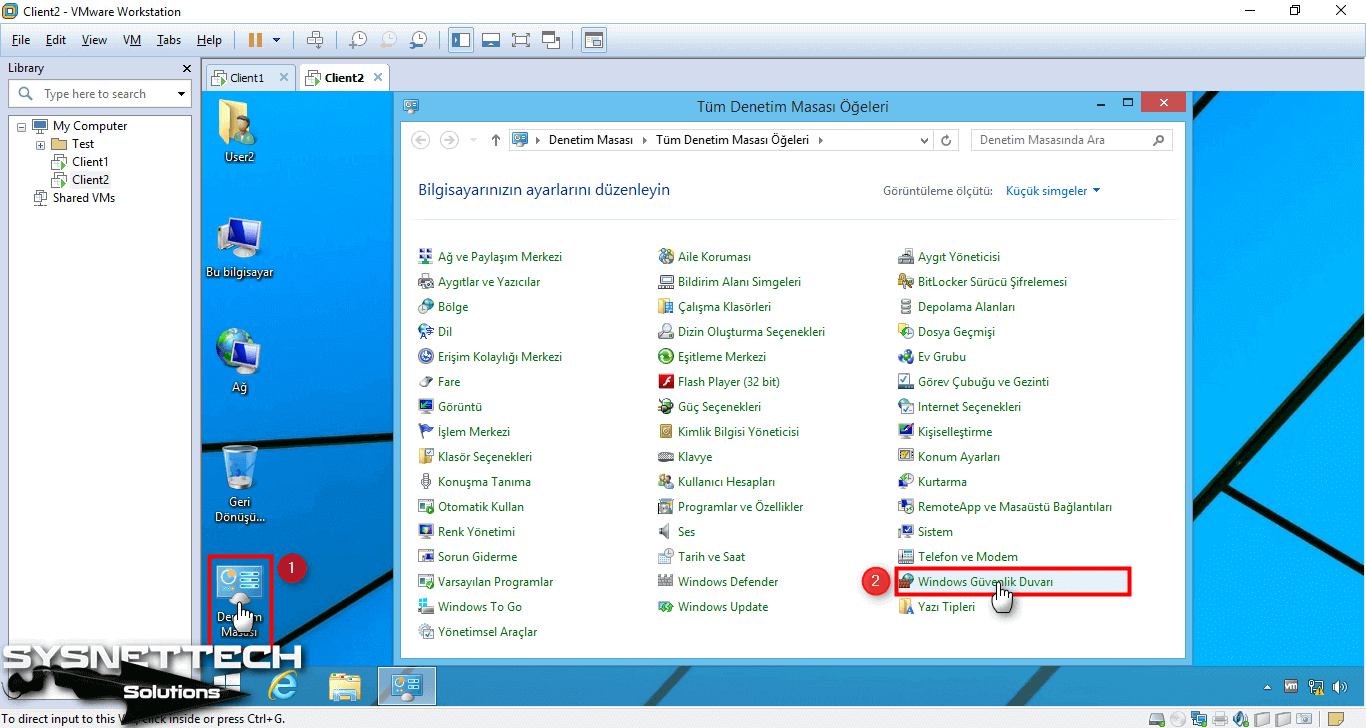
Because Ping is failing, you need to check the Windows Firewall. On the Desktop, click Control Panel, and then click Windows Firewall.
Step 8
In the Firewall window, click Allow an application or feature to switch to Windows Firewall.

Step 9
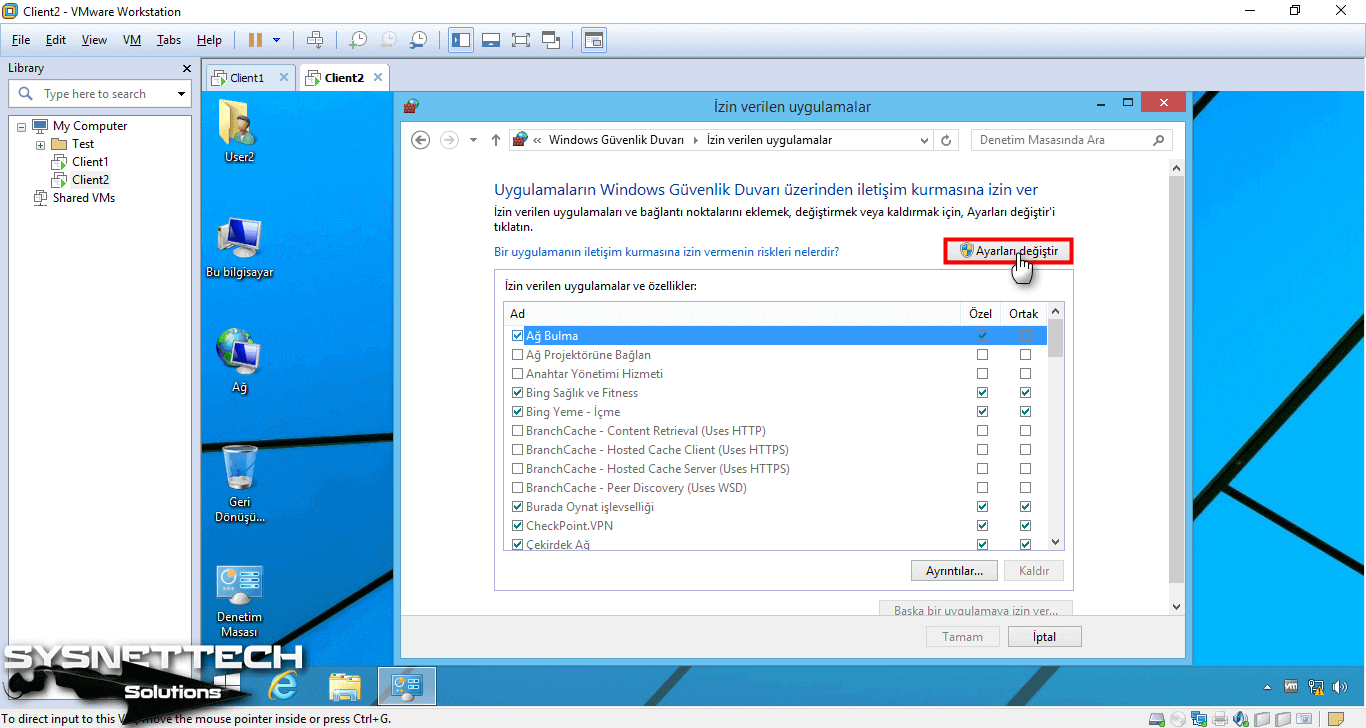
If you do not have administrator rights in the window that opens, click Change Settings.
Step 10
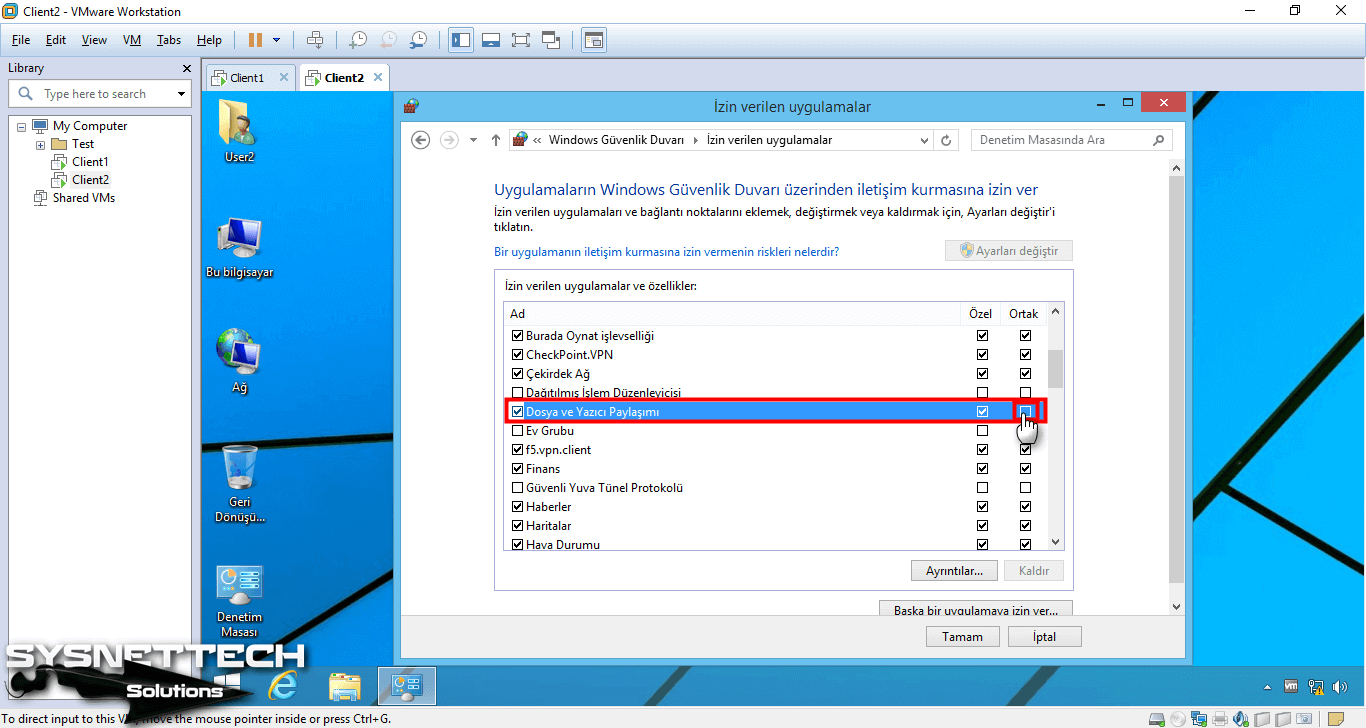
Select File and Printer Sharing for both Private and Public network.
Step 11
Click the OK button to close the window.

Step 12
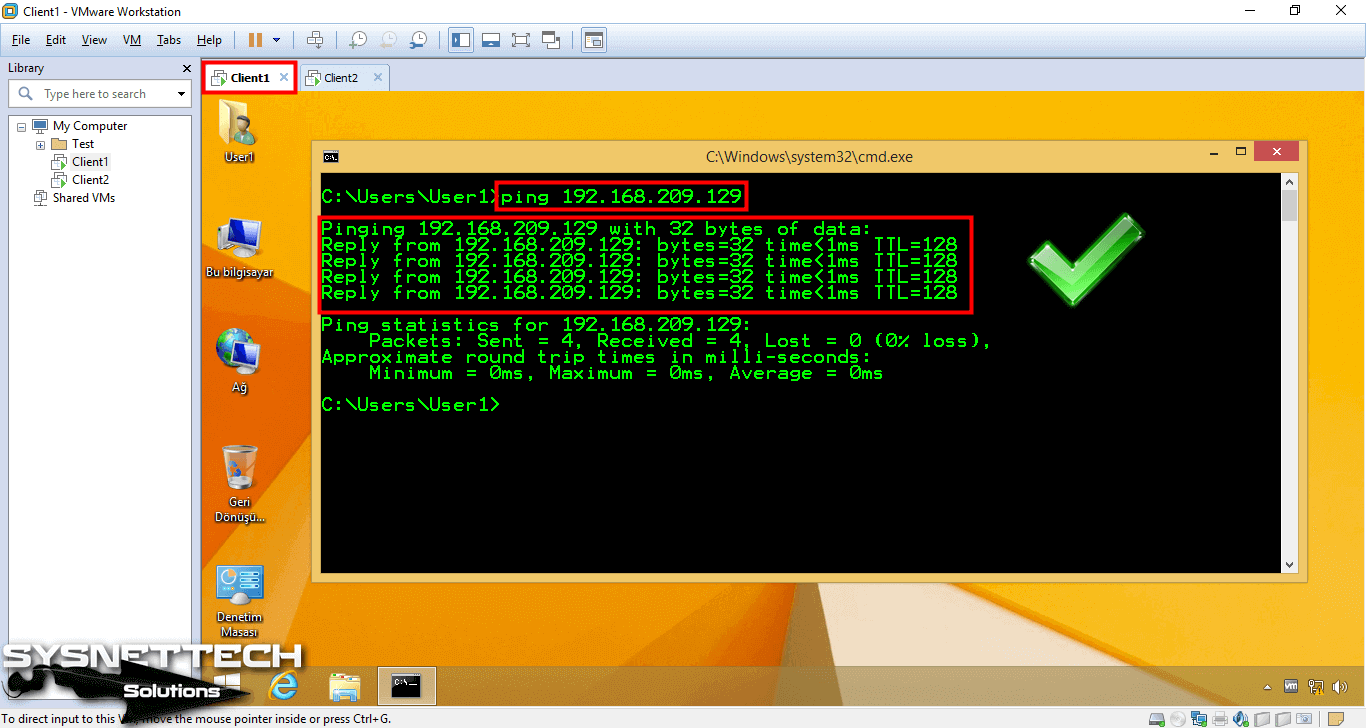
Check the network connection between the Client1 and Client2 machines again by pinging. This time you can see that Ping is successful.
Physical Network Access Test
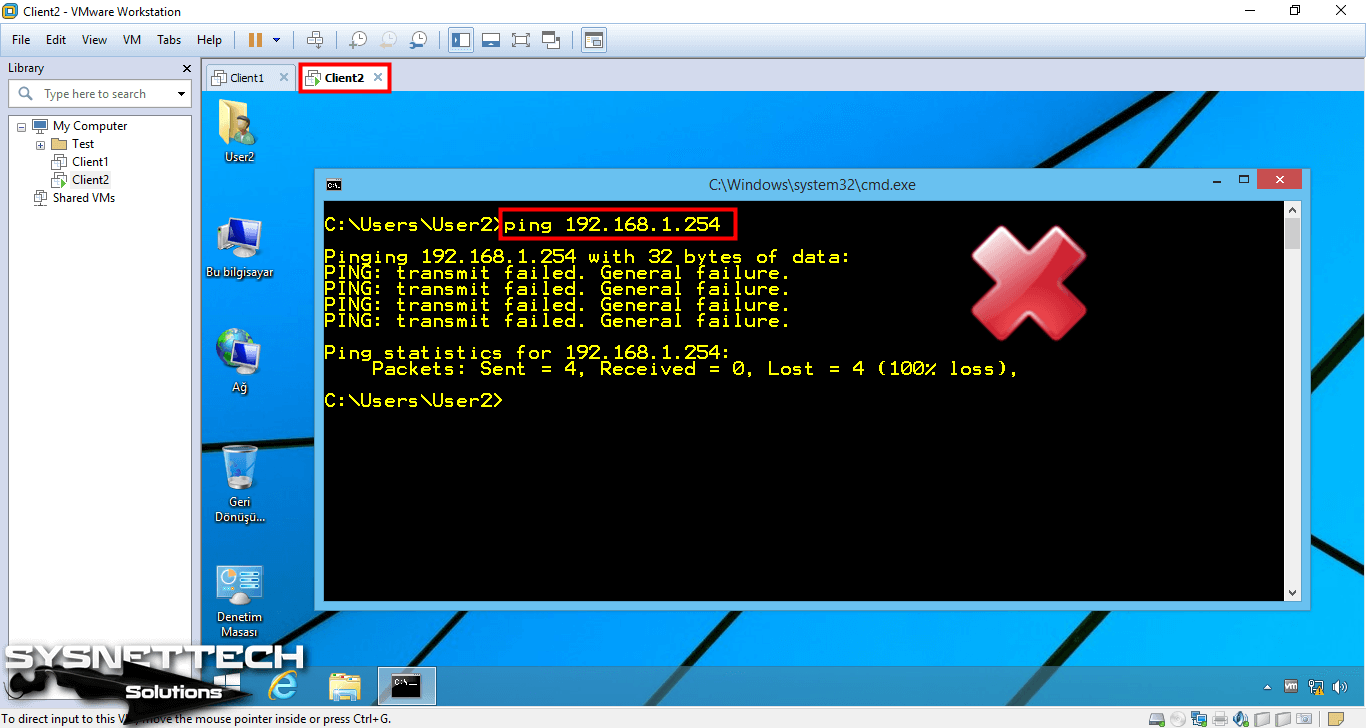
All virtual machines configured as Host-Only can only communicate with each other. Check the network connection by pinging your physical network over Client1 and Client2 machine.
As you can see in the image below, Client1 cannot access the machine on the physical network.
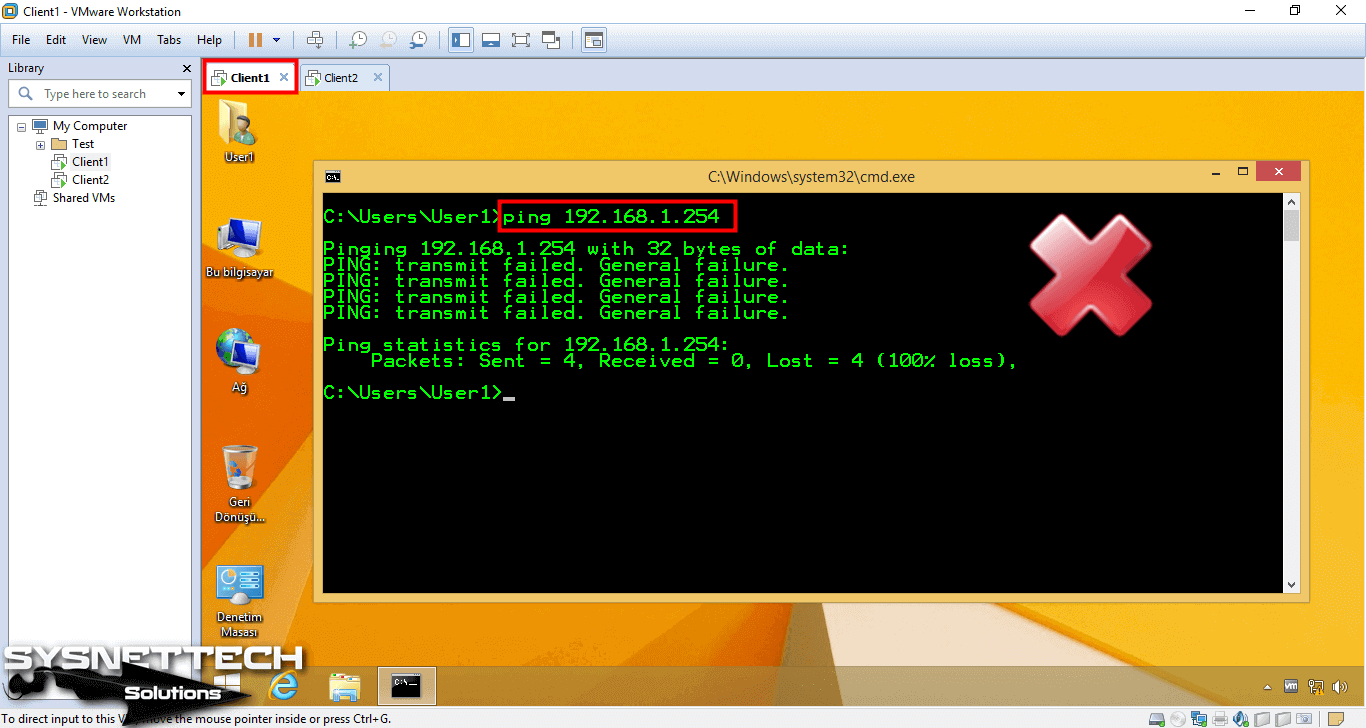
The Client2 virtual machine is also unable to access the physical network.
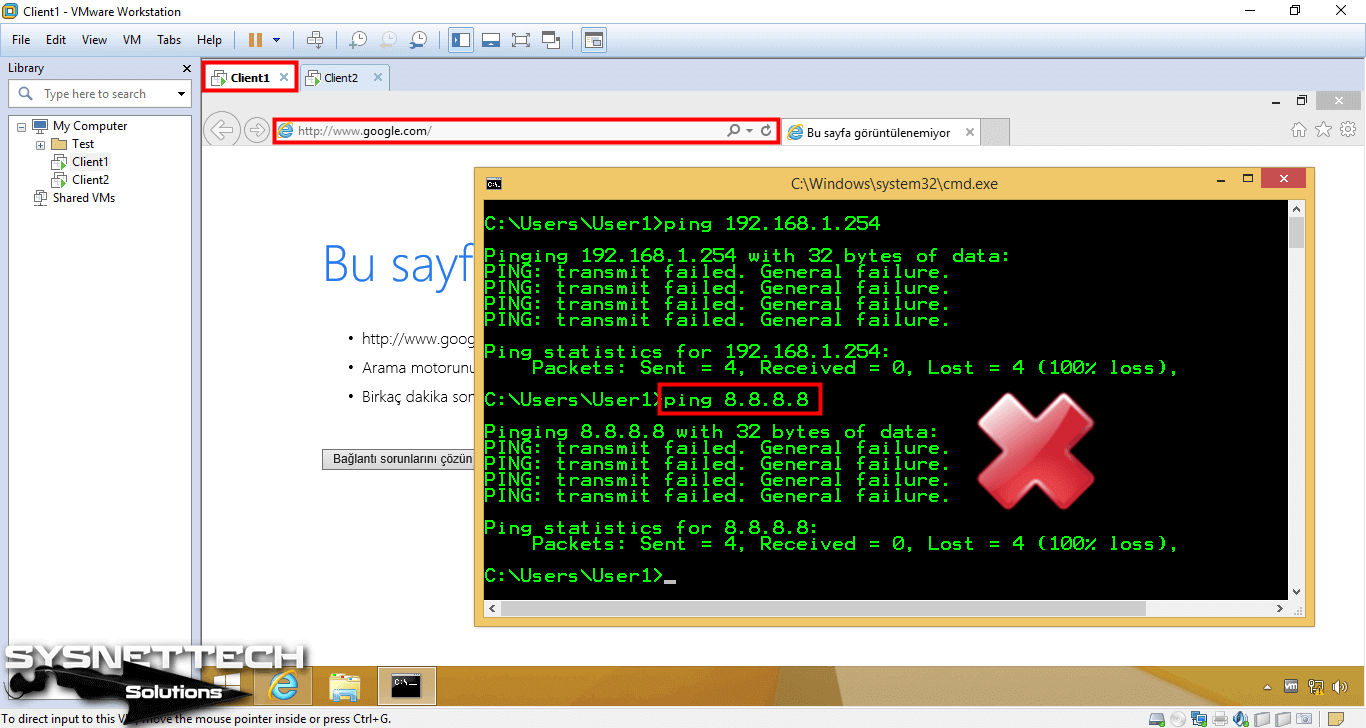
In this network configuration, virtual machines cannot access the physical network or the Internet. When you try to visit www.google.com after opening a web browser on the Client1 virtual machine interface, the virtual machine as follows will not be able to access the Internet.
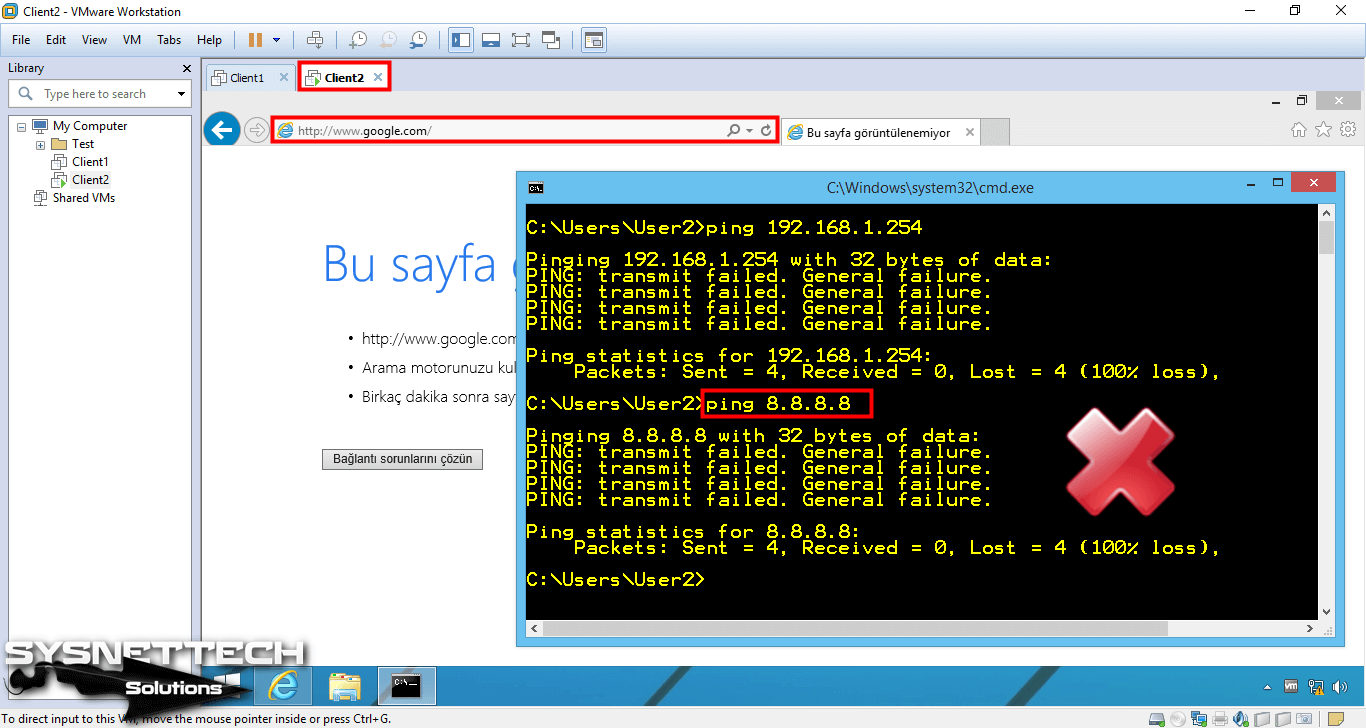
Again, the Client2 virtual machine will also fail in this case.
To learn more about this network type of VMware virtualization program, visit https://www.vmware.com/support/ws3/doc/ws32_network6.html.
Final Word
In this article, we have examined how to make a Host-Only connection using Virtual Network Editor on the VM Workstation / Player virtualization program step by step. Thanks for following us!

